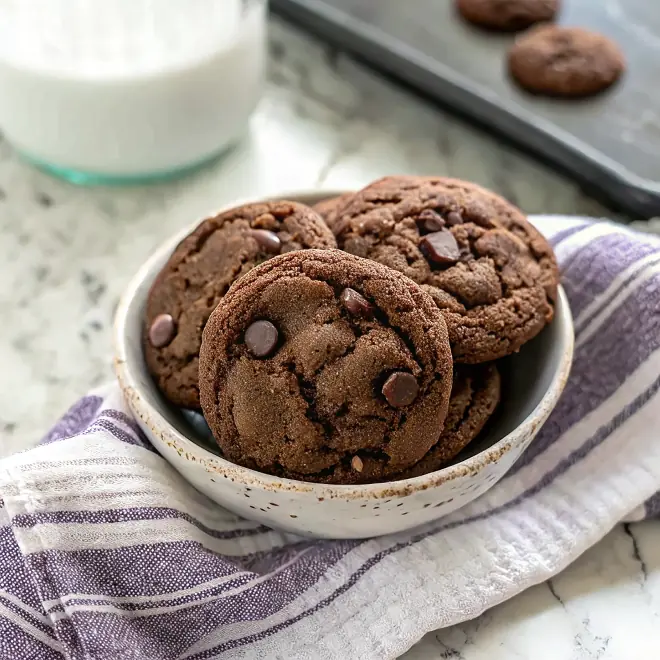
It looks like a professional bakery spent hours on these. In reality, my daughter and I had these Funfetti Easter M&M Cookies in the oven before the kettle even finished boiling for my morning tea. They are the ultimate humble treat that manages to steal the show every single time.
Why You Will Love This Funfetti Easter M&M Cookies
The first time I whipped these up, I was just trying to clear out my baking cabinet before the holiday. I didn’t expect them to become the most requested treat every April, but that vanilla dough mixed with chocolate is a total crowd-pleaser.
Honestly, I was surprised by how much the extra egg yolk changed the texture. It turned a simple sugar cookie into something incredibly soft that stays chewy for days, which is exactly what I wanted for our family brunch.
What Makes This Funfetti Easter M&M Cookies Special
The texture is what really sets these apart. Using both granulated and brown sugar gives them those slightly crispy edges while keeping the middle perfectly soft.
Those pastel colors make any dessert table look instantly festive. My daughter loves how the rainbow sprinkles peek through the golden dough like little hidden treasures.
This is a truly reliable base that does not require any chilling time. You can go from a craving to a warm cookie in less than thirty minutes without any fuss.
The Best Funfetti Easter M&M Cookies Recipe
I made these Funfetti Easter M&M Cookies last Sunday when the spring sun finally peeked through the clouds. It is the kind of recipe that reminds me why simple, colorful baking is always the most joyful part of the season.
Ingredient Notes
- Unsalted Butter: Make sure it is softened at room temperature so it creams perfectly with the sugars for a fluffy base.
- Egg Yolk: Adding one extra yolk is my personal secret for that rich, chewy texture that never gets dry.
- Easter Milk Chocolate Candies: These provide the chocolate crunch and the pretty spring colors that make them festive.
- Rainbow Sprinkles: I prefer using the long jimmy-style sprinkles because they hold their shape and color best during baking.
- Light Brown Sugar: This keeps the cookies moist and adds a subtle hint of caramel flavor that pairs so well with vanilla.
Instructions
- Preheat and Prep. Set your oven to 350 degrees and line your pans with parchment paper. This simple step prevents sticking and ensures the bottoms of your cookies do not get too dark.
- Whisk Dry Ingredients. Gently combine the flour and baking soda in a medium bowl. I like to make sure there are no lumps so the dough is perfectly smooth.
- Cream Butter and Sugars. Beat the softened butter, both sugars, and salt together until the mixture is light and fluffy. This usually takes about two minutes and creates the perfect base for your dough.
- Add Eggs and Vanilla. Mix in the vanilla extract, the whole egg, and that extra egg yolk. Be sure to beat them until everything is fully incorporated and smooth.
- Combine the Mixture. Gradually stir the flour mixture into the wet ingredients on low speed. Stop mixing the moment you no longer see any white streaks of flour.
- Fold in Candies. Use a spatula to gently stir in the chocolate candies and sprinkles by hand. This keeps the candies from breaking so they look beautiful once baked.
Billy’s Tips and Mistakes to Avoid
- Do not overbake these or they will lose that signature softness. I always take mine out when the edges are just barely golden even if the centers look a little soft.
- Make sure your butter is softened but not melted. If the butter is too warm, the cookies will spread too much on the baking sheet.
- I learned the hard way to let them rest on the hot pan for five minutes. They need that time to set up before you try to move them to a cooling rack.
- Use a cookie scoop to keep the portions even. This ensures every cookie in the batch finishes baking at the exact same time.
- Let the kids help with the sprinkles. It might be a little messy, but it is their favorite part of holiday baking in our kitchen.
Storage Tips
You can keep these cookies in an airtight container at room temperature for up to 4 days. If you want to save some for later, they freeze beautifully for up to 2 months. I usually place a small piece of parchment paper between the layers so the candies do not stick together.
Variations and Swaps
- Try swapping half of the chocolate candies for white chocolate chips for a creamier spring flavor.
- If you need a gluten-free version, a good 1-to-1 baking flour works well in this specific dough.
- Press a few extra M&Ms into the top of each dough ball before baking for a more decorated look.
Why This Recipe Works Every Time
The balance of fats and sugars in this dough creates a structure that is sturdy enough to hold the heavy candies but soft enough to melt in your mouth. I have tested this ratio many times to make sure they do not spread too thin on the pan.
Personally, I have found that the salt is just as important as the sugar. It cuts through the sweetness of the milk chocolate and makes the vanilla flavor really pop in every single bite.

Ingredients
- 2 1/4 cups all -purpose flour
- 1/2 teaspoon baking soda
- 1 cup unsalted butter, softened
- 1/2 cup granulated sugar
- 1 cup light brown sugar, packed
- 1 teaspoon sal t
- 2 teaspoons vanilla extract
- 1 large eg g
- 1 large egg yolk
- 1/2 cup rainbow sprinkles
- 1 cup Easter milk chocolate candies (M&Ms)
Instructions
- Preheat oven to 350°F (175°C) and line baking sheets with parchment paper or silicone mats.
- In a medium bowl, whisk together the flour and baking soda.
- In a large bowl, cream together the softened butter, granulated sugar, brown sugar, and salt until the mixture is light and fluffy.
- Add the vanilla extract, whole egg, and egg yolk, beating until fully incorporated.
- Gradually add the dry flour mixture to the wet ingredients, mixing on low speed until just combined.
- Gently fold in the rainbow sprinkles and milk chocolate candies using a spatula.
- Portion the dough into rounded tablespoons and place them 2 inches apart on the prepared baking sheets.
- Bake for 10 to 12 minutes, or until the edges are set and lightly golden while the centers remain soft.
- Allow cookies to cool on the baking sheet for 5 minutes before transferring to a wire cooling rack.
Frequently Asked Questions
Can I freeze the cookie dough?
Yes, you can scoop the dough into balls and freeze them for up to 3 months. Just add an extra minute or two to the baking time when you are ready to eat them.
Why are my cookies flat?
This usually happens if the butter was too warm or if your baking soda is old. Make sure your butter is soft to the touch but still holds its shape when you press it.
Can I use salted butter?
You can certainly use salted butter if that is what you have on hand. Just reduce the added salt in the recipe to a half teaspoon so they do not end up too salty.
The Bottom Line
There is something so joyful about a plate of bright, colorful cookies sitting on the kitchen counter during the holidays. Whether you are hosting a big family brunch or just want a sweet afternoon snack, these are always a hit. Sweet moments don’t have to be complicated. Let’s make something wonderful together.
I hope your kitchen smells like vanilla and happiness this spring. Happy baking from my family to yours! Billy
Billy