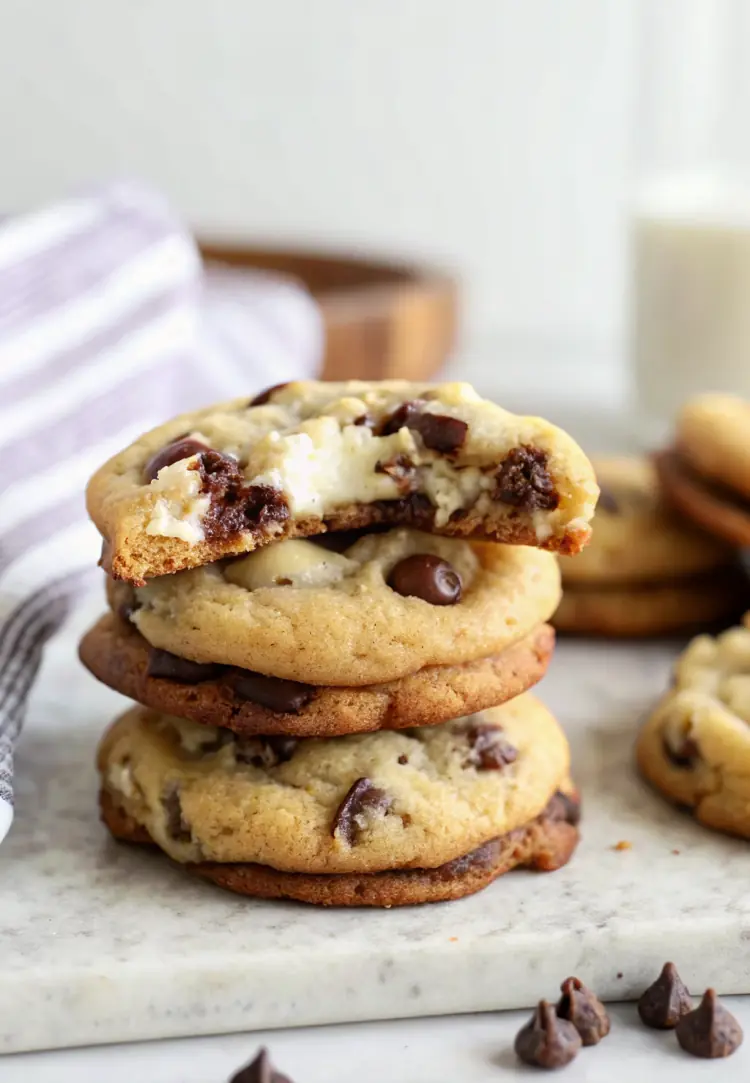
A school bake sale can sneak up on you, especially if it’s the night before and you’ve entirely forgotten about it. Sound familiar? That’s why I love having quick recipes up my sleeve that not only look fantastic but taste even better. Enter these Cheesecake Stuffed Chocolate Chip Cookies! They’re an impressive way to send those school fundraising treats without spending all night in the kitchen.
Why You’ll Love This Cheesecake Stuffed Chocolate Chip Cookies
These cookies blend the best of both worlds—the creamy richness of cheesecake and the classic comfort of chocolate chip cookies. As a mom who loves to bake with my daughter, I appreciate how much joy simple ingredients can bring to our family kitchen, turning ordinary moments into delightful memories.
When I discovered this recipe, I was thrilled at how quickly I could whip them up, even with my daughter’s little hands “helping” along the way. With a few simple steps, we have desserts that disappear fast and leave everyone asking for the secret to this sweet surprise!
What Makes this Recipe Unique
– **Speed:** This recipe lets you create a show-stopping dessert in a flash.
– **Key Ingredients:** The cream cheese filling adds a delightful surprise inside every cookie, elevating them from tasty to unforgettable.
– **Method:** While they might look like they take a lot of work, they come together quickly, perfect for those last-minute baking needs.
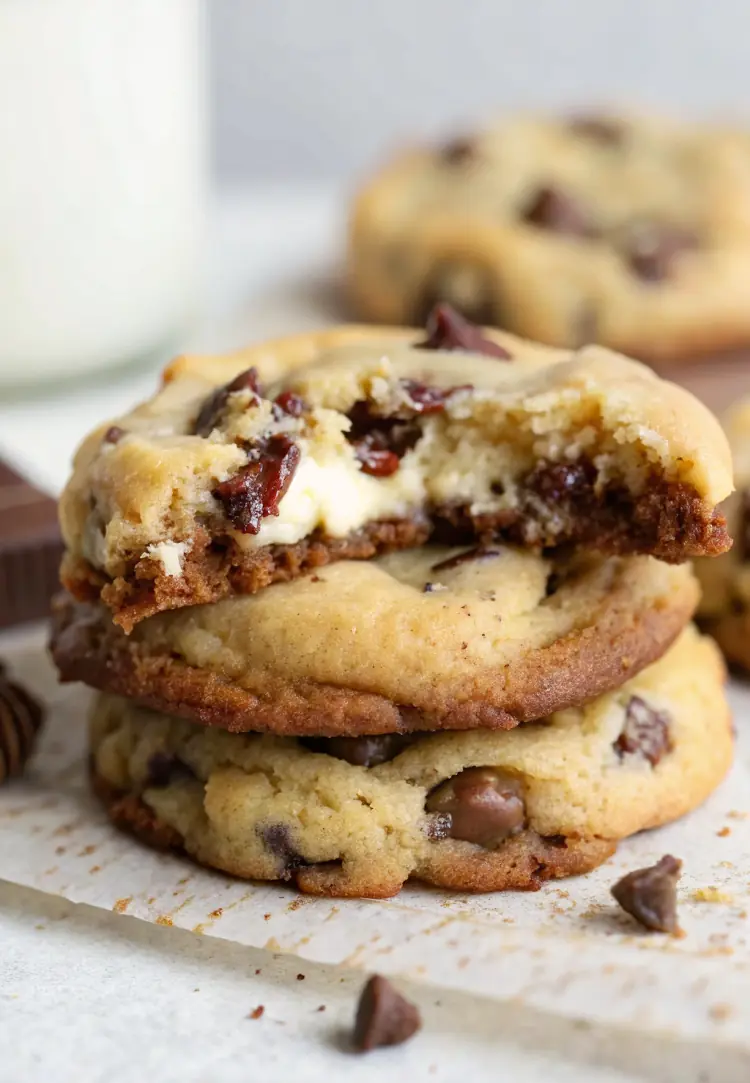
– **Texture:** You’ll enjoy a gooey, creamy center paired with a soft, chewy cookie that balances both flavors beautifully.
Estimated Macros & Calories
These cookies pack in charm and flavor.
(estimated per serving, without optional ingredients)
- Calories: 150
- Protein: 2 g
- Carbohydrates: 20 g
- Fat: 8 g
- Fiber: 1 g
The Most Authentic Cheesecake Stuffed Chocolate Chip Cookies Recipe
Baking should be about bringing warmth into your home and sharing joyful moments. These cheesecake stuffed cookies are just that—delightfully easy to make and a luscious treat to share with family or friends.
Ingredient Notes
– Cream Cheese: Make sure it’s softened for the filling to be creamy. Block cream cheese works best for the right texture.
– Powdered Sugar: This is your sweetener for the cheesecake filling; it dissolves easily and gives a smooth finish.
– Unsalted Butter: Using room temperature butter ensures you get that fluffy cookie base. Don’t skip softening it properly!
– Baking Soda: This is what gives the cookies a nice rise, so it’s essential for that soft and chewy texture.
– Chocolate Chips: Semi-sweet chocolate chips create a lovely balance with the sweetness of the cheesecake. Feel free to use your favorite kind!
Instructions
Step 1: Prepare the Cheesecake Center
Begin by beating the softened cream cheese with the powdered sugar until it’s silky and lump-free. Stir in some fresh lemon zest for that extra zing! Once combined, chill it in the refrigerator to firm up while you prepare the cookie dough.
Step 2: Preheat the Oven
Set your oven to 350°F (175°C). Don’t forget to line two baking sheets with parchment paper and set them aside. This little prep makes for easy cleanup later!
Step 3: Cream the Butter and Sugars
In a large bowl, cream the room-temperature butter with the brown and granulated sugars until it’s smooth and slightly fluffy. This should only take a couple of minutes. Remember to scrape down the sides of the bowl to ensure everything is well mixed.
Step 4: Add the Egg and Vanilla
Add in the whole egg, egg yolk, and vanilla extract. Beat it all together until perfectly combined. This mixture should be rich and inviting!
Step 5: Mix in Dry Ingredients
Stir in the baking soda and kosher salt until evenly distributed. Then, carefully add the flour to the mixture and fold it in gently. Don’t overmix it—just enough until you don’t see any dry flour.
Step 6: Fold in the Chocolate Chips
Now, gently fold in the chocolate chips so that they’re scattered throughout the dough. This step is always my daughter’s favorite!
Step 7: Portion the Cookie Dough
Divide the dough into 24 equal pieces. Roll each piece into a ball and flatten them slightly into disks in your palm.
Step 8: Add the Cheesecake Filling
Scoop about a teaspoon of the chilled cheesecake filling onto the center of each disk. Then, wrap the dough around the filling and pinch to seal, rolling gently to form a nice ball. Make sure the filling is fully enclosed!
Step 9: Arrange and Chill
Place the filled cookie balls on your prepared baking sheets, leaving enough space in between them. For a neater shape, you can chill these in the refrigerator for a short while before baking.
Step 10: Bake to Perfection
Slide one sheet into the preheated oven and bake until the edges are golden. Each batch should look set but still soft on top. Remember to rotate the pan halfway through baking for even browning!
Step 11: Cool Before Enjoying
Let the cookies rest on the baking sheet for a few moments before transferring them to a cooling rack. This step allows the cheesecake center to firm up a bit, making them perfect for biting into.
Tips and Mistakes to Avoid
– Make sure your cream cheese is softened before mixing, or you’ll end up with lumps in your filling.
– Watch the baking time closely; cookies can go from perfect to overbaked in a flash.
– Allow enough cooling time for the cookies to firm up—impatience can lead to messy bites!
Storage Tips
These cookies can be stored in an airtight container at room temperature for a few days. If you want to keep them longer, pop them in the freezer—and they’re just as delightful after being thawed!
Variations and Substitutions
Try swapping out the cheesecake filling for peanut butter for a fun twist. You can also use gluten-free flour to make these cookies without the wheat—perfect for family members who need that option.
Why This Recipe Is The Real Deal
This recipe shines because it saves you time without sacrificing taste—or fun! The mix of quick prep and delightful flavors keeps everyone satisfied, including my little helper, who always asks for a taste test before they cool completely.
There’s something special about these cookies that transforms a last-minute bake sale into a sweet memory you won’t forget. Give them a try, and you’ll find yourself making them again and again!
The Bottom Line
So, if you find yourself in a last-minute baking pinch, these Cheesecake Stuffed Chocolate Chip Cookies are the answer you didn’t know you needed. You’ll want to try them out and come back to share your thoughts!
Billy Mackenzie
Founder of MerryDessert.com
Simple, joyful homemade desserts — sweet moments, made with love.
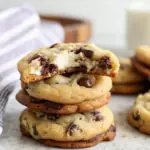
Cheesecake Stuffed Chocolate Chip Cookies
Ingredients
Cheesecake Filling
- 12 oz cream cheese, softened and cubed
- 3/4 cup powdered sugar
- 1 tsp fresh lemon zest
Cookie Dough
- 1 cup unsalted butter, room temperature
- 1 cup light brown sugar, packed
- 1/4 cup granulated sugar
- 1 large egg
- 1 large egg yolk
- 2 tsp pure vanilla extract
- 1 tsp baking soda
- 1 tsp kosher salt
- 2 1/4 cups all-purpose flour
- 1 3/4 cups semi-sweet chocolate chips
Instructions
Preparation Steps
- Make the cheesecake center: in a medium bowl, beat the softened cream cheese and powdered sugar with a hand mixer (or whisk vigorously) until silky and lump-free. Stir in the lemon zest. Transfer the mixture to a small bowl, cover, and chill in the refrigerator while you prepare the dough so it firms up — about 15 minutes.
- Heat the oven to 350°F (175°C). Line two baking sheets with parchment paper and set aside.
- In a large bowl, cream the room-temperature butter with the brown sugar and granulated sugar until smooth and slightly fluffy (2–3 minutes) using a hand mixer or stand mixer fitted with the paddle. Scrape down the bowl.
- Add the whole egg, egg yolk and vanilla to the butter mixture and beat until combined. Stir in the baking soda and salt until evenly distributed.
- Lower the mixer speed or fold in the flour by hand with a sturdy spatula until just incorporated — do not overmix. Fold in the chocolate chips so they are evenly dispersed through the dough.
- Portion the cookie dough into 24 equal pieces (about 1 1/4 tablespoons per piece). Roll each piece into a ball and place on the prepared sheet. Flatten each ball into a 2-inch disk in your palm.
- Scoop about 1 teaspoon of the chilled cheesecake filling onto the center of each flattened dough disk. Wrap the dough up around the filling and pinch to seal, rolling gently to form a smooth ball so the filling is completely enclosed.
- Arrange the filled cookie balls 2 inches apart on the baking sheets. For a slightly neater shape, chill the assembled cookies on the tray in the refrigerator for 8–10 minutes before baking.
- Bake one sheet at a time in the preheated oven for 11–12 minutes, or until cookie edges are golden and the tops look set but still soft. Rotate the pan halfway through for even browning.
- Remove from oven and let cookies rest on the baking sheet for 3–4 minutes to finish setting, then transfer to a cooling rack to cool completely so the cheesecake center firms up.