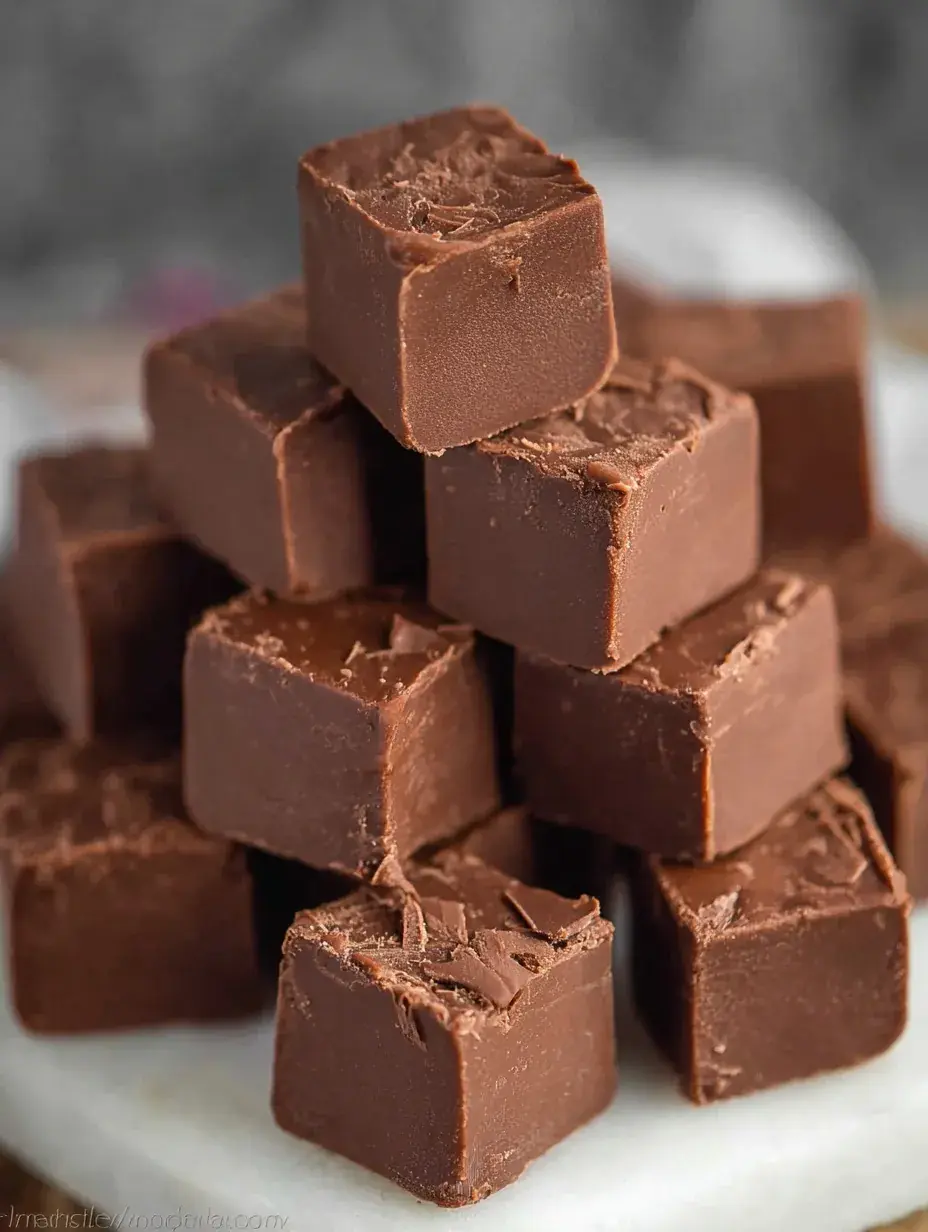
There is something so peaceful about a quiet Sunday afternoon in the kitchen when the house smells like melting chocolate. My daughter usually pulls up a stool to help me stir, even though she is mostly just waiting to lick the spoon. This fudge is our go-to when we want something sweet without spending hours by the oven.
Why You Will Love This Easy Chocolate Fudge
I remember the first time I tried to make fudge as a teenager and it turned into a crumbly mess because I tried to do it the old-fashioned way with a thermometer. Honestly, I thought I was just bad at making candy until I discovered this shortcut version that never fails.
My daughter and I have made this so many times that we can practically do it with our eyes closed now, and it always disappears fast. I once brought a batch to a school bake sale and several parents asked me for the secret, thinking I had spent all morning over a hot stove.
What Makes This Easy Chocolate Fudge Special
- Key feature: The texture is incredibly smooth and creamy without the graininess you sometimes find in traditional fudge recipes.
- Key ingredient: Sweetened condensed milk is the magic here because it provides the sweetness and the structure without needing to boil sugar.
- Ease factor: This is a simple no-bake treat that only takes a few minutes of active work in the microwave.
- Seasonal fit: While I make this all year, it is a staple during the Christmas season for gifting to neighbors.
- Kid-friendly note: Kids love helping to stir the warm chocolate and choosing their own toppings to press into the top.
The Best Easy Chocolate Fudge Recipe
I usually make this late at night when the house is quiet and I need a little treat for the next day. It is one of those recipes that feels like a hug in a box, especially when you share it with friends.
Ingredient Notes
- Semi-sweet Chocolate Chips: These provide the rich base and hold their shape well once chilled.
- Sweetened Condensed Milk: Do not swap this for evaporated milk or the fudge will never set properly.
- Pure Vanilla Extract: I always add a splash at the end to give it that homemade, bakery-style aroma.
- Fine Salt: A tiny bit of salt balances the sugar so it does not taste overly sweet.
- Parchment Paper: This is not an ingredient but it is essential for lifting the fudge out of the pan cleanly.
Instructions
- Prepare Pan. Line your square pan with parchment paper so the edges hang over the sides like little handles. This makes it so much easier to lift the whole block out once it is firm.
- Combine Ingredients. Add your chocolate chips and the full can of condensed milk into a microwave-safe bowl. I usually use a glass bowl so I can see if any chips are stuck at the bottom.
- Heat Gently. Microwave the mixture on high for exactly one minute and then let it sit undisturbed for another minute. This rest period lets the residual heat do the work so the chocolate does not burn.
- Stir Smooth. Use a sturdy spoon to stir everything together until it looks like a glossy, thick ribbon. If you still see little lumps, give it another fifteen seconds in the microwave.
- Add Flavor. Mix in your vanilla and salt until the color is even and everything is well combined. You will notice the mixture getting thicker and harder to stir as it cools.
- Chill Well. Spread the mixture into your pan and smooth the top with a spatula before putting it in the fridge. It needs at least two hours to firm up before you try to slice it.
Billy’s Tips and Mistakes to Avoid
- Use high-quality chocolate chips because they are the main flavor here and cheaper brands sometimes do not melt as smoothly.
- I discovered that letting the bowl sit for a minute after microwaving is the secret to a perfectly glossy finish.
- Never get a drop of water in the bowl or the chocolate will seize up and turn grainy instantly.
- For the cleanest squares, run your knife under hot water and wipe it dry between every single cut.
- My daughter likes to add sprinkles on top while the fudge is still wet so they stick perfectly.
Storage Tips
Store these little squares in an airtight container in the refrigerator for up to 14 days. If you prefer a softer bite, you can keep them at room temperature for about 4 days. They also freeze beautifully for up to 3 months if you wrap them tightly in plastic wrap and foil.
Variations and Swaps
- Stir in a half cup of chopped walnuts or pecans for a classic crunchy texture.
- Use white chocolate chips and a bit of peppermint extract for a festive holiday version.
- Swap half of the chocolate chips for peanut butter chips to make a marbled swirl effect.
Why This Recipe Works Every Time
This recipe relies on the stable fat content in the chocolate and the thick consistency of the milk to create a foolproof set. I love that I do not have to worry about the humidity or the exact temperature of a sugar syrup.
The first time I made this, I was worried it would be too soft, but it firmed up perfectly in the fridge. I have learned that being patient during the chilling stage is the only hard part of the whole process.

Ingredients
- 3 cups semi -sweet chocolate chips (approx. 18 oz)
- 1 can (14 oz) sweetened condensed milk
- 1 teaspoon pure vanilla extract
- 1/4 teaspoon fine salt
Instructions
- Line an 8x8 inch square baking pan with parchment paper, leaving an overhang on the sides for easy removal.
- In a medium microwave-safe bowl, combine the chocolate chips and sweetened condensed milk.
- Microwave on high for 1 minute, then let sit for 1 minute to allow the residual heat to melt the chips.
- Stir the mixture until completely smooth. If chips are not fully melted, microwave in additional 15-second intervals, stirring after each.
- Stir in the vanilla extract and salt until well incorporated.
- Pour the mixture into the prepared baking pan and spread evenly with a spatula.
- Refrigerate for at least 2 hours or until firm.
- Lift the fudge out of the pan using the parchment paper overhang and cut into 1-inch squares.
Frequently Asked Questions
Why is my fudge grainy?
This usually happens if the chocolate was overheated or if a little bit of water got into the bowl during melting. Always stir slowly and ensure your utensils are completely dry.
Can I use milk chocolate instead?
Yes, you can, but the fudge will be much softer and sweeter than the semi-sweet version. I personally find semi-sweet gives the best balance for most people.
Does this fudge need to be refrigerated?
It stays firmest in the fridge, but it is fine to leave it out on a dessert table for several hours during a party. If your kitchen is very warm, it might start to soften up a bit.
The Bottom Line
Sometimes the most basic recipes are the ones that bring the most joy to a busy home. I hope you enjoy making these little bites of chocolate heaven as much as we do. Sweet moments don’t have to be complicated. Let’s make something wonderful together.
There is nothing quite like a cold evening and a plate of homemade fudge to share. Happy baking! Billy
Billy