Every time the first winter frost hits the window, my daughter and I start dreaming about the richest, darkest cakes we can bake. There is something about the cold air that makes me reach for the cocoa powder and my trusty stand mixer. This Chocolate Buttercream Frosting has become our official signal that the cozy baking season has finally arrived.
Why You Will Love This Chocolate Buttercream Frosting
I remember the first time I tried to make a homemade chocolate frosting and it ended up like a gritty soup because I was in too much of a hurry. I spent a rainy Saturday afternoon tweaking the ratios, determined to find that perfect cloud-like texture that still tasted like a decadent truffle.
When I finally hit on this specific balance of cream and sifted cocoa, I was honestly surprised at how much better it was than anything from a tub. Personally I have found that the secret is all in the timing of the whip, which gives it that professional finish without the professional effort.
What Makes This Chocolate Buttercream Frosting Special
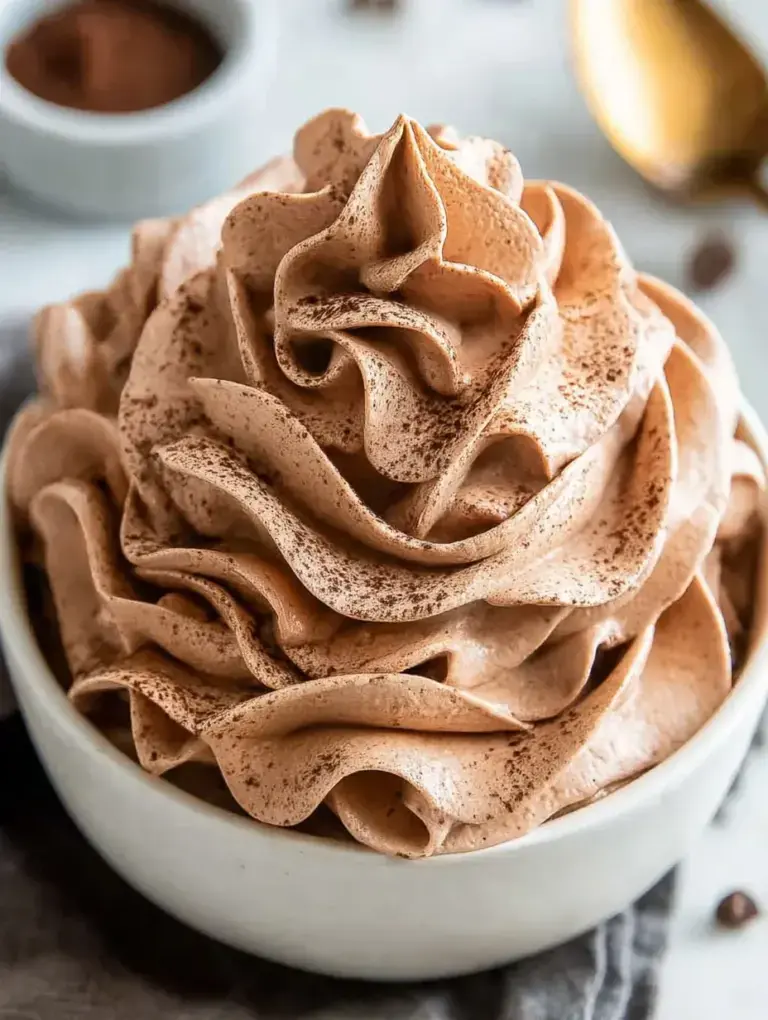
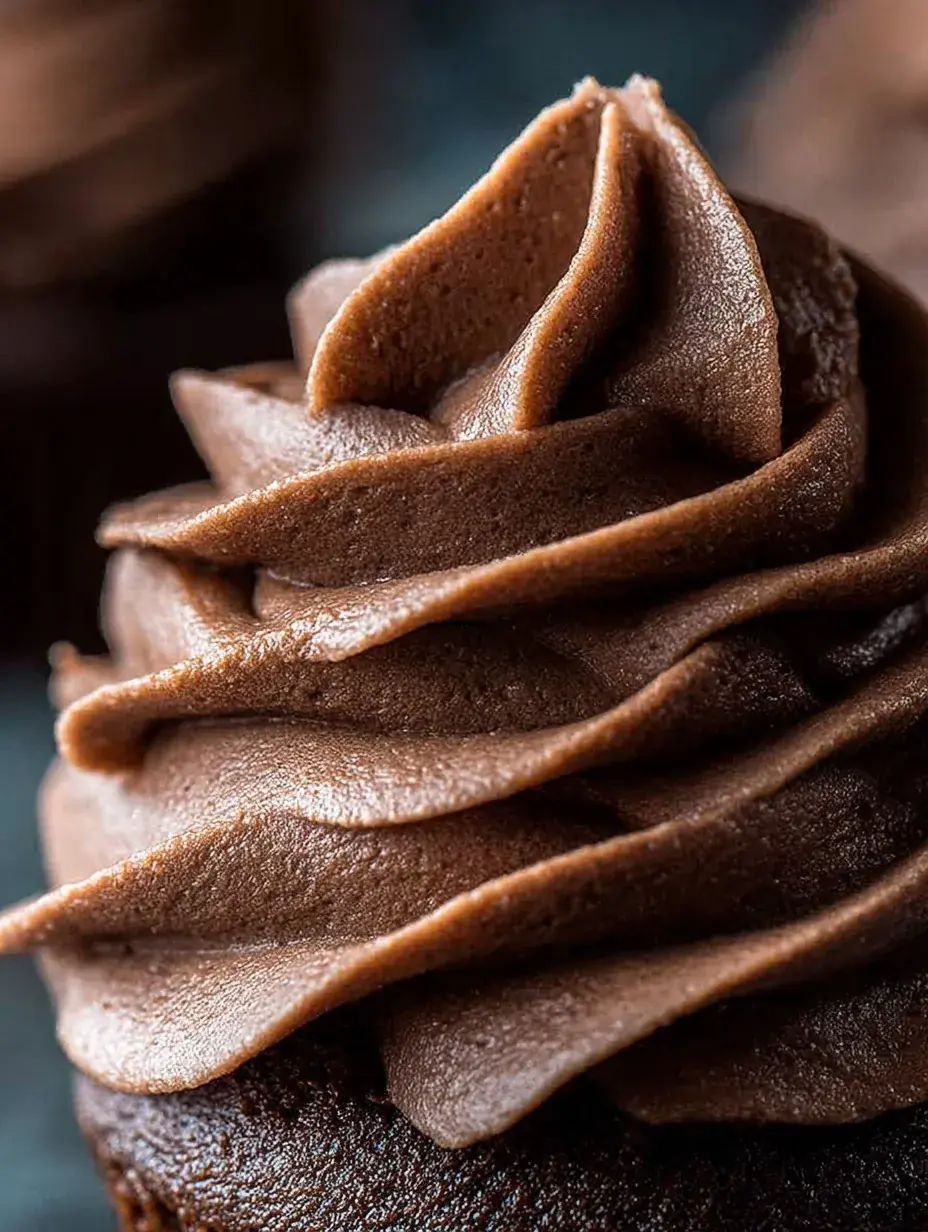
The texture is the real star here because it stays incredibly stable while remaining soft enough to melt on your tongue. It is the kind of frosting that holds its shape perfectly for piping tall swirls on cupcakes.
Using heavy cream instead of milk adds a velvety richness that transforms a simple powdered sugar base into something truly special. You really notice the difference in how smoothly it spreads across a warm-toned chocolate cake.
It is remarkably fast to whip up, taking less than ten minutes from start to finish in your own kitchen. This makes it my favorite choice for those last-minute school bake sales or unexpected family gatherings.
The Best Chocolate Buttercream Frosting Recipe
The last time I made this was for my daughter’s birthday, and I was reminded just how much of a difference real butter makes. It is a simple recipe, but it feels like such a luxury when it is swirled onto a fresh cake.
Ingredient Notes
- Unsalted Butter: Make sure this is softened to room temperature so it creams properly without leaving any tiny yellow lumps in your frosting.
- Cocoa Powder: Sifting this is a non-negotiable step I learned the hard way, as it prevents those stubborn little pockets of dry powder in the final mix.
- Powdered Sugar: This provides the structure and sweetness, and I find adding it gradually keeps my kitchen from being covered in a white sugar cloud.
- Heavy Cream: This is my secret for that silkier finish compared to using regular milk; it makes the frosting feel much more decadent.
- Vanilla Extract: A good quality pure vanilla actually deepens the chocolate flavor rather than just adding a simple scent.
Instructions
- Cream the butter. Place the softened butter in the bowl of a stand mixer and beat on medium-high speed for 2 minutes. It should look pale and very creamy before you add any other ingredients.
- Combine the base. Reduce the speed to low and gradually add the powdered sugar, cocoa powder, heavy cream, vanilla, and salt. Mixing on low prevents the dry ingredients from flying out of the bowl and making a mess.
- Whip to fluffy. Once the sugar is mostly incorporated, increase the speed to high and beat for 2 minutes. The frosting should transform into a light, airy texture that looks almost like a mousse.
- Scrape the sides. Stop the mixer and use a rubber spatula to scrape down the sides of the bowl. This ensures that every bit of cocoa and butter is completely homogenized for a uniform color.
- Check the consistency. If the frosting feels too stiff, add another tiny splash of cream, or more sugar if it seems too soft. It should hold a stiff peak but still feel very spreadable.
- Final whip. Give it one last quick mix on high for thirty seconds to knock out any remaining air bubbles. This step makes it much easier to pipe smooth designs later.
Billy’s Tips and Mistakes to Avoid
- Don’t rush the butter softening; if it is too cold, the frosting will be chunky, which I have learned from many impatient mornings.
- Always sift your cocoa powder because it is naturally clumpy and will never fully dissolve if you skip this step.
- If your kitchen is very warm, chill the mixing bowl for ten minutes before frosting your cake to help the butter stay stable.
- Use the paddle attachment rather than the whisk to avoid whipping too much air into the frosting, which causes unsightly bubbles when spreading.
- Add the salt even if you think you do not need it; it perfectly balances the intense sweetness of the powdered sugar.
Storage Tips
You can keep this frosting in an airtight container at room temperature for up to 2 days if your house is cool. In the fridge, it stays fresh for about 7 days, but you will need to let it sit out for an hour and give it a quick whip before using it again. It also freezes beautifully for up to 3 months, which is a lifesaver during the busy Christmas season.
Variations and Swaps
- Add a teaspoon of espresso powder dissolved in the vanilla to make a rich mocha version that I love for adult dinner parties.
- Swap the vanilla for peppermint extract during the holidays for a festive candy cane flavor that my daughter adores.
- For a dairy-free option, use a high-quality plant-based butter stick and full-fat coconut cream in place of the heavy cream.
Why This Recipe Works Every Time
I have made this hundreds of times, and the reason it never fails is the specific beating time for the butter at the very beginning. Most people stop too early, but giving it those full two minutes creates the airy foundation that makes the chocolate so light.
The first few times I made this Chocolate Buttercream Frosting, I used milk because it was all I had in the fridge, but switching to heavy cream was a total turning point. My daughter now insists that we never go back to the old way because this version tastes like real fudge and has a much better mouthfeel.
Ingredients
- 1 cup (226g) unsalted butter, softened to room temperature
- 3.5 cups (420g) powdered sugar
- 0.5 cup (45g) unsweetened cocoa powder, sifted
- 3 tablespoons heavy cream
- 1 teaspoon pure vanilla extract
- 0.25 teaspoon sal t
Instructions
- Place the softened butter in the bowl of a stand mixer fitted with a paddle attachment.
- Beat the butter on medium-high speed for 2 minutes until pale and creamy.
- Reduce speed to low and gradually add the powdered sugar, cocoa powder, heavy cream, vanilla, and salt.
- Once the sugar is incorporated, increase the speed to high and beat for 2 minutes until the frosting is light and fluffy.
- Scrape down the sides of the bowl as needed to ensure complete homogenization.
Frequently Asked Questions
How do I make my frosting darker?
To get a deeper, nearly black color, use a Dutch-processed cocoa powder. It provides a more intense chocolate look and a smoother flavor profile without needing extra food coloring.
Why is my buttercream grainy?
Grainy frosting usually happens if the sugar wasn’t fine enough or the butter was too cold to incorporate properly. Make sure your butter is truly soft to the touch before you start mixing.
Can I use this for piping flowers?
This recipe is very stable and works well for piping, but if you are doing very intricate flowers, you might want to add an extra half-cup of powdered sugar. This makes the frosting a bit stiffer so it holds those delicate petal shapes.
The Bottom Line
There is no need to settle for store-bought when you can have this rich, buttery topping ready in less than ten minutes. It brings a little extra love to every cupcake and makes any occasion feel like a real celebration. Sweet moments don’t have to be complicated. Let’s make something wonderful together.
I hope your kitchen smells like a chocolate dream today while you whip this up. Happy baking from my family to yours. Billy
Billy