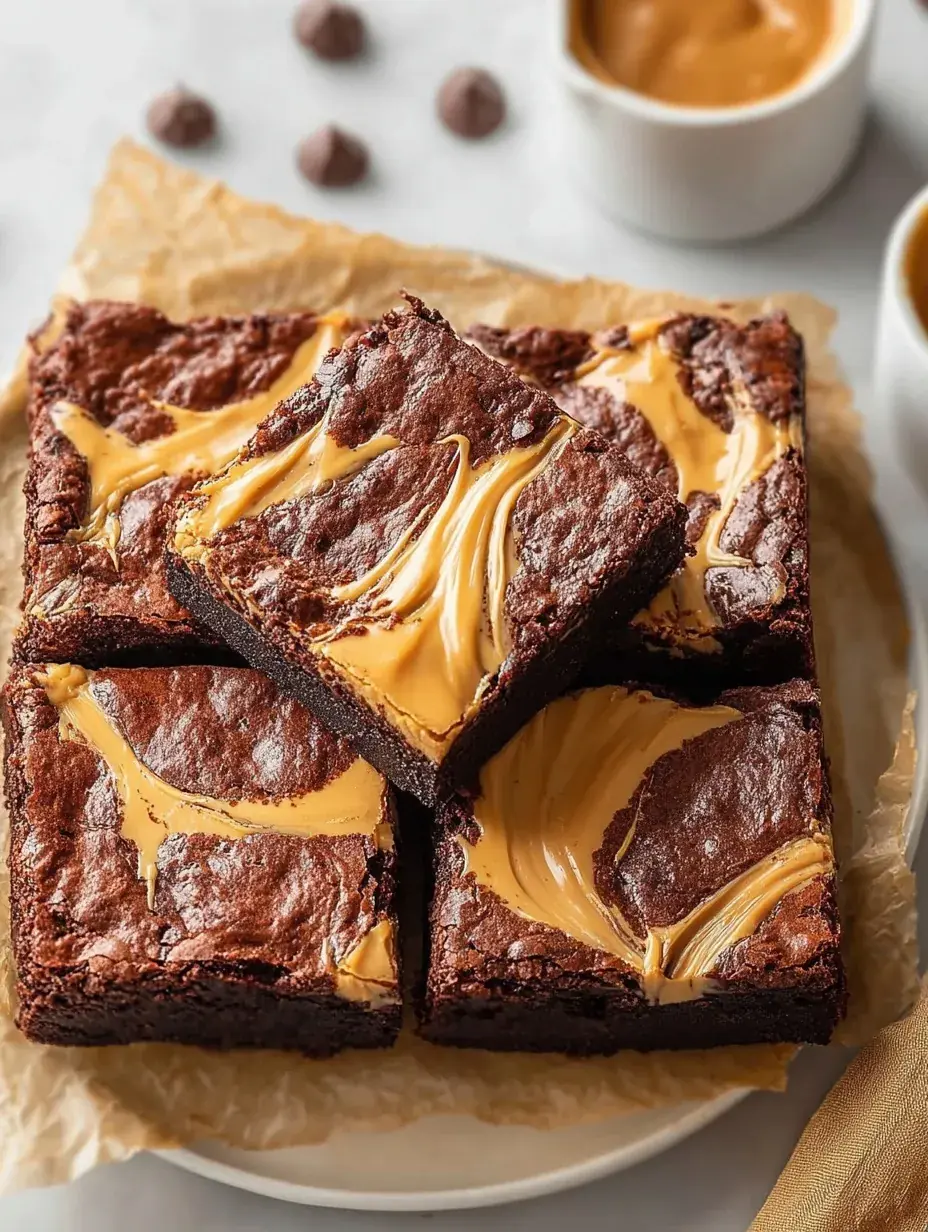
Most people think a marbled swirl takes a professional hand and hours of patience. Honestly, these come together in about twenty minutes and look like they belong in a bakery window. I love how the salty peanut butter cuts right through that rich cocoa base.
Why You Will Love This Peanut Butter Brownies
My daughter is the official swirl expert in our house, and she takes her job very seriously. We usually have some holiday music playing in the background while she uses her little butter knife to draw patterns in the batter. It is one of those simple kitchen moments where we just talk and laugh while the house starts to smell like warm chocolate.
Personally, I have found that letting her take the lead on the decorating makes these taste even better. The first time we made these, she tried to swirl them so much the colors almost blended together, but we learned that a light touch creates those beautiful golden ribbons.
What Makes This Peanut Butter Brownies Special
- The Swirl Technique: The peanut butter mixture is thinned with a little butter so it actually swirls instead of just sitting in a heavy clump.
- Deep Cocoa Base: We use unsweetened cocoa powder which provides a rich, dark contrast to the sweet peanut butter topping.
- Pantry Staples: You do not need a trip to the specialty store because these use basic ingredients you likely already have.
- Edge Texture: Using melted butter instead of creaming cold butter gives these those slightly crispy, chewy edges that my family loves.
- Kid Involvement: This is the perfect recipe for little hands to help with stirring and creating the marble patterns.
The Best Peanut Butter Brownies Recipe
I made these last Tuesday when the rain was hitting the windows and we just needed something warm. They are thick, rich, and satisfy every chocolate craving you could possibly have.
Ingredient Notes
- Unsweetened Cocoa Powder: This provides the intense chocolate flavor that balances the creamy peanut butter.
- Creamy Peanut Butter: Avoid the natural oil-separated kind for this recipe as it can make the swirl too greasy.
- Melted Butter: This is the secret to that dense, fudgy texture rather than a cake-like brownie.
- Powdered Sugar: A little bit in the peanut butter mixture helps it set up so it does not disappear into the batter.
- All-Purpose Flour: Just enough to hold everything together without making the brownies heavy or dry.
Instructions
- Prep the Pan. Preheat your oven to 350°F and grease your 8×8 inch pan well. I usually line mine with parchment paper so I can lift the whole block out easily later.
- Mix Chocolate Base. Whisk the melted butter and sugar together until they look smooth and shiny. Add the eggs and vanilla, beating them in until the mixture is completely combined.
- Fold Dry Ingredients. Gently stir in the cocoa powder, flour, salt, and baking powder. Stop as soon as you see the last streak of flour disappear to keep them tender.
- Prepare PB Swirl. In a small bowl, stir the peanut butter, powdered sugar, and extra melted butter. It should look like a thick, pourable frosting.
- Layer and Marbelize. Spread the chocolate batter into the pan first, then dollop the peanut butter mixture on top. Drag a knife through the drops to create those pretty loops and swirls.
- Bake and Cool. Bake for 25 to 30 minutes until the edges look set but the center still has a tiny bit of wiggle. They must cool completely in the pan or they will fall apart when you cut them.
Billy’s Tips and Mistakes to Avoid
- Do not overbake these or they will lose that fudgy center. I start checking them at 23 minutes because every oven runs a little differently.
- The first time I made these, I swirled too deep and hit the bottom of the pan. Keep your knife shallow to keep the peanut butter on the top layer where it looks best.
- If you skip the powdered sugar in the peanut butter mix, the swirl tends to sink and vanish into the chocolate.
- Wait for them to be stone cold before slicing. I know it is hard, but it is the only way to get those clean, sharp squares.
- Let your kids do the swirling! My daughter reminds me that the messier the swirl, the more homemade it looks.
Storage Tips
These stay perfectly fresh in an airtight container at room temperature for up to 4 days. If you like them extra fudgy, you can keep them in the fridge for about a week. They also freeze wonderfully if you wrap individual squares in plastic wrap for a quick lunchbox treat later.
Variations and Swaps
- Toss a handful of dark chocolate chips into the batter for an extra hit of melty chocolate.
- You can use a 1-to-1 gluten-free flour blend if you need to avoid wheat.
- Swap the peanut butter for almond butter or sunflower seed butter if there is an allergy in the house.
Why This Recipe Works Every Time
The balance of fats in this recipe is what makes the texture so consistent. By using melted butter in both the brownie and the swirl, the two layers bake at the same rate, preventing one from getting dry while the other stays gooey.
I once tried to make these without melting the butter for the peanut butter layer, and it was a disaster. The peanut butter was too thick to move, and I ended up with big lumps instead of swirls. Adding that tiny bit of extra butter makes all the difference for that professional look.
Ingredients
- 1/2 cup unsalted butter, melted
- 1 cup granulated sugar
- 2 large egg s
- 1 teaspoon vanilla extract
- 1/3 cup unsweetened cocoa powder
- 1/2 cup all -purpose flour
- 1/4 teaspoon sal t
- 1/4 teaspoon baking powder
- 1/2 cup creamy peanut butter
- 1/4 cup powdered sugar
- 2 tablespoons unsalted butter, melted
Instructions
- Preheat oven to 350°F (175°C) and grease an 8x8 inch baking pan.
- In a medium bowl, whisk 1/2 cup melted butter and granulated sugar until well combined.
- Beat in the eggs and vanilla extract until the mixture is smooth.
- Gently fold in cocoa powder, all-purpose flour, salt, and baking powder until no dry streaks remain.
- In a separate small bowl, stir together creamy peanut butter, powdered sugar, and 2 tablespoons melted butter until smooth.
- Spread the chocolate batter evenly into the prepared baking pan.
- Dollop the peanut butter mixture over the chocolate batter and use a knife to create a marble swirl pattern.
- Bake for 25 to 30 minutes until a toothpick inserted into the center comes out with a few moist crumbs.
- Remove from oven and allow to cool completely in the pan before slicing into 16 squares.
Frequently Asked Questions
Can I use natural peanut butter for the swirl?
I would recommend sticking with standard creamy peanut butter. Natural versions often have too much oil separation, which can make the top of your brownies greasy and prevent the swirl from setting properly.
How do I know when the brownies are done?
The toothpick test is your best friend here. You want it to come out with a few moist crumbs attached, rather than being completely clean or covered in wet batter.
Can I double this recipe for a larger crowd?
Yes, you can double the ingredients and use a 9×13 inch baking pan. Just keep an eye on the clock, as it might need an extra 5 to 10 minutes of baking time.
The Bottom Line
There is something so comforting about the combination of salty peanut butter and sweet chocolate. Whether it is a rainy afternoon or a busy weekend, these brownies bring a little bit of joy to the kitchen. Sweet moments don’t have to be complicated. Let’s make something wonderful together.
I hope your kitchen stays warm and smells like chocolate this week. Happy baking! Billy
Billy