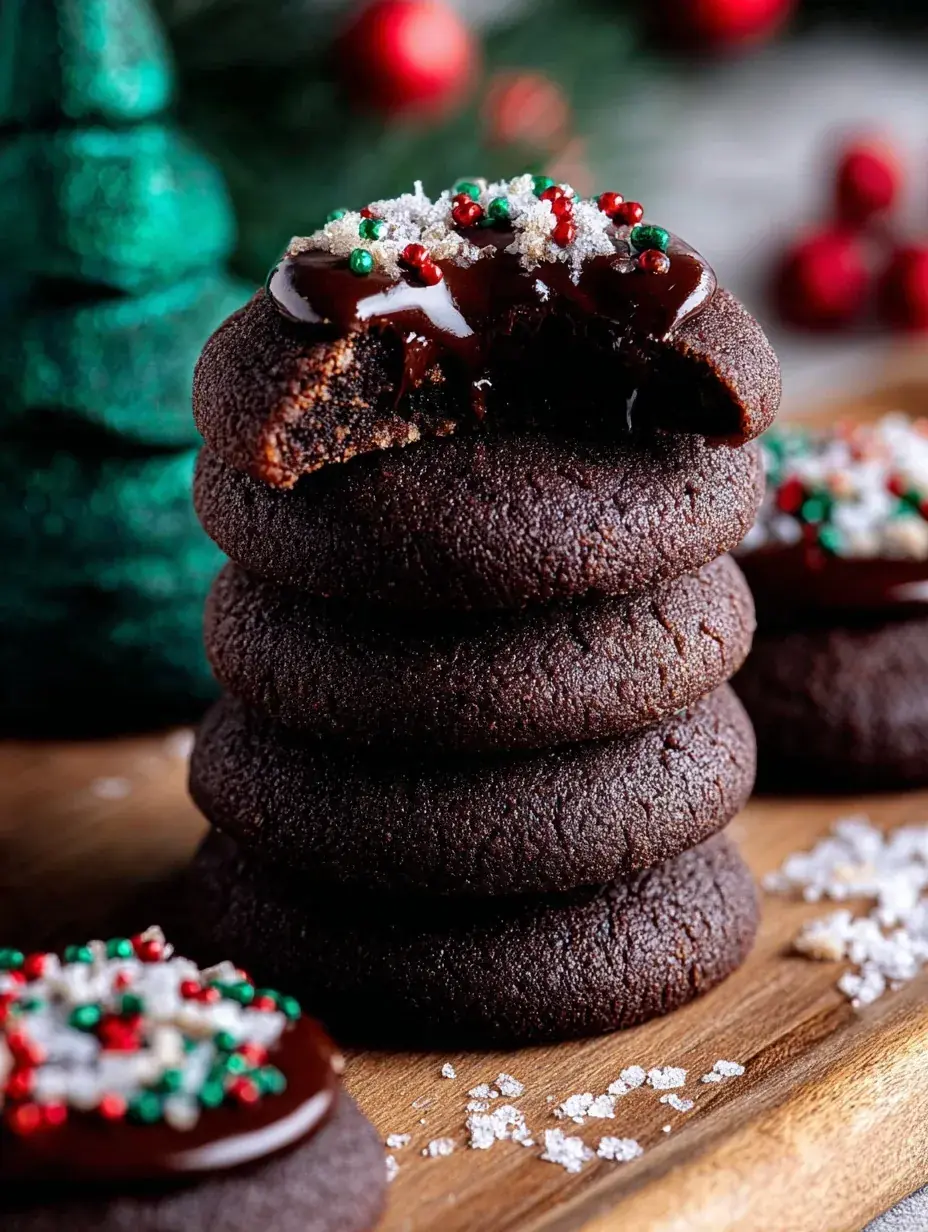
The kitchen smells like deep, rich cocoa and sweet butter the moment I pull the mixing bowl out of the cupboard. There is a soft rustle of parchment paper as my daughter helps me line the trays, our favorite holiday playlist humming quietly in the background. It is these little sounds and scents that make a cold afternoon feel so much brighter.
Why You Will Love This Chocolate Thumbprint Cookies
My daughter loves getting her hands into the dough, especially when it comes time to roll those little 1-inch balls. She calls it the button stage because she gets to press her thumb into the center of each one to make room for the chocolate. Watching her concentrate so hard on making the perfect little crater is honestly my favorite part of the whole process.
We have made these together so many times that she now knows exactly when the ganache is shiny enough to start filling. The first time we tried this, we accidentally filled them while they were too hot and the chocolate ran everywhere, but we just laughed and ate them anyway. Now, it is our little tradition to wait for them to cool together while we sip on a bit of leftover milk.
What Makes This Chocolate Thumbprint Cookies Special
- Double Chocolate Impact: Using both cocoa powder in the base and semi-sweet chips in the center creates a truly decadent flavor profile.
- Shortbread Texture: The high butter-to-flour ratio ensures a crumbly, melt-in-your-mouth feel that contrasts perfectly with the creamy filling.
- Ganache Simplicity: Making the filling with just heavy cream and chocolate chips is an easy way to add a professional touch without any stress.
- Perfect Portions: These cookies are naturally bite-sized, making them the best addition to any holiday dessert platter or gift box.
The Best Chocolate Thumbprint Cookies Recipe
I usually make these on a Sunday afternoon when we need a little something sweet to get us through the week. They look so fancy with that glossy center, but they are actually one of the simplest cookies in my rotation.
Ingredient Notes
- Unsweetened Cocoa Powder: This provides the deep chocolate color and base flavor, so I always reach for a good quality one.
- Egg Yolk: Adding just the yolk instead of the whole egg gives the dough a richer, more tender shortbread texture.
- Semi-Sweet Chocolate Chips: These melt down beautifully for the ganache, though you could use dark chocolate if you prefer a less sweet treat.
- Unsalted Butter: I prefer using unsalted so I can control the saltiness myself, especially since cocoa can be a bit bitter.
- Heavy Cream: This is essential for getting that ganache to be smooth and pourable rather than just melted chocolate.
Instructions
- Prep the Oven. Heat your oven to 350°F and get your baking sheets ready with parchment paper so nothing sticks. You want the oven fully preheated before the cookies go in to ensure they set properly.
- Whisk Dry Ingredients. Combine the flour, cocoa, and salt in a medium bowl until the color is a uniform light brown. This ensures you do not end up with any salty or floury clumps in your dough.
- Cream Butter and Sugar. Use a large bowl to beat the softened butter and granulated sugar until the mixture looks pale and fluffy. I usually find this takes about two minutes of steady mixing to get the right airiness.
- Mix in Liquids. Add the egg yolk, milk, and vanilla extract, beating them in until the batter is smooth and well combined. It might look a little wet at this stage, but that is exactly what we want.
- Add Dry Mix. Gradually stir in the flour and cocoa mixture until a thick, cohesive dough forms that you can easily handle. If the dough feels too sticky, I sometimes pop it in the fridge for ten minutes to firm up.
- Shape and Bake. Roll the dough into small balls and press an indentation into each one before baking for about 12 minutes. If the centers puff up too much in the oven, just gently press them down again while they are still warm.
Billy’s Tips and Mistakes to Avoid
- Use a measuring spoon. If you do not want to use your thumb, the back of a rounded half-teaspoon makes a perfectly even circle every time.
- Don’t overbake. These cookies can go from soft to dry very quickly, so pull them out as soon as the edges feel firm to the touch.
- Let the ganache sit. Resisting the urge to stir the chocolate and cream immediately is hard, but waiting those two minutes ensures it becomes silky smooth.
- Room temperature ingredients. I have learned that using a cold egg yolk can sometimes make the butter seize up, so I try to set everything out an hour early.
- Fill when cool. If you add the ganache while the cookies are hot, it won’t set up as a thick, fudgy center and might soak into the cookie.
Storage Tips
These stay fresh in an airtight container at room temperature for up to 4 days. If your kitchen is quite warm, you might want to keep them in the fridge to keep the ganache firm, where they will last for about a week. You can also freeze the baked cookies for a month, though I think they are best enjoyed fresh.
Variations and Swaps
- Peppermint Twist: Add a tiny drop of peppermint extract to the ganache for a festive holiday flavor.
- Dairy-Free Option: Use a high-quality plant-based butter and coconut cream in place of the heavy cream for the filling.
- Sprinkle Topping: My daughter loves adding a few white nonpareils or a pinch of sea salt on top of the wet ganache for a little extra sparkle.
Why This Recipe Works Every Time
The balance between the slightly bitter cocoa cookie and the sweet, creamy ganache is what makes these so successful. It is a classic combination that feels sophisticated but remains incredibly approachable for any home baker.
I used to struggle with the cookies cracking when I pressed them, but I found that adding those two tablespoons of milk helps the dough stay pliable enough to hold its shape. It took me three batches to figure that out, but now they come out beautiful every time.
Ingredients
- 1 cup all -purpose flour
- 1/3 cup unsweetened cocoa powder
- 1/4 teaspoon sal t
- 1/2 cup unsalted butter, softened
- 2/3 cup granulated sugar
- 1 large egg yolk
- 2 tablespoons whole milk
- 1 teaspoon vanilla extract
- 1/2 cup semi -sweet chocolate chips
- 1/4 cup heavy cream
Instructions
- Preheat oven to 350°F (175°C) and line a baking sheet with parchment paper.
- In a medium bowl, whisk together the flour, cocoa powder, and salt.
- In a separate large bowl, cream the butter and granulated sugar until light and fluffy.
- Beat in the egg yolk, milk, and vanilla extract until well combined.
- Gradually incorporate the dry flour mixture into the wet ingredients until a cohesive dough forms.
- Roll the dough into 1-inch diameter balls and place them 2 inches apart on the prepared baking sheet.
- Press a thumb or the back of a small measuring spoon into the center of each ball to create an indentation.
- Bake for 10 to 12 minutes until the edges are firm and set.
- While cookies bake, heat the heavy cream in a small saucepan until simmering, then pour over the chocolate chips in a heat-proof bowl.
- Let the cream and chocolate sit for 2 minutes, then stir until a smooth ganache forms.
- Remove cookies from the oven and carefully re-press the center indentations if they have puffed up.
- Transfer cookies to a wire rack to cool completely before filling each center with the prepared ganache.
Frequently Asked Questions
Can I make the dough ahead of time?
Yes, you can wrap the dough tightly in plastic wrap and keep it in the fridge for up to two days. Just let it sit on the counter for a few minutes before rolling so it is not too hard to work with.
Why did my cookies crack?
Cracking usually happens if the dough is too dry or too cold when you press the indentation. If you see cracks forming, try gently pinching them back together or letting the dough warm up a bit more.
What can I use instead of a thumb?
A small measuring spoon or even the end of a wooden spoon works beautifully if you want a more uniform look. I personally like the handmade look of using my thumb, but the spoon method is great for extra deep wells.
The Bottom Line
These little chocolate treats are such a joy to bake and even better to share with the people you love. Whether you are filling a holiday tin or just looking for a cozy weekend project, they never disappoint. Sweet moments don’t have to be complicated. Let’s make something wonderful together.
I hope your kitchen stays warm and your cookies stay soft this week. My daughter is already asking when we can make the next batch! Billy
Billy