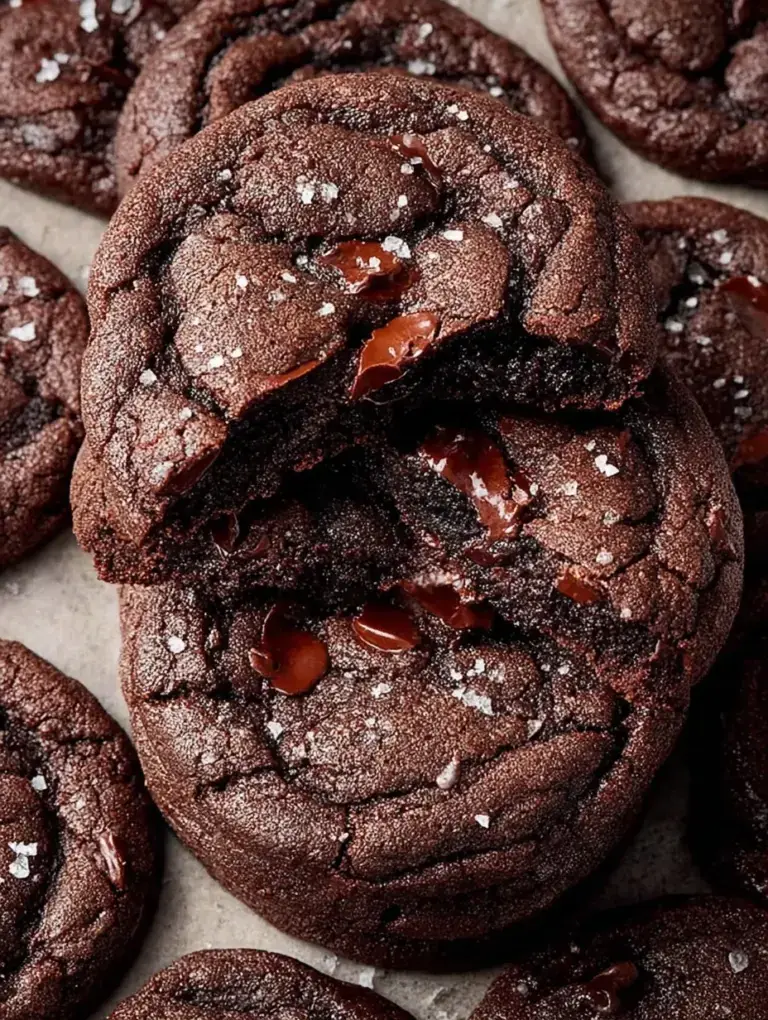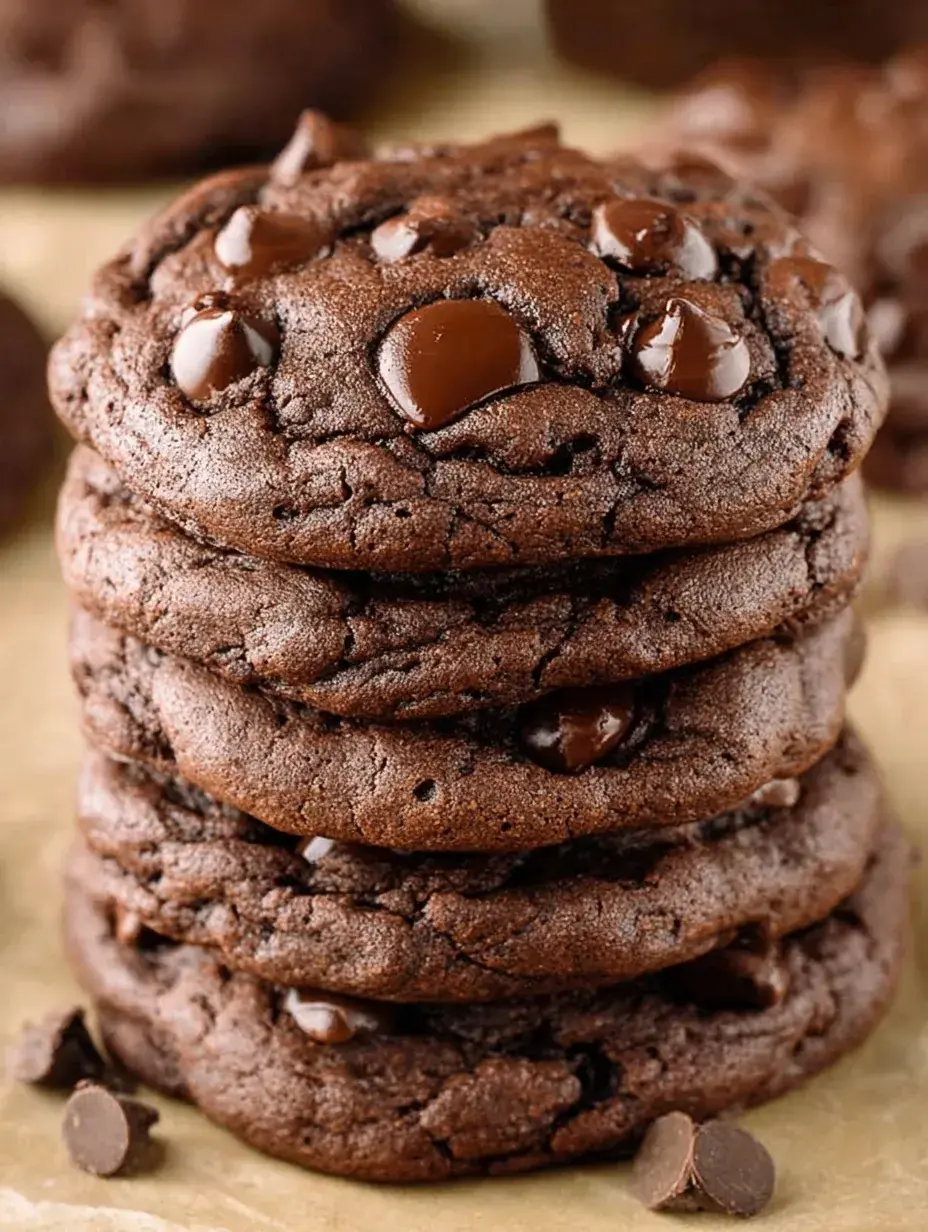
They look like they came from a fancy bakery window downtown. In reality, I made these with my daughter in my slippers while the kettle was still whistling. It is amazing how something so dark and decadent can be whipped up in less than half an hour.
Why You Will Love This Double Chocolate Chip Cookies
When the air turns crisp and the sun starts setting before dinner, my kitchen becomes a chocolate workshop. There is something about a deep, dark cocoa cookie that feels like a warm hug during the cold winter months. We love making these when the first snow hits because the house smells like a chocolate factory for hours.
I used to think these would be too intense for a casual afternoon, but after testing them three times with different cocoa brands, I realized they are the ultimate holiday comfort food. My daughter always says they look like little mountains of sweet coal, the kind that everyone actually wants to find in their stocking on Christmas morning.
What Makes This Double Chocolate Chip Cookies Special
These cookies are not just your average chocolate chip treat because the dough itself is rich with high-quality cocoa.
- Deep Cocoa Base: The unsweetened cocoa powder creates a fudgy, brownie-like texture that makes every bite feel indulgent.
- Semi-Sweet Balance: Using semi-sweet chips instead of milk chocolate keeps the sweetness from being overwhelming.
- Chewy Centers: We bake these just until the edges set so the middle stays soft and almost gooey.
It is the kind of simple recipe that makes any rainy Tuesday feel like a celebration.
The Best Double Chocolate Chip Cookies Recipe
I remember the last time I made these, I forgot to soften the butter beforehand, but they still turned out beautifully after a little patience. They are truly my go-to when I need a chocolate fix that feels a bit more special than a standard cookie.
Ingredient Notes
- Unsalted Butter: Softened to room temperature is key so the sugar creams perfectly without leaving lumps.
- Unsweetened Cocoa Powder: I prefer a high-quality Dutch-process for a darker color, but regular cocoa works just fine too.
- Light Brown Sugar: This is what gives the cookies that soft, chewy bite we all love and keeps them from drying out.
- Semi-Sweet Chocolate Chips: You can use chunks if you want bigger pools of chocolate, but standard chips distribute perfectly in every bite.
- Room Temperature Eggs: These incorporate into the butter mixture much better than cold eggs straight from the fridge.
Instructions
- Preheat and Prep. Get your oven to 350°F and line those pans with parchment paper. This prevents sticking and makes the cleanup a total breeze later on.
- Cream the Base. Beat the butter and both sugars for about three minutes until the mixture looks pale and fluffy. This step creates the structure for the cookie, so do not rush it.
- Mix in Liquids. Add your eggs one at a time, beating well, then stir in that pure vanilla extract. You want the batter to look smooth and well-combined before moving to the dry ingredients.
- Whisk Dry Ingredients. In another bowl, combine the flour, cocoa, baking soda, and salt. I always whisk these well to make sure there are no cocoa clumps hiding in the dough.
- Combine Carefully. Gradually add the flour mixture to the wet ingredients on low speed. Stop mixing the moment you see the white streaks of flour disappear to avoid a tough cookie.
- Fold and Scoop. Use a spatula to gently fold in those chocolate chips by hand. Scoop rounded tablespoons onto your sheets, leaving enough space for them to spread slightly.
Billy’s Tips and Mistakes to Avoid
- Don’t overbake these! They will look slightly underdone in the center when you pull them out, but they firm up on the hot pan.
- Sift your cocoa powder if it looks lumpy; I learned the hard way that biting into a dry cocoa pocket is not a pleasant surprise.
- I sometimes add a tiny pinch of flaky sea salt on top right after baking to make the chocolate flavor really pop.
- Chilling the dough for just 15 minutes while the oven preheats can help prevent the cookies from spreading too thin in the heat.
- Let the kids help with the chocolate chips; my daughter says it is the most important job in the whole kitchen.
Storage Tips
Keep these in an airtight container at room temperature for up to 4 days to maintain that soft texture. If you want to keep them longer, they freeze beautifully for up to 30 days. I usually just pop one in the microwave for 10 seconds to get that fresh-from-the-oven melty chocolate feel.
Variations and Swaps
- Use white chocolate chips for a beautiful black-and-white contrast that looks lovely on a holiday dessert platter.
- For a dairy-free version, use a plant-based butter stick and dairy-free chocolate chips; I have done this for friends and they couldn’t tell the difference.
- Add a half teaspoon of peppermint extract during the holidays for a festive mint-chocolate twist that feels like a treat from a cafe.
Why This Recipe Works Every Time
The balance of fats and sugars creates a texture that is halfway between a traditional cookie and a fudgy brownie. It is reliable because the measurements are simple and the bake time is short enough that the centers stay moist and tender.
I actually failed my first batch years ago by using too much flour, which made them dry and cakey. Now I always spoon and level my flour into the measuring cup to ensure that perfect fudgy center every single time I bake them.

Ingredients
- 1 cup unsalted butter, softened
- 3/4 cup granulated white sugar
- 3/4 cup packed light brown sugar
- 2 large eggs , room temperature
- 2 teaspoons pure vanilla extract
- 2 cups all -purpose flour
- 2/3 cup unsweetened cocoa powder
- 1 teaspoon baking soda
- 1/2 teaspoon sal t
- 2 cups semi -sweet chocolate chips
Instructions
- Preheat oven to 350°F (175°C) and line two large baking sheets with parchment paper.
- In a large bowl or stand mixer, cream together the softened butter, granulated sugar, and brown sugar until light and fluffy, approximately 3 minutes.
- Add the eggs one at a time, beating well after each addition, then stir in the vanilla extract.
- In a separate medium bowl, whisk together the flour, cocoa powder, baking soda, and salt.
- Gradually add the dry ingredients to the wet ingredients, mixing on low speed until just combined.
- Fold in the chocolate chips by hand using a spatula.
- Drop rounded tablespoons of dough (about 2 tablespoons per cookie) onto the prepared baking sheets, spaced 2 inches apart.
- Bake for 9 to 11 minutes or until the edges are set but the centers still look slightly soft.
- Cool on the baking sheet for 5 minutes before transferring to a wire rack to cool completely.
Frequently Asked Questions
Can I use Dutch-processed cocoa?
Yes, it works beautifully in this recipe. It will give your cookies an even darker color and a slightly smoother chocolate flavor compared to regular natural cocoa.
Why did my cookies come out flat?
This often happens if your butter was too melted or if your kitchen was very warm. Try chilling the dough balls in the fridge for 20 minutes before baking to help them hold their shape.
Do I need to chill this dough?
You do not have to chill it, which is great for when you are in a hurry. However, I find that even a short 15-minute chill makes the cookies a little thicker and the flavors more developed.
The Bottom Line
These are the cookies I turn to when I need a little bit of chocolate magic in my kitchen. They are simple, reliable, and always disappear within minutes when I put them out for guests. Sweet moments don’t have to be complicated. Let’s make something wonderful together.
I am off to pour a big glass of milk and enjoy a warm cookie with my girl while the snow falls outside. Happy baking! Billy
Billy