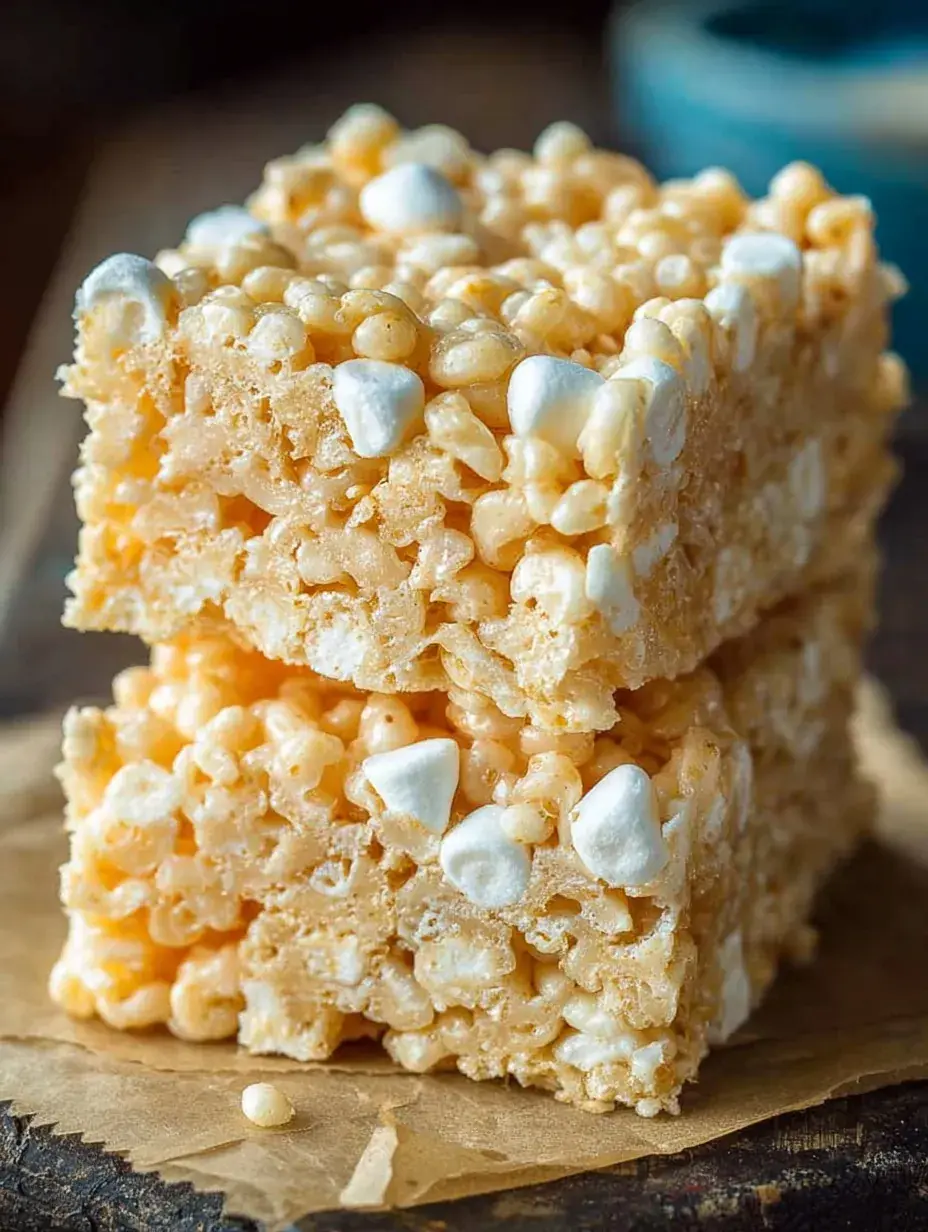
Have you ever noticed how the simplest things usually bring the biggest smiles? I was standing in my kitchen yesterday afternoon when my daughter asked for something sweet, and I realized we did not need a complicated cake to be happy. These Rice Krispie Treats are exactly what we needed for a quiet Sunday baking session together.
Why You Will Love This Rice Krispie Treats
My daughter loves being the official marshmallow stirrer, and watching her face light up as they melt into a gooey cloud is my favorite part of the process. It is one of those rare recipes where I can step back and let her take the lead without worrying about a huge mess or a failed bake. We spend the whole time talking about her day while she waits impatiently for the cereal to hit the pot.
These Rice Krispie Treats have become our little tradition for those afternoons when we just want to create something sweet together without any stress. Personally I have found that the memory of making them is just as sweet as the treats themselves. I love how this recipe allows us to slow down and enjoy the moment.
What Makes This Rice Krispie Treats Special
The texture is perfectly balanced between crispy and soft, thanks to a little extra butter and a splash of vanilla. I have found that using fresh marshmallows makes all the difference in achieving that iconic pull.
It is a no-bake wonder that fits into any busy schedule, whether you need a quick school snack or a late-night treat. This version stays soft for days instead of getting hard like the store-bought ones.
My daughter and I always make sure to press them gently into the pan so they stay light and airy. If you press too hard, they lose that wonderful fluffy crunch that we all love.
The Best Rice Krispie Treats Recipe
Honestly, I have made these dozens of times and I still get excited when the butter starts browning slightly. It is the ultimate comfort food that takes me right back to being a kid in my own mother’s kitchen during the holidays.
Ingredient Notes
- Unsalted Butter: This provides the rich base for the marshmallow glue and keeps the treats from being overly salty.
- Marshmallows: Use a fresh bag for the best melt; old marshmallows can result in a grainy or stiff texture.
- Puffed Rice Cereal: This gives the treats their classic airy crunch that everyone recognizes.
- Vanilla Extract: I prefer adding this at the very end to keep the flavor bright and fragrant.
- Salt: A tiny pinch can be added to balance the sweetness if you find marshmallows too sugary.
Instructions
- Prepare the Pan. Butter a 9×13 inch baking pan thoroughly or line it with parchment paper for easy removal. This ensures your treats do not stick to the sides later.
- Melt the Butter. In a large saucepan, melt the butter over very low heat to prevent burning. You want it completely liquid and shimmering before adding the next ingredient.
- Incorporate Marshmallows. Add the marshmallows to the pan and stir constantly until they are completely melted and smooth. The mixture should look like a thick white cloud with no lumps remaining.
- Add Flavor. Remove the saucepan from the heat and stir in the vanilla extract immediately. This distributes the flavor evenly through the sticky mixture.
- Fold in Cereal. Add the puffed rice cereal and fold gently until every single piece is coated in the marshmallow mixture. Work quickly but carefully so you do not crush the cereal.
- Set the Treats. Transfer the mixture to your pan and press down very lightly with a buttered spatula. Allow them to cool at room temperature for at least 30 minutes before cutting.
Billy’s Tips and Mistakes to Avoid
- Tip 1: Do not turn up the heat to melt the marshmallows faster. I learned the hard way that high heat makes the sugar crystallize, resulting in rock-hard treats.
- Tip 2: Use buttered wax paper to press the mixture into the pan. This prevents the sticky cereal from clinging to your hands or the spatula.
- Tip 3: Never skip the vanilla extract. It adds a depth of flavor that makes these taste homemade rather than processed.
- Tip 4: Store these at room temperature in an airtight container for up to 3 days. Putting them in the fridge will make them lose their soft texture.
- Tip 5: Let your kids help with the pouring. My daughter loves being the one to dump the cereal into the marshmallow pot.
Storage Tips
Keep your treats in an airtight container at room temperature for up to 4 days. If you need to stack them, place a sheet of parchment paper between the layers to prevent sticking. I do not recommend freezing these as it can change the texture of the cereal once thawed.
Variations and Swaps
- Stir in half a cup of chocolate chips right at the end for a melty surprise.
- Use brown butter for a deeper, nuttier flavor that feels a bit more grown-up.
- Add festive sprinkles to the top while the mixture is still sticky for a holiday look.
Why This Recipe Works Every Time
The secret is all in the ratio of butter to marshmallows. This recipe uses enough butter to keep the cereal lubricated, which prevents that dry, sawdust feeling some treats have. It creates a gooey, stretchy bond that stays soft even after the treats have cooled completely.
On my second batch of testing, I discovered that removing the pot from the heat before adding the cereal is crucial. If the cereal cooks even for a few seconds in the hot pot, it loses its crunch. This small adjustment changed everything and perfected the texture for my family.
Ingredients
- 3 tablespoons unsalted butter
- 10 ounces marshmallow s
- 6 cups puffed rice cereal
- 0.5 teaspoon vanilla extract
Instructions
- Butter a 9x13 inch baking pan or line with parchment paper.
- In a large saucepan, melt the butter over low heat.
- Add the marshmallows and stir constantly until completely melted and smooth.
- Remove the saucepan from the heat and stir in the vanilla extract.
- Add the puffed rice cereal and fold gently until all cereal is evenly coated with the marshmallow mixture.
- Transfer the mixture to the prepared pan and press down lightly with a buttered spatula or wax paper.
- Allow the treats to cool completely at room temperature for at least 30 minutes.
- Cut into squares and serve.
Frequently Asked Questions
Why are my treats hard?
Usually, this happens because the marshmallows were melted over too high a heat or the mixture was pressed too firmly into the pan. Keep the heat low and use a light touch when flattening them out.
Can I use marshmallow fluff instead?
You can, but the texture will be much softer and less stable than using real marshmallows. If you use fluff, you may need to reduce the amount of butter slightly to help them hold their shape.
How do I keep them from sticking to my hands?
Rub a little bit of butter or a tiny drop of oil on your fingertips before pressing the mixture into the pan. This creates a barrier so the marshmallow sticks to the pan and not to you.
The Bottom Line
Making these treats is a reminder that the best moments in the kitchen are often the simplest ones. Whether you are making these for a school bake sale or just a quiet night in, they always bring a sense of nostalgia. I hope you enjoy every gooey bite with your loved ones. Sweet moments don’t have to be complicated. Let’s make something wonderful together.
My daughter already has the cereal box ready for our next batch. I hope your kitchen feels just as warm and sweet today. Billy
Billy