My daughter saw the heavy cream on the counter and immediately started pulling her little stool toward the mixer. She knows that whenever the chocolate comes out, something special is happening in our kitchen. We spent the afternoon whisking and waiting for the custard to set, which is honestly my favorite way to spend a quiet Sunday.
Why You Will Love This Boston Cream Pie
I used to think making a fancy layered dessert meant spending hours in the kitchen and dealing with stressful assembly. This recipe solves that feeling because it takes the intimidation out of classic baking by using simple steps that actually work. It is the answer for those days when you want a showstopper but only have a regular afternoon to make it happen.
Personally I have found that most store-bought versions are way too sweet and have a rubbery filling that just isn’t right. This recipe fixes that problem with a silky, homemade pastry cream that tastes like real vanilla and fresh milk. After making this several times with my daughter, I can promise the homemade version is worth the tiny bit of extra effort.
What Makes This Boston Cream Pie Special
What really sets this version apart is the texture of the sponge cake itself. It is light enough to soak up just a little bit of that cream without becoming soggy, which was something I struggled with on my first few tries. The chocolate ganache on top isn’t just for looks; it adds a deep richness that ties the whole thing together beautifully.
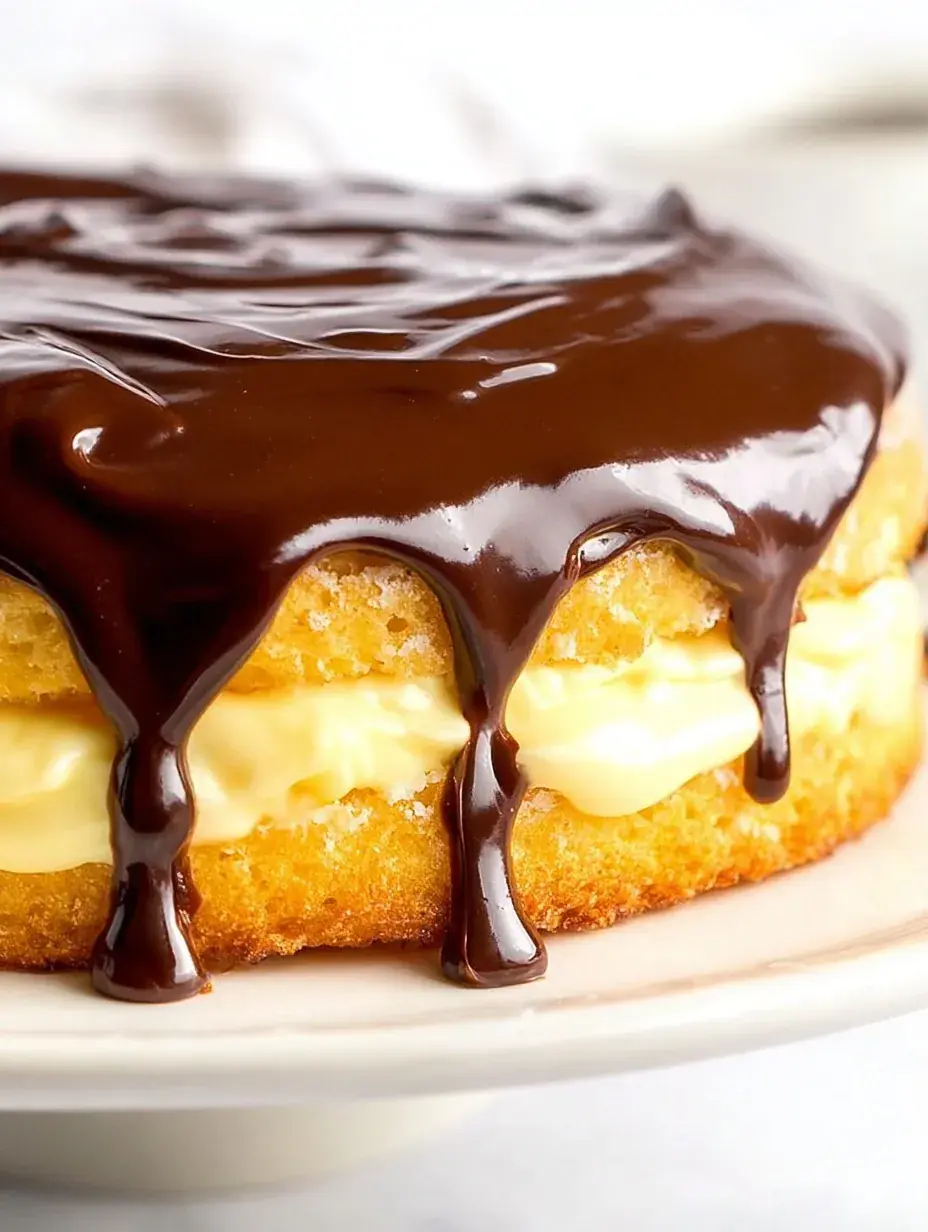
I love that this isn’t a traditional pie at all but a cake that feels like a celebration. It has a nostalgic feel that reminds me of old-fashioned bakeries, but it is much easier to put together in your own home. My daughter always says the best part is watching the chocolate drip down the sides of the cake as we pour it on.
The Best Boston Cream Pie Recipe
This is my go-to version because it relies on basic pantry staples that most of us already have in our cupboards. I remember making this for a small family gathering last month and everyone was surprised it wasn’t from a professional shop.
Ingredient Notes
- Large Eggs: These are the secret to the fluffy sponge cake, so make sure they are at room temperature before you start.
- Cornstarch: This is what gives the pastry cream its thick, scoopable structure so it does not run out the sides.
- Semi-sweet Chocolate: I prefer using a good quality bar finely chopped because it melts much smoother than standard chips.
- Whole Milk: Don’t try to use skim here because the fat content is what makes the custard feel so rich and indulgent.
- Light Corn Syrup: This is optional but I always add a splash to the glaze for that beautiful glossy finish.
Instructions
- Prepare the Pan. Grease and flour your round pan carefully to ensure the cake releases without sticking. You want a clean edge for the best presentation later.
- Beat the Eggs. Whisk the eggs and sugar on high speed until the mixture is thick and very pale in color. This step incorporates the air needed for a light crumb.
- Mix the Batter. Gently fold in your sifted dry ingredients and the warm milk mixture until no streaks remain. The batter should look smooth and pour easily into the pan.
- Bake and Cool. Bake until the top is golden and a tester comes out clean from the center. Let the cake cool completely on a wire rack before you even think about slicing it.
- Cook the Cream. Whisk your egg yolks and sugar with cornstarch before slowly adding the hot milk to temper the eggs. Cook it until it is thick and bubbling, then chill it with plastic wrap touching the surface.
- Glaze and Assemble. Slice your cake in half and spread that cold cream thick between the layers. Pour the warm chocolate ganache over the top and let it set for a few minutes.
Billy’s Tips and Mistakes to Avoid
- Always temper your eggs by adding the hot milk very slowly so you don’t end up with scrambled eggs in your custard. I learned this the hard way during my very first attempt years ago.
- Make sure the pastry cream is completely cold before assembling or it will melt right off the cake.
- Use a serrated knife to cut the cake layers horizontally to get a clean and even split without crumbling the sponge.
- If you are in a rush, you can make the pastry cream the night before to save time on the day of serving.
- Let the kids help with the whisking but keep little hands away from the stove when the milk is hot and scalding.
Storage Tips
You should keep this cake in the refrigerator because of the fresh dairy in the filling. It stays delicious for up to 3 days when covered loosely with plastic wrap. I don’t recommend freezing this one because the custard texture can change quite a bit when it thaws out.
Variations and Swaps
- Try adding a half teaspoon of almond extract to the pastry cream for a slightly different nutty flavor that I personally love.
- You can use a gluten-free all-purpose flour blend if you need to, though the cake might be slightly denser than the original.
- For a fun kid-friendly twist, add some colorful sprinkles on top of the wet chocolate glaze before it sets.
Why This Recipe Works Every Time
This recipe works because the sponge cake is specifically designed to be sturdy enough to hold the heavy cream filling. I spent a few weekends testing different ratios to make sure the middle layer didn’t just squash down when you cut into it. The result is a dessert that looks impressive but feels very approachable for any home baker.
One thing I learned after a failed batch was that the temperature of the milk matters when mixing the batter. Using warm milk helps the butter incorporate perfectly without deflating all the air we whipped into the eggs. It is these small details that make the final cake so soft and consistent every single time we make it.
Ingredients
- 1.25 cups all -purpose flour
- 1 teaspoon baking powder
- 0.25 teaspoon sal t
- 3 large eggs , room temperature
- 1 cup granulated sugar
- 0.5 cup whole milk
- 2 tablespoons unsalted butter
- 1 teaspoon vanilla extract
- 2 cups whole milk (for filling)
- 0.5 cup granulated sugar (for filling)
- 4 large egg yolks
- 0.25 cup cornstarc h
- 2 tablespoons unsalted butter (for filling)
- 1 teaspoon vanilla extract (for filling)
- 4 ounces semi -sweet chocolate, finely chopped
- 0.5 cup heavy cream
- 1 tablespoon light corn syrup
Instructions
- Preheat oven to 350°F (175°C). Grease and flour a 9-inch round cake pan.
- Sift together flour, baking powder, and salt.
- In a stand mixer, beat eggs and 1 cup sugar on high speed for 5 minutes until thick and pale.
- Heat 0.5 cup milk and 2 tbsp butter in a small saucepan until butter melts. Stir into egg mixture along with 1 tsp vanilla.
- Gently fold in the dry ingredients until just combined. Pour into the prepared pan.
- Bake for 25 to 30 minutes until a toothpick comes out clean. Cool in the pan for 10 minutes, then transfer to a wire rack to cool completely.
- To make the pastry cream: Whisk egg yolks, 0.5 cup sugar, and cornstarch in a bowl.
- Scald 2 cups milk in a saucepan. Gradually whisk the hot milk into the egg mixture to temper.
- Return the mixture to the saucepan and cook over medium heat, whisking constantly, until thickened and boiling.
- Remove from heat; stir in 2 tbsp butter and 1 tsp vanilla. Cover with plastic wrap pressed directly onto the surface and chill until cold.
- To make the glaze: Heat heavy cream and corn syrup until simmering. Pour over chopped chocolate, let sit for 5 minutes, then stir until smooth.
- Assemble by slicing the cake horizontally into two layers. Spread the chilled pastry cream over the bottom layer. Place the top layer over the cream and pour the chocolate glaze over the top, allowing it to drip down the sides.
Frequently Asked Questions
Why is it called a pie if it is a cake?
This name comes from a time when cakes and pies were often baked in the same types of tins. It is definitely a cake, but the traditional name has stuck around for over a century in American kitchens.
Can I use vanilla pudding instead of pastry cream?
You can in a pinch, but the homemade custard is much thicker and has a better flavor. The pudding might be too soft to hold up the weight of the top layer of cake and the chocolate.
How do I stop the chocolate from running off the sides?
Let the ganache cool for about five or ten minutes until it thickens slightly. It should be pourable but slow-moving so it creates those beautiful thick drips rather than a puddle on the plate.
The Bottom Line
Making a Boston Cream Pie at home is such a rewarding experience that always brings a smile to my family’s faces. It is a timeless treat that proves you don’t need fancy tools to create something truly special for your loved ones. Sweet moments don’t have to be complicated. Let’s make something wonderful together.
There is nothing quite like the smell of a fresh cake cooling on the counter while the music plays in the background. I hope this becomes a new favorite in your home too. Billy
Billy