Every November, this recipe shows up on my counter before Thanksgiving even gets here. There is something about the cold air that makes me want the richest chocolate treats without the fuss of preheating the oven. My daughter and I love making this together on quiet Sunday afternoons while we listen to our favorite holiday music.
Why You Will Love This No Bake Chocolate Pie
This pie is my secret weapon for the busy holiday rush because it looks like a fancy bakery item but requires zero oven space. I often make this during the week of Christmas when my oven is already packed with a turkey or roasted vegetables, making it the ultimate stress-free dessert for a crowded kitchen.
Personally, I have found that having a reliable no-bake option keeps me from feeling overwhelmed during the big family dinners. The first time I made this for a holiday gathering, I was worried it might not be decadent enough, but it was the first dessert to disappear from the table.
What Makes This No Bake Chocolate Pie Special
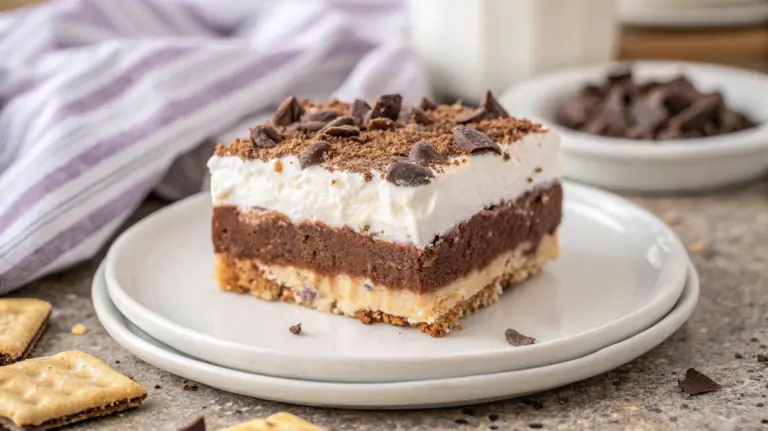
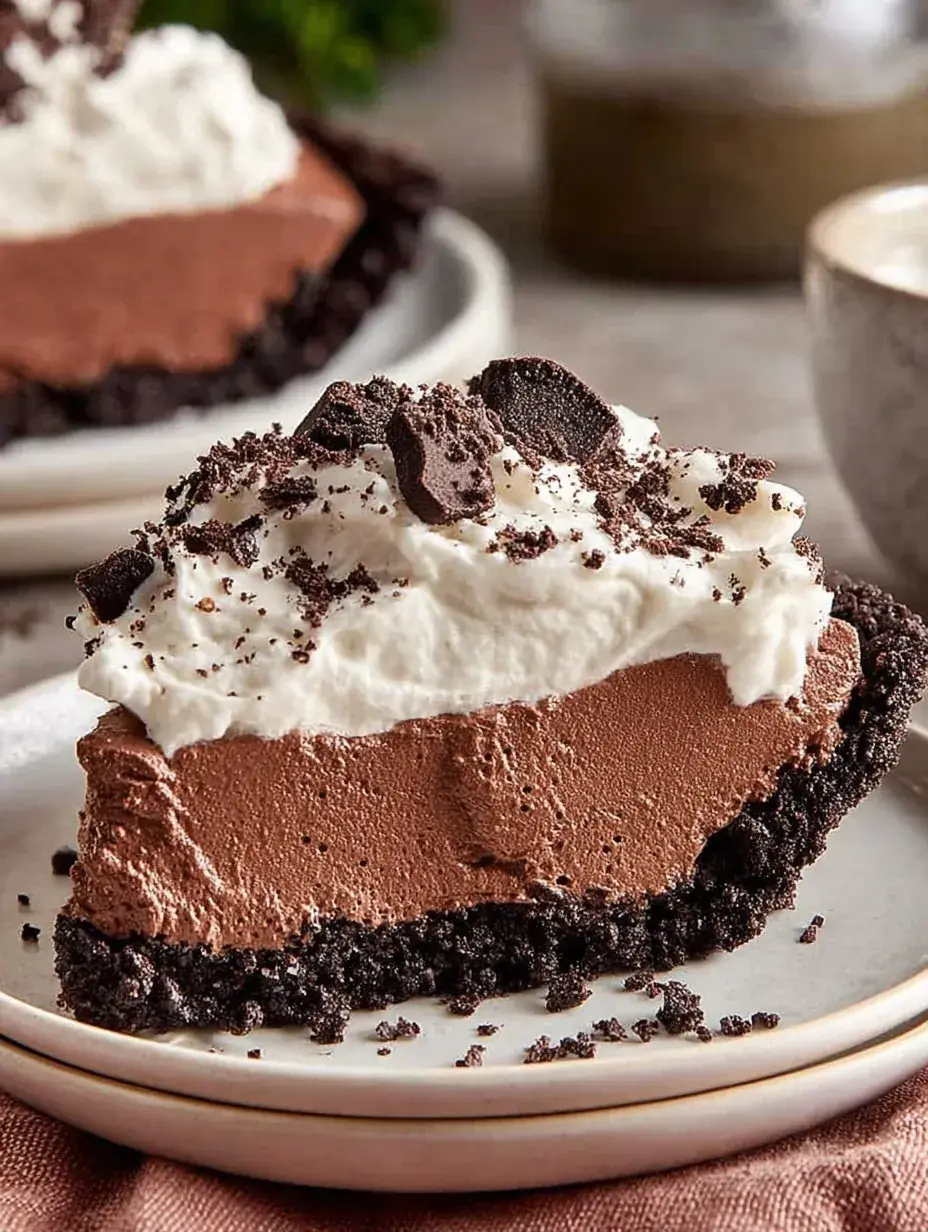
What really sets this apart is the incredible texture that falls somewhere between a light mousse and a dense chocolate truffle. It feels very sophisticated on a dessert table, yet it is simple enough that my daughter can do most of the mixing herself while I handle the melting. We love how the dark chocolate color looks against a white serving plate, especially when we add a few chocolate shavings on top for extra flair.
The combination of cream cheese and heavy cream creates a filling that is stable enough to slice beautifully but still melts in your mouth. Honestly, I prefer this version over traditional baked custard pies because it is so much more forgiving and never ends up with a cracked top. It is the kind of recipe you can rely on when you need a guaranteed success for a party.
The Best No Bake Chocolate Pie Recipe
I remember making this on a snowy afternoon last year when we were stuck inside. It is a straightforward process that yields such a luxurious result with very little actual work required from the baker.
Ingredient Notes
- Semi-Sweet Chocolate Chips: These provide the deep flavor and structure for the filling as they cool and set.
- Cream Cheese: Make sure this is fully softened so you do not end up with tiny white lumps in your dark chocolate filling.
- Heavy Whipping Cream: This must be very cold before whipping to ensure you get those stiff, stable peaks.
- Chocolate Cookie Crust: Using a pre-made crust saves time, but you can always make your own from crushed cookies and butter.
- Powdered Sugar: This adds just enough sweetness while helping the cream cheese mixture stay smooth and light.
Instructions
- Melt Chocolate. Heat the chocolate chips in short bursts in the microwave until they are completely liquid and glossy. Let the mixture sit for a few minutes so it is not boiling hot when you add it to the cheese.
- Cream Cheese Base. Whip the softened cream cheese and powdered sugar together in a large bowl. You want it to look light and fluffy with no visible clumps of cheese remaining.
- Combine Flavors. Stir the slightly cooled melted chocolate and vanilla into the cream cheese mixture. It should turn a beautiful deep brown color and look very smooth.
- Whip Cream. In a separate chilled bowl, beat the heavy cream until it holds its shape firmly on the whisk. Be careful not to over-beat it into butter, but it needs to be stiff enough to provide lift.
- Fold Gently. Use a spatula to carefully fold the whipped cream into the chocolate base. Continue until no white streaks remain and the mixture looks like a uniform chocolate cloud.
- Set the Pie. Pour the filling into your crust and smooth the top with your spatula. Place it in the refrigerator for at least 4 hours so it can firm up for clean slicing.
Billy’s Tips and Mistakes to Avoid
- Always use a room temperature cream cheese to avoid a grainy texture. I once tried to rush this by using cold cheese and the filling never got perfectly smooth.
- The chocolate needs to be warm but not hot when you mix it in. If it is too hot, it can deflate the air you worked so hard to put into the cream cheese.
- Do not skip the chilling time because the chocolate needs those hours to firm back up. If you cut it too early, the center might be a bit too soft to hold its shape.
- Store the pie in the back of the fridge where it is coldest. This helps maintain that perfect firm yet creamy consistency until the moment you serve it.
- Let your daughter help with the whipped cream folding. It is a great way to teach kids how to be gentle with delicate ingredients in the kitchen.
Storage Tips
You should keep this pie covered in the refrigerator where it will stay fresh for up to 4 days. If you want to make it further in advance, it actually freezes beautifully for up to 1 month. Just make sure to thaw it in the fridge for a few hours before you plan on slicing into it.
Variations and Swaps
- Try adding a half teaspoon of peppermint extract for a festive holiday version.
- Use a graham cracker crust and a sprinkle of sea salt on top if you prefer a salty-sweet balance.
- Top with plenty of extra whipped cream and chocolate curls to make it look like it came from a professional bakery.
Why This No Bake Chocolate Pie Works Every Time
The success of this recipe lies in the balance between the tang of the cream cheese and the richness of the semi-sweet chocolate. It creates a flavor profile that is not overly sugary, which means you can actually taste the quality of the cocoa. My family always reaches for seconds because it feels lighter than a traditional fudge-filled pie.
After testing this several times, I learned that using chilled heavy cream is the most important factor for success. On one attempt, I used cream that had been sitting on the counter, and the pie simply would not set correctly. Now I always keep my bowl and whisk in the freezer for ten minutes before I start that step.

Ingredients
- 1 (9-inch) chocolate cookie crust
- 1.5 cups semi -sweet chocolate chips
- 8 ounces cream cheese, softened
- 0.5 cup powdered sugar
- 1 teaspoon vanilla extract
- 1.5 cups heavy whipping cream, chilled
Instructions
- Melt the chocolate chips in a microwave-safe bowl in 30-second increments, stirring until smooth.
- Beat the softened cream cheese and powdered sugar in a large bowl until light and fluffy.
- Stir the melted chocolate and vanilla extract into the cream cheese mixture until well combined.
- In a separate bowl, whip the heavy cream until stiff peaks form.
- Gently fold the whipped cream into the chocolate mixture until no streaks remain.
- Pour the mixture into the prepared crust and smooth the top.
- Refrigerate for at least 4 hours to allow the pie to set before serving.
Frequently Asked Questions
Can I freeze No Bake Chocolate Pie?
Yes, you can absolutely freeze this pie for up to a month. Wrap it tightly in plastic wrap and foil to prevent freezer burn, and let it thaw in the fridge before serving.
How long does No Bake Chocolate Pie last in the fridge?
This pie will stay delicious and hold its texture for about 4 days when kept cold. Make sure to keep it covered so it does not pick up any other scents from your refrigerator.
Can I use milk chocolate chips instead of semi-sweet?
You can use milk chocolate, but keep in mind the pie will be much sweeter and slightly softer. I recommend sticking to semi-sweet for the best structural set and a deeper chocolate flavor.
The Bottom Line
Whether you are looking for a simple weekend treat or a reliable holiday dessert, this pie never fails to impress. It is proof that you can create something truly indulgent without spending hours by the oven. Sweet moments don’t have to be complicated. Let’s make something wonderful together.
I hope this brings a little extra sweetness to your kitchen this season. It is a favorite in our house, especially on those cold evenings when we just want to curl up with a treat. Billy
Billy