My daughter, Lily, saw me pulling out the heavy-bottomed pan and already knew exactly what was happening in the kitchen. She loves watching the candy thermometer rise, waiting for that specific moment we take it off the heat. It is a quiet afternoon tradition we have come to love as the weather starts to cool down.
Why You Will Love This Brown Sugar Fudge
I remember my grandmother making a version of this every single December, though she always called it penuche. The smell of melting sugar always takes me back to her tiny kitchen where the windows were constantly fogged up from the heat of the stove. It felt like absolute magic seeing simple cream and sugar turn into something so rich and crumbly.
When I first tried making it myself, I overcooked the batch and it turned into something more like a hard rock candy. I realized then that Brown Sugar Fudge is all about patience and listening to the soft sizzle of the pan. Now, every time I make a batch with my daughter, I feel like I am passing down a little piece of that cozy holiday history.
What Makes This Brown Sugar Fudge Special
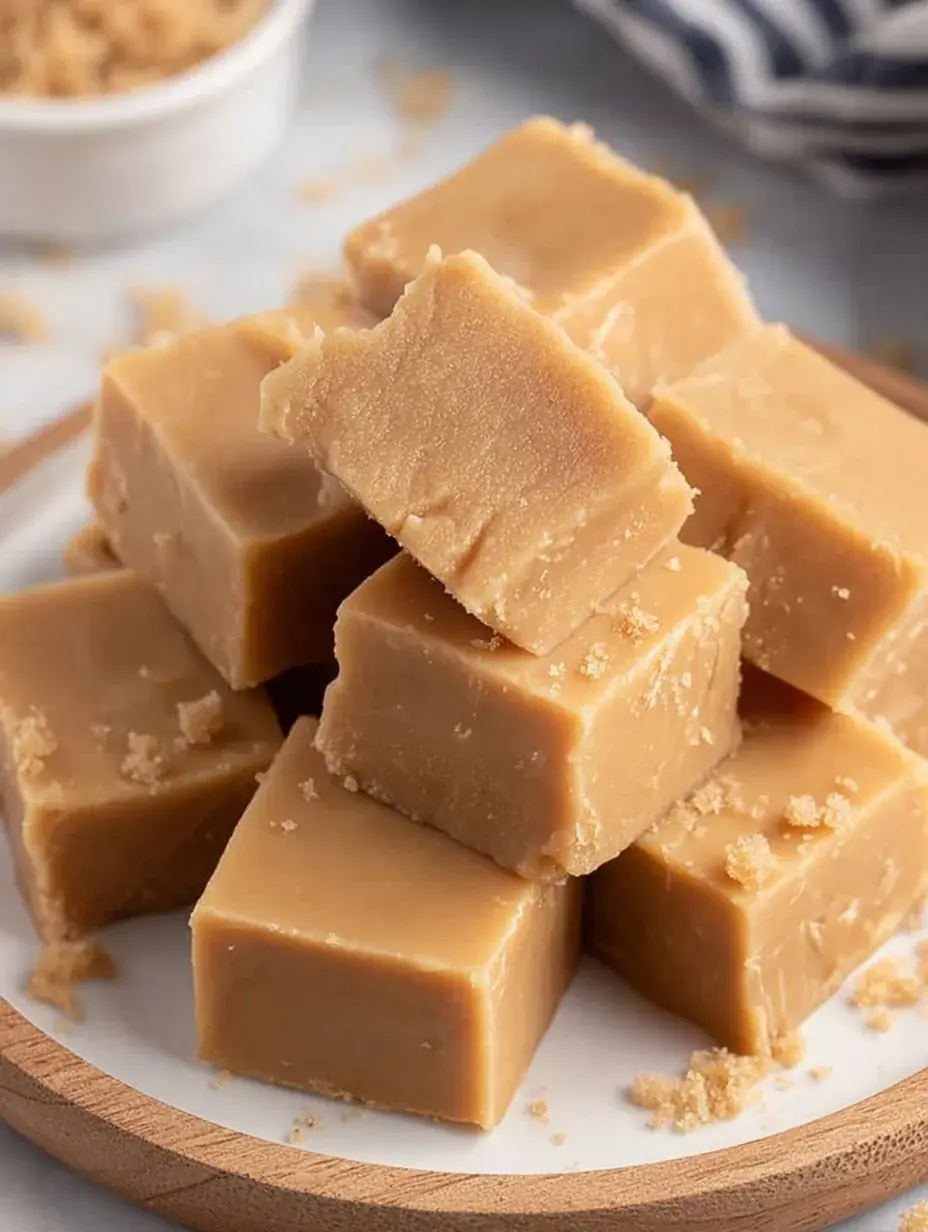
This isn’t your typical soft, marshmallow-cream style treat that you find in most shops these days. It has that authentic, old-fashioned crumbly texture that melts away the second it hits your tongue, leaving behind a deep caramel flavor. Honestly, the heavy cream makes all the difference, giving it a richness that you just cannot get with milk or water.
I also love how it does not rely on chocolate to be the star of the show. The brown sugar brings its own molasses notes that feel so much warmer and more comforting during the winter months. It is the kind of treat that feels special because it takes a little bit of focus and a lot of love to get the temperature just right.
The Best Brown Sugar Fudge Recipe
Making candy at home can feel a bit intimidating if you have never done it before. I promise, once you see how these simple ingredients transform in the pan, you will be hooked on the process just like I am.
Ingredient Notes
- Brown Sugar: Use light brown sugar for a mellow flavor, and make sure it is packed tight in the measuring cup for accuracy.
- Heavy Cream: This provides the fat needed for a smooth, creamy finish; do not try to swap this for half-and-half or milk.
- Unsalted Butter: I prefer unsalted so I can control the saltiness myself, which balances the intense sweetness of the sugars.
- Vanilla Extract: Always add this at the very end so the heat does not cook away that beautiful floral aroma.
- Walnuts: These are optional, but I think the crunch perfectly offsets the soft texture of the fudge squares.
Instructions
- Prep Pan. Line your square pan with parchment paper so you can lift the fudge out easily later. Leaving a little overhang on the sides makes slicing much less of a headache for you.
- Combine Ingredients. Stir the sugars, cream, butter, and salt in a heavy saucepan over medium heat. You want to keep stirring until you do not feel any gritty sugar crystals against the bottom of the pan.
- Boil and Monitor. Attach your candy thermometer and stop stirring once it reaches a full boil. Let it bubble away until it hits exactly 238°F, which is the soft-ball stage.
- Cool Down. Take it off the heat immediately and let it sit perfectly still until it cools down to 110°F. If you stir it while it is still hot, you might end up with a very grainy texture.
- Beat Vigorously. Add your vanilla and nuts, then start beating the mixture with a wooden spoon or heavy mixer. You will see it change from shiny and translucent to thick, dull, and creamy.
- Set and Slice. Quickly transfer it into your pan and smooth the top before it hardens too much. Let it sit on the counter for at least an hour until it is firm enough to cut into squares.
Billy’s Tips and Mistakes to Avoid
- Tip 1: Do not let the thermometer bulb touch the bottom of the pan or you will get a false high reading. I learned this the hard way after a very soft first attempt.
- Tip 2: Use a heavy-bottomed pot to ensure the heat distributes evenly and prevents the sugar from scorching.
- Tip 3: If you stir the boiling sugar too much after it starts bubbling, you can cause crystallization which makes the fudge grainy.
- Tip 4: This treat is best stored at room temperature in an airtight container to keep it from drying out too quickly.
- Tip 5: If you are making this with kids, let them be the official thermometer watchers while you handle the hot pan.
Storage Tips
Keep your fudge in an airtight container at room temperature for up to 14 days. If you want it to last longer, you can store it in the fridge for about 21 days, but I find the texture is best when it is not chilled. You can also freeze it for up to 3 months if you wrap it tightly in plastic and foil.
Variations and Swaps
- Swap the walnuts for pecans or even salted peanuts for a different kind of nutty crunch.
- Add a pinch of sea salt on top right after pouring it into the pan for a salted caramel vibe.
- Use dark brown sugar if you want an even deeper, more intense molasses flavor in every bite.
Why This Recipe Works Every Time
The science of the soft-ball stage is what makes this recipe so reliable for home bakers. By hitting that specific temperature and then letting it cool undisturbed, you control exactly how the sugar crystals form. It results in that perfect, slightly crumbly bite every single time.
I spent a few afternoons testing the cooling temperatures and found that 110°F is the absolute sweet spot. The first time I tried beating it while it was still too warm, it never quite set up right, but waiting for that cool-down changed everything.
Ingredients
- 2 cups packed light brown sugar
- 1 cup granulated white sugar
- 3/4 cup heavy cream
- 1/2 cup unsalted butter
- 1/4 teaspoon sal t
- 1 teaspoon pure vanilla extract
- 1/2 cup chopped walnuts (optional)
Instructions
- Line an 8x8 inch square baking pan with parchment paper and set aside.
- In a heavy-bottomed 3-quart saucepan, combine the brown sugar, granulated sugar, heavy cream, butter, and salt.
- Place the saucepan over medium heat and stir constantly until the sugar dissolves and the mixture begins to boil.
- Attach a candy thermometer to the side of the pan, ensuring the bulb does not touch the bottom.
- Continue cooking without stirring until the mixture reaches 238°F (114°C), known as the soft-ball stage.
- Remove the pan from the heat immediately and allow it to cool undisturbed until the thermometer reads 110°F (43°C).
- Add the vanilla extract and optional walnuts to the pan.
- Using a wooden spoon or heavy-duty mixer, beat the mixture vigorously until it thickens, loses its glossy sheen, and starts to hold its shape.
- Quickly transfer the fudge into the prepared pan and smooth the surface with a spatula.
- Allow the fudge to cool at room temperature for at least 1 hour until firm before slicing into 1-inch squares.
Frequently Asked Questions
Why is my brown sugar fudge grainy?
This usually happens if the sugar isn’t fully dissolved before the mixture starts boiling. It can also happen if you stir the mixture while it is cooling down to 110°F.
Can I make this without a candy thermometer?
It is possible using the cold water test, but I highly recommend using a thermometer for the most consistent results. Precision is key when you are working with boiled sugar recipes.
How do I fix fudge that didn’t set?
You can usually scrape it back into the pan with a little bit more heavy cream and re-boil it. Just make sure you hit that 238°F mark again before cooling.
The Bottom Line
There is something so rewarding about making candy from scratch in your own kitchen with your family. It fills the house with the best scent and gives you a treat that tastes so much better than anything store-bought. Sweet moments don’t have to be complicated. Let’s make something wonderful together.
I am planning to tuck a few squares of this into my neighbor’s gift baskets this year. I hope your kitchen feels just as warm and sweet today. Billy
Billy