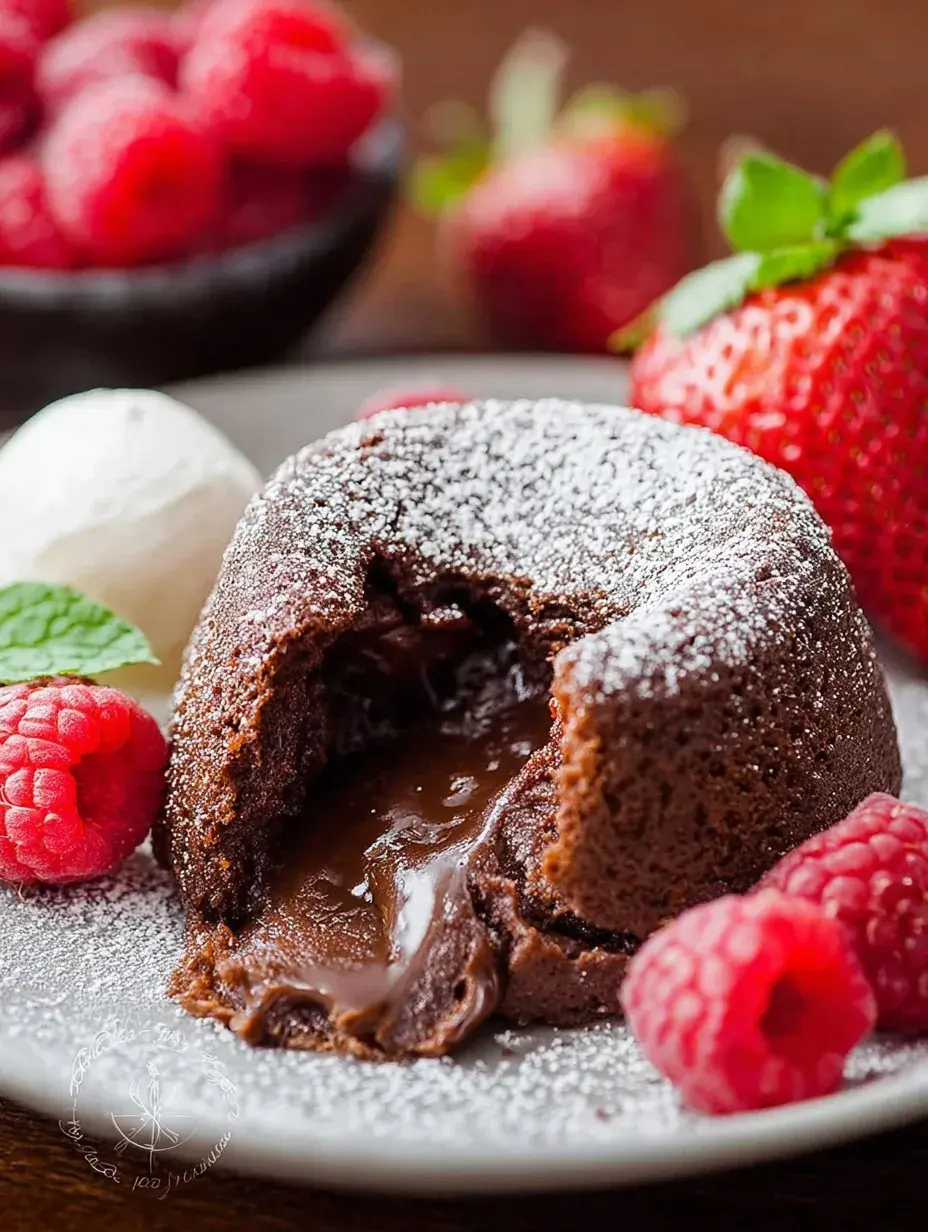
My daughter peaked over the counter, her eyes wide as the first pool of dark chocolate melted into the butter. She knows that when the ramekins come out, we are about to have a very special fancy night in the living room. It is one of those quiet traditions we’ve kept since she was little.
Why You Will Love This Chocolate Lava Cakes
I first tried making these years ago on a particularly cold Tuesday when we just needed a little pick-me-up. I was so nervous about getting that perfect molten center, but the look on my daughter’s face when her spoon hit that gooey middle made every bit of effort worth it. Now, it is our go-to treat for birthdays or even just rainy afternoons.
Honestly, I have found that you don’t need a professional kitchen to make something that feels this elegant. The first time I made them, I overbaked them slightly, and they were still the best little chocolate cakes we’d ever had. It’s the kind of recipe that makes your home feel like a cozy bistro.
What Makes This Chocolate Lava Cakes Special
The magic here really is in the contrast between the firm, cakey outside and that warm, silky chocolate heart. You don’t have to worry about complicated fillings or freezing ganache centers like some other recipes suggest. We keep it simple by focusing on the timing, which creates that beautiful lava effect naturally as it bakes.
I also love that this is a small-batch recipe, so you aren’t left with a dozen cakes on the counter. It is just enough for a small family treat or a quiet date night once the kids are in bed. Plus, it uses ingredients you probably already have in your pantry, which is always a win in my book.
The Best Chocolate Lava Cakes Recipe
There is something so comforting about a warm dessert that feels like a hug in a bowl. I usually make these Chocolate Lava Cakes when the house feels a bit too quiet and we need a reason to gather around the kitchen table.
Ingredient Notes
- Bittersweet Chocolate: This provides the deep flavor, so I recommend using a bar you actually enjoy eating on its own.
- Unsalted Butter: It adds that rich, buttery crumb that makes the edges so delicious.
- Large Eggs and Yolks: The extra yolks are the secret to that velvety, rich texture in the center.
- Granulated Sugar: Just enough to sweeten the dark chocolate without making it cloying.
- All-purpose Flour: You only need a tiny bit to hold the cake structure together while keeping the middle liquid.
Instructions
- Prep Ramekins. Butter the dishes well and dust with cocoa so the cakes slide out perfectly. You want a thin, even coating everywhere.
- Melt Chocolate. Combine the chocolate and butter, heating in short bursts until everything is glossy and smooth. Let it cool slightly so it doesn’t scramble the eggs later.
- Whisk Eggs. Beat the eggs and sugar until the mixture looks pale and slightly thickened. This airiness helps the cake rise just enough.
- Combine Mixtures. Stir the chocolate and vanilla into the egg mixture until the color is uniform. It should look like a rich, dark velvet batter.
- Fold Flour. Gently mix in the flour and salt until you no longer see white streaks. Be careful not to overmix, as we want a tender crumb.
- Bake Cakes. Pour into ramekins and bake until the edges are set but the center still jiggles slightly. This is the key to that molten lava flow.
Billy’s Tips and Mistakes to Avoid
- Always grease your ramekins right to the top to prevent the delicate edges from sticking. I learned this the hard way after a few messy attempts.
- Use a timer and watch the oven closely during the last two minutes. The difference between molten and fully cooked is very small.
- Don’t skip the extra egg yolks because they ensure the center stays gooey rather than just underbaked.
- You can prep the batter a few hours ahead and keep it in the fridge until you are ready to bake.
- Let my daughter help with the dusting of cocoa powder; it is a fun job for little hands.
Storage Tips
These are definitely best eaten immediately while they are warm and gooey. If you have leftovers, they can stay in the fridge for up to 2 days, but the center will firm up. You can gently reheat them in the microwave for 15 seconds to soften the middle again before serving.
Variations and Swaps
- Add a pinch of espresso powder to the batter to deepen the chocolate flavor.
- Use a gluten-free flour blend if you need to avoid wheat; it works surprisingly well here.
- Drop a single raspberry or a tiny square of white chocolate into the center before baking for a surprise middle.
Why This Recipe Works Every Time
The high heat is what makes this happen. By baking at a higher temperature for a short time, we cook the outside quickly while leaving the inside perfectly soft. It is a simple bit of kitchen science that feels like magic every time you flip one onto a plate.
I remember testing this several times to find the exact minute where the cake goes from raw to molten. My second batch was a bit of a puddle, but I realized that letting them sit for exactly one minute after they leave the oven is the secret. That short rest allows the structure to firm up just enough to hold its shape.
Ingredients
- 6 ounces bittersweet chocolate, chopped
- 1/2 cup unsalted butter
- 2 large egg s
- 2 large egg yolks
- 1/4 cup granulated sugar
- 1 teaspoon vanilla extract
- 2 tablespoons all -purpose flour
- 1/8 teaspoon sal t
Instructions
- Preheat oven to 425 degrees Fahrenheit and grease four 6-ounce ramekins with butter and dust with cocoa powder.
- Melt the chopped chocolate and butter together in a microwave-safe bowl in 30-second intervals until smooth.
- In a separate medium bowl, whisk together the eggs, egg yolks, sugar, and salt until thick and pale yellow.
- Whisk the vanilla extract and the melted chocolate mixture into the egg mixture until well combined.
- Gently fold in the flour until just incorporated.
- Divide the batter evenly among the four prepared ramekins.
- Bake for 12 to 14 minutes until the sides are firm but the centers are still soft to the touch.
- Let the cakes cool in the ramekins for 1 minute, then run a knife around the edges and invert onto dessert plates.
Frequently Asked Questions
Can I make these without ramekins?
Yes, you can use a standard muffin tin, but the baking time will be much shorter, usually around 8 to 10 minutes. Just be very careful when removing them so they do not break apart.
What if I don’t have bittersweet chocolate?
Semi-sweet chocolate works perfectly fine, though the cakes will be a bit sweeter. Personally I would avoid milk chocolate as it doesn’t provide enough structure or depth for the lava center.
How do I know for sure they are done?
The edges should look dry and firm, but the very center should still look a bit soft and move when you gently shake the pan. If the whole top looks dry, they might be overbaked.
The Bottom Line
Chocolate Lava Cakes are much easier than they look and always bring a bit of joy to the table. Whether it is a holiday or just a quiet night, these little cakes are a perfect way to show some love. Sweet moments don’t have to be complicated. Let’s make something wonderful together.
I’m thinking of you and your family as you bake these tonight. I hope your kitchen smells as wonderful as mine does right now. Billy
Billy