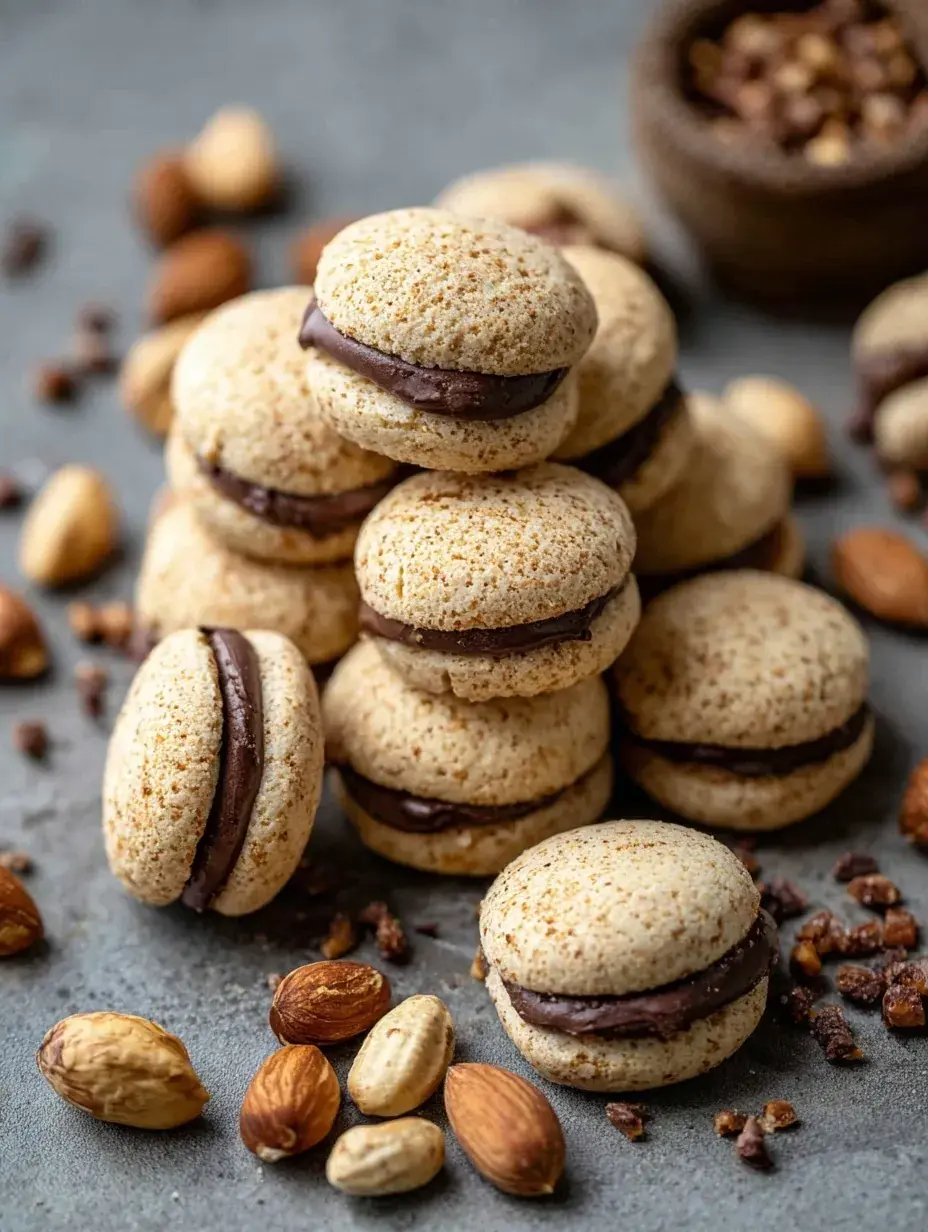
The kitchen smells like toasted hazelnuts and dark chocolate, a scent that always makes me feel like the holidays are just around the corner. I love how these tiny cookies fill the house with a nutty warmth while they bake on a quiet Sunday afternoon. It is one of those treats that makes you want to put on a sweater and stay inside.
Why You Will Love This Baci di Dama
My daughter calls these the kiss cookies because of how the two little rounds meet in the middle. We spend hours at the kitchen table rolling the dough into tiny balls, and she is getting so good at making them all exactly the same size.
It is such a slow, sweet process that gives us time to talk about her school day while we wait for the chocolate to melt. I personally have found that these quiet moments together are just as sweet as the cookies themselves.
What Makes This Baci di Dama Special
- Equal Proportions: Using the same weight for the main ingredients creates a perfectly balanced, buttery texture that melts away.
- Toasted Hazelnut Base: Grinding the nuts with sugar ensures a fine, sandy crumb that is full of deep, roasted flavor.
- Dark Chocolate Center: The slightly bitter ganache perfectly offsets the sweet, nutty biscuit for a sophisticated finish.
- Bite-Sized Charm: Their small size makes them the most elegant addition to any holiday cookie tray or gift box.
The Best Baci di Dama Recipe
I first tried these in a little bakery years ago, and I was intimidated by how perfect they looked. Honestly, once I realized the dough uses a simple rub-in method, they became a staple in my kitchen for every special occasion.
Ingredient Notes
- Toasted Hazelnuts: These are the heart of the cookie; make sure the skins are removed so the flavor stays sweet and not bitter.
- Cold Cubed Butter: It is vital to keep the butter chilled so the cookies hold their dome shape in the oven rather than spreading.
- Dark Chocolate: I prefer using at least 60% cacao to provide a deep contrast to the hazelnut dough.
- Granulated Sugar: This helps create that signature sandy texture that traditional Italian cookies are known for.
- All-Purpose Flour: This provides just enough structure to keep the delicate hazelnut meal together without making them tough.
Instructions
- Pulse Nuts. Combine the hazelnuts and sugar in a processor until they look like a fine, sandy meal. Be careful not to over-process or you will end up with hazelnut butter!
- Mix Dry. Whisk the nut mixture with the flour and salt in a large bowl. You want everything evenly distributed before you think about adding the fat.
- Rub Butter. Use your fingertips to work the cold butter into the flour until a smooth dough forms. It will feel crumbly at first but will come together as the warmth of your hands works its magic.
- Chill Dough. Wrap the dough tightly and let it rest in the fridge for at least 30 minutes. This prevents the cookies from spreading too much and losing their cute shape.
- Roll Balls. Shape the dough into tiny marbles, aiming for about 8 to 10 grams each. Place them on your tray with just a little space between them because they do not spread much.
- Bake and Fill. Bake until the bottoms are just barely golden, then let them cool completely. Once cold, sandwich them together with a small drop of melted dark chocolate.
Billy’s Tips and Mistakes to Avoid
- Don’t skip the chilling step or your cookies will flatten out into pancakes instead of little domes.
- I learned the hard way that weighing the dough balls is much better than eyeballing them if you want them to match up perfectly.
- If the chocolate is too runny, let it sit for a few minutes before assembly so it stays put between the cookies.
- Keep your kitchen cool while rolling the balls; if the dough gets too warm, pop it back in the fridge for ten minutes.
- I usually let my daughter help with the glueing stage because it is her favorite part and she loves being the chocolate expert.
Storage Tips
These keep beautifully in an airtight container at room temperature for up to 5 days. If it is a particularly warm week, I usually tuck them into the fridge so the chocolate stays snappy. You can even freeze the undecorated biscuits for up to 30 days if you want to get ahead on your holiday baking.
Variations and Swaps
- Try swapping the hazelnuts for toasted almonds if you prefer a lighter, Marzipan-like flavor.
- Use white chocolate for the filling if you want a sweeter, creamier finish for the kids.
- Add a tiny pinch of espresso powder to the chocolate for a more sophisticated mocha-style treat.
Why This Recipe Works Every Time
The secret to this recipe is the simplicity of the ratio and the patience of the chill. By using cold butter and resting the dough, the cookies maintain that beautiful spherical shape that makes them look like they came from a professional shop.
The first time I made these, I did not pulse the nuts finely enough, and the cookies were a bit too chunky. Now I make sure the meal is nice and sandy, which gives that melt-in-your-mouth feel that my family loves.

Ingredients
- 150 g toasted hazelnuts, skins removed
- 150 g all -purpose flour
- 150 g granulated sugar
- 150 g unsalted butter, cold and cubed
- 1/4 teaspoon fine sea salt
- 100 g dark chocolate (60% cacao or higher)
Instructions
- Place the toasted hazelnuts and sugar in a food processor and pulse until a fine, sandy meal is formed.
- Transfer the nut mixture to a large mixing bowl and whisk in the flour and salt.
- Add the cold, cubed butter to the dry ingredients. Rub the butter into the flour using your fingertips or a pastry blender until a smooth, cohesive dough forms.
- Wrap the dough in plastic wrap and refrigerate for 30 minutes to firm up.
- Preheat the oven to 160°C (320°F) and line a baking sheet with parchment paper.
- Form the dough into small balls, approximately 8-10 grams each (about the size of a marble).
- Place the balls on the prepared baking sheet, leaving 2cm of space between them.
- Bake for 12-15 minutes or until the cookies are firm to the touch and slightly golden on the bottom.
- Remove from the oven and allow to cool completely on a wire rack.
- Melt the dark chocolate in a double boiler or in the microwave in 20-second increments until smooth.
- Apply a small dollop of melted chocolate to the flat side of one cookie and press the flat side of another cookie against it to create a sandwich.
- Set the cookies aside for the chocolate to firm up before serving.
Frequently Asked Questions
Can I use hazelnut flour instead of whole nuts?
Yes, you can use pre-ground hazelnut meal, but I find that toasting whole nuts yourself gives a much deeper flavor. If you use store-bought flour, try toasting it lightly in a pan first for the best results.
Why did my cookies spread in the oven?
This usually happens if the butter was too soft or the dough was not chilled long enough before baking. Make sure the dough balls are firm and cold when they go into the heat.
How do I melt the chocolate without it seizing?
Use low heat and melt it in short 20-second bursts in the microwave, stirring well in between each session. Never let a drop of water touch the chocolate or it will become grainy.
The Bottom Line
Baci di Dama are such a wonderful way to bring a little bit of Italian tradition into your own home. They look so impressive on a plate but are truly just a labor of love that anyone can master. Sweet moments don’t have to be complicated. Let’s make something wonderful together.
I hope these little hazelnut kisses bring as much joy to your kitchen as they do to ours. There is nothing like a warm cookie and a cold glass of milk on a winter evening. Billy
Billy