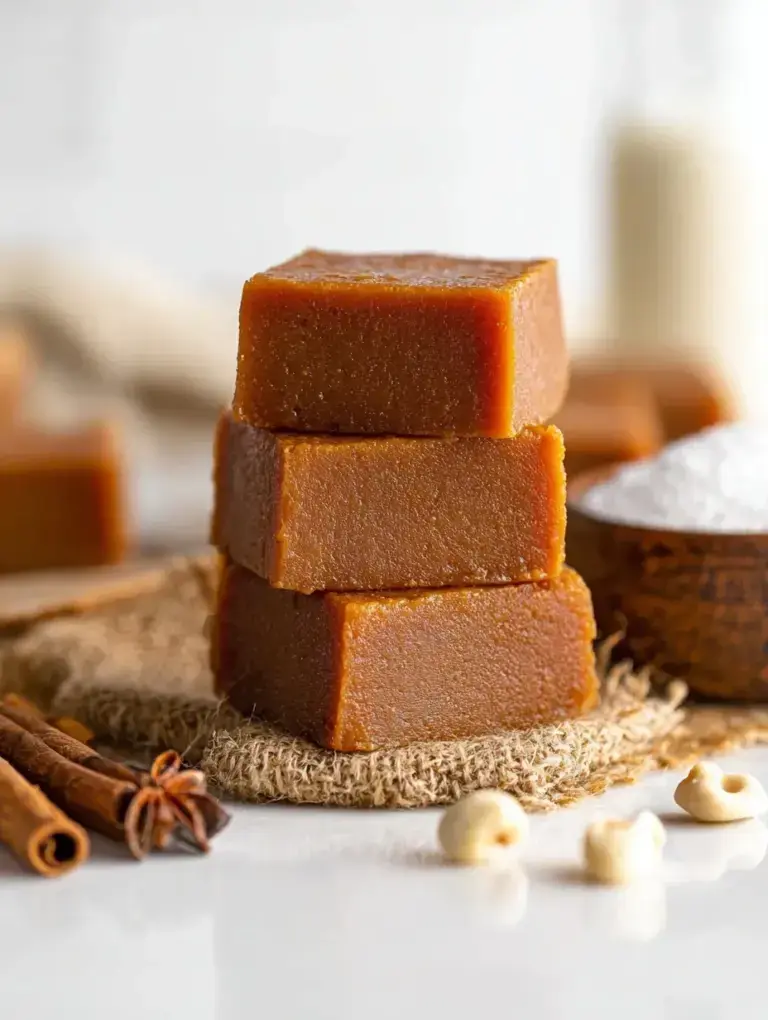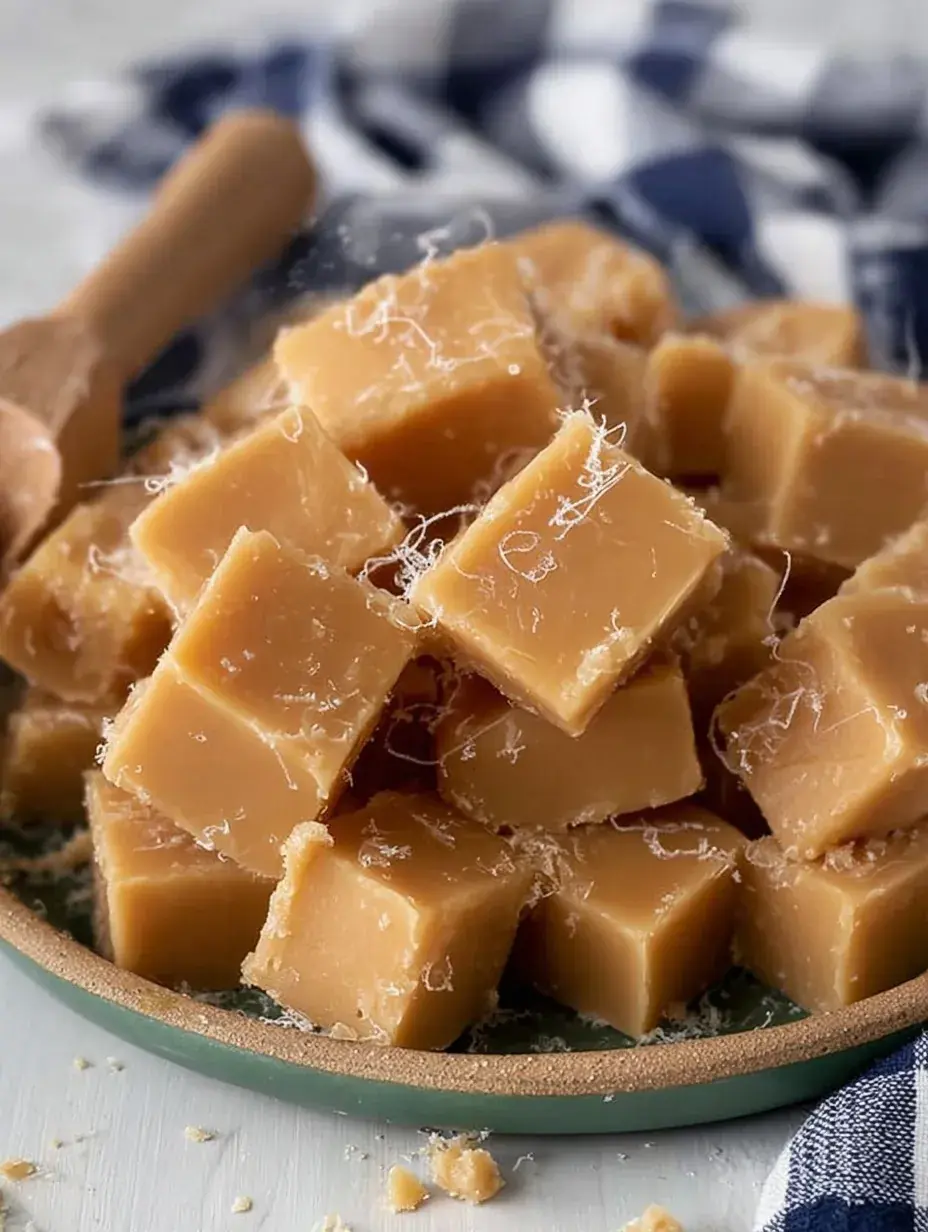
It looks like a high-end candy shop treat that required professional training to master. Honestly, it is just a bit of patience and a heavy-bottomed pot in your own kitchen. My daughter and I love watching the bubbly mixture turn into this smooth, golden delight on a quiet Sunday afternoon.
Why You Will Love This Traditional Caramel Fudge
I discovered the secret to this recipe purely by accident one rainy November when I was trying to recreate a sweet I had at a local fair. I was so worried about the temperature being exactly right, but I found that as long as you watch for that specific soft-ball stage, the result is melt-in-your-mouth perfection.
My daughter was the one who noticed that the gloss disappears at just the right moment to pour it into the pan. After testing this recipe five times, I finally realized that the cooling period is just as important as the boiling phase for that silky finish.
What Makes This Traditional Caramel Fudge Special
- Perfect Crystalline Structure: Beating the mixture as it cools creates that signature fine crumb that separates real fudge from simple chocolate bars.
- Rich Heavy Cream: Using real cream instead of milk provides a buttery depth that lingers on your tongue.
- Corn Syrup Stability: A tiny splash of syrup prevents those gritty sugar crystals from ruining the smooth finish.
- Slow Cooling Method: Allowing the pot to sit undisturbed ensures the base is stable before you start the hard work of beating it.
The Best Traditional Caramel Fudge Recipe
Making this candy is one of those kitchen rituals that makes the whole house smell like a dream. It feels a bit like magic when the glossy liquid suddenly transforms into a thick, opaque fudge right before your eyes.
Ingredient Notes
- Granulated Sugar: This provides the structure and sweetness, forming the base of the candy through careful heating.
- Heavy Cream: I always use full-fat cream because it gives the fudge its luxurious, velvety mouthfeel.
- Unsalted Butter: This adds a rich flavor without making the candy too salty, though I do add a pinch of sea salt later.
- Light Corn Syrup: It acts as an insurance policy against graininess, keeping the texture exactly where it should be.
- Vanilla Extract: Add this only after cooling slightly so the beautiful floral aroma does not just evaporate into the steam.
Instructions
- Prep the Pan. Line your square baking dish with parchment paper so you can easily lift the finished block out later. Look for the parchment paper to sit flush against the corners.
- Melt and Dissolve. Combine the sugar, cream, butter, syrup, and salt in a heavy pot over medium heat, stirring until the grains of sugar vanish. The mixture should look uniform and pale yellow.
- Boil to Temperature. Stop stirring and let the mixture reach 238 degrees, watching for the bubbles to become thick and slow. The bubbles will change from fast and thin to slow, thick, and lava-like.
- Cool Undisturbed. Take the pot off the heat and let it sit until it drops to 110 degrees, which is crucial for the final texture. The pot will feel much cooler to the touch, and the surface might form a very thin skin.
- Beat Vigorously. Add your vanilla and stir with a wooden spoon until the gloss disappears and it looks thick and matte. It will suddenly turn from shiny and translucent to a dull, matte finish.
- Set and Slice. Spread the mixture into your pan and let it rest at room temperature for two hours before cutting into small squares. The fudge should feel firm to a light touch and not stick to your finger.
Billy’s Tips and Mistakes to Avoid
- Use a heavy-bottomed saucepan to prevent the sugar from scorching on the bottom before the middle reaches the right temperature.
- I learned the hard way that stirring while it boils can cause the sugar to crystallize and make the fudge gritty.
- A candy thermometer is your best friend here because guessing the soft-ball stage by eye is really tricky for beginners and often leads to soft fudge.
- This fudge stays fresh for up to two weeks in an airtight container, so it is perfect for making ahead of the holidays.
- Make sure your parchment paper has a little overhang on the sides so you have handles to lift the fudge out cleanly before slicing.
Storage Tips
You can keep these squares in an airtight container at room temperature for up to 14 days. If your kitchen is particularly warm, they will stay firm in the fridge for about 21 days. For long-term prep, I usually wrap the block in foil and freeze it for up to 3 months.
Variations and Swaps
- Sprinkle a few extra flakes of sea salt over the top right after pouring it into the pan for a modern salted caramel twist.
- I have tried this with full-fat coconut milk and vegan butter sticks, and while the flavor is different, the texture remains lovely for dairy-free friends.
- My daughter loves it when we fold in half a cup of chopped toasted pecans during the beating stage for a bit of crunch.
Why This Recipe Works Every Time
This recipe relies on the chemistry of sugar and fat to create a texture that is both firm and melting. By using heavy cream and butter, we ensure there is enough fat to keep the sugar crystals tiny and smooth rather than large and crunchy.
I learned through several failed batches that rushing the cooling process is the fastest way to get grainy candy. Waiting for that perfect temperature drop changed everything for my results and made the process much more consistent every time I bake with my daughter.
Ingredients
- 2 cups granulated sugar
- 1 cup heavy cream
- 4 tablespoons unsalted butter
- 2 tablespoons light corn syrup
- 1 teaspoon vanilla extract
- 1/4 teaspoon fine sea salt
Instructions
- Line an 8x8 inch baking pan with parchment paper and set aside.
- In a heavy-bottomed saucepan, combine the granulated sugar, heavy cream, unsalted butter, light corn syrup, and sea salt.
- Place the saucepan over medium heat and stir constantly until the sugar has completely dissolved and the butter has melted.
- Stop stirring and increase the heat to medium-high, bringing the mixture to a boil.
- Continue boiling without stirring until a candy thermometer reaches 238°F (114°C), which is the soft-ball stage.
- Immediately remove the saucepan from the heat and allow the mixture to sit undisturbed until it cools to approximately 110°F (43°C).
- Add the vanilla extract to the cooled mixture.
- Using a wooden spoon or a heavy-duty electric mixer, beat the mixture vigorously until it loses its glossy sheen and becomes thick and opaque.
- Quickly transfer the fudge into the prepared baking pan and smooth the top with a spatula.
- Allow the fudge to set at room temperature for at least 2 hours before cutting into 1-inch squares.
Frequently Asked Questions
Why is my caramel fudge grainy?
This usually happens if the sugar grains did not fully dissolve at the very beginning or if the mixture was stirred while it was boiling. Make sure to wipe down the sides of the pot with a wet brush if you see crystals forming.
Can I make this without a candy thermometer?
While you can use the cold water test to look for a ball that flattens when removed from water, I highly recommend a thermometer. It takes the guesswork out of the process and ensures a perfect set every time.
Why didn’t my fudge set properly?
If the mixture did not reach the full 238 degrees, it will remain too soft to cut into clean squares. Always double check your thermometer is not touching the bottom of the pan for an accurate reading.
The Bottom Line
This Traditional Caramel Fudge is a testament to how simple ingredients can become something truly extraordinary with just a little bit of care. It is the perfect treat for sharing or keeping in a jar on the counter for those moments when you need a little sweetness. Sweet moments don’t have to be complicated. Let’s make something wonderful together.
There is something so peaceful about the rhythm of stirring fudge while the kitchen windows fog up from the cold outside. I hope this brings a bit of that warmth to your home. Billy
Billy