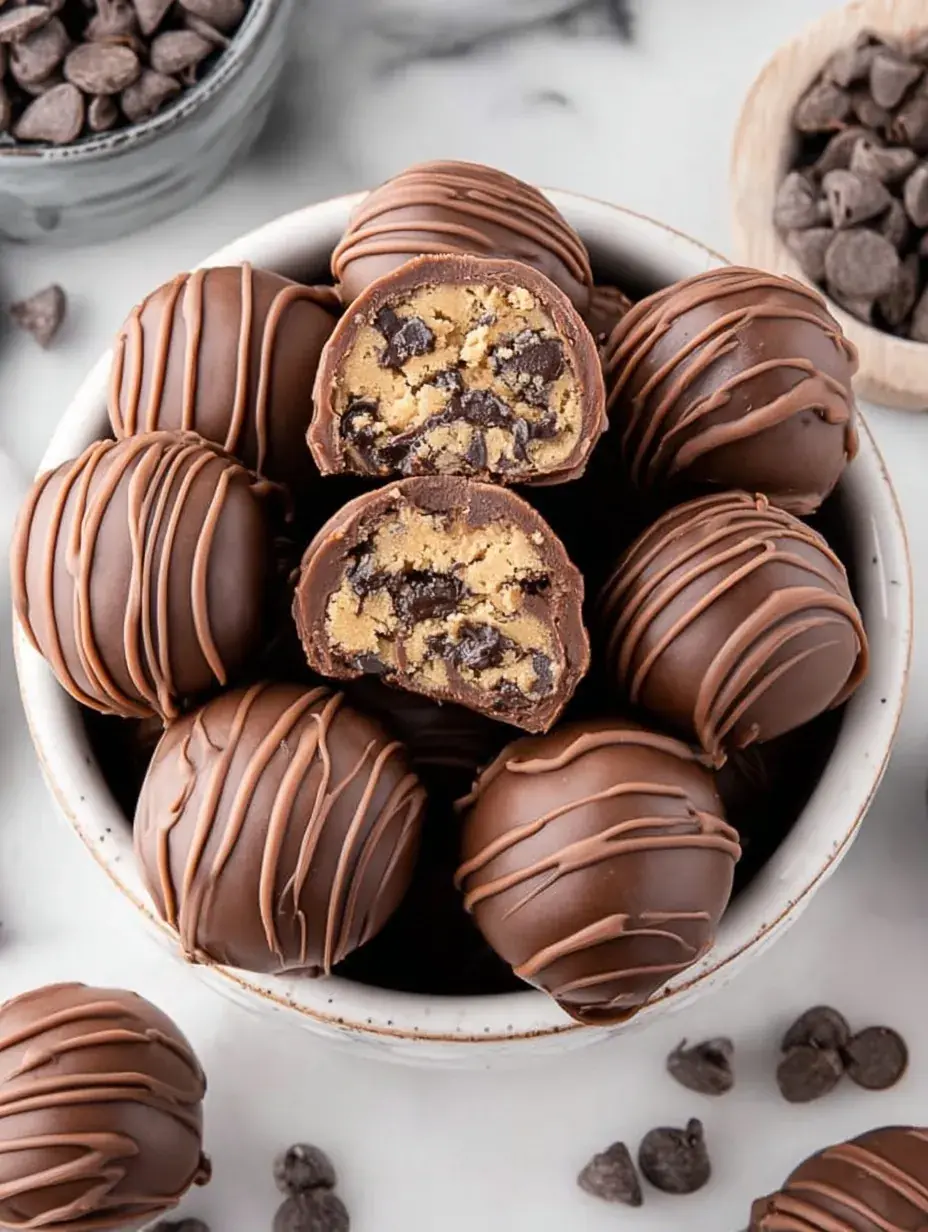
The sound of mini chocolate chips clinking against the glass bowl is the first sign that something sweet is happening in our kitchen today. My daughter loves hearing that rattle because she knows we are skipping the oven and going straight to the good stuff. It is the kind of quiet afternoon activity that fills the house with the scent of brown sugar and vanilla without any of the heat.
Why You Will Love This Cookie Dough Truffles
We all grew up wanting to eat the raw dough, but the worry about raw eggs and untreated flour always lingered in the back of my mind. These treats solve that kitchen dilemma entirely by using a simple heat-treating method for the flour and leaving out the eggs completely.
Personally I have found that I can finally let my daughter enjoy every bit of the process without hovering over her. It is a relief to have a recipe that tastes exactly like a fresh batch of cookies but is specifically designed to be eaten right out of the bowl.
What Makes This Cookie Dough Truffles Special
- Heat-Treated Flour: We make the flour safe to eat by quickly warming it in the oven to kill any bacteria.
- Mini Chocolate Chips: Using smaller chips ensures you get a bit of chocolate in every single bite without making the truffles too bulky.
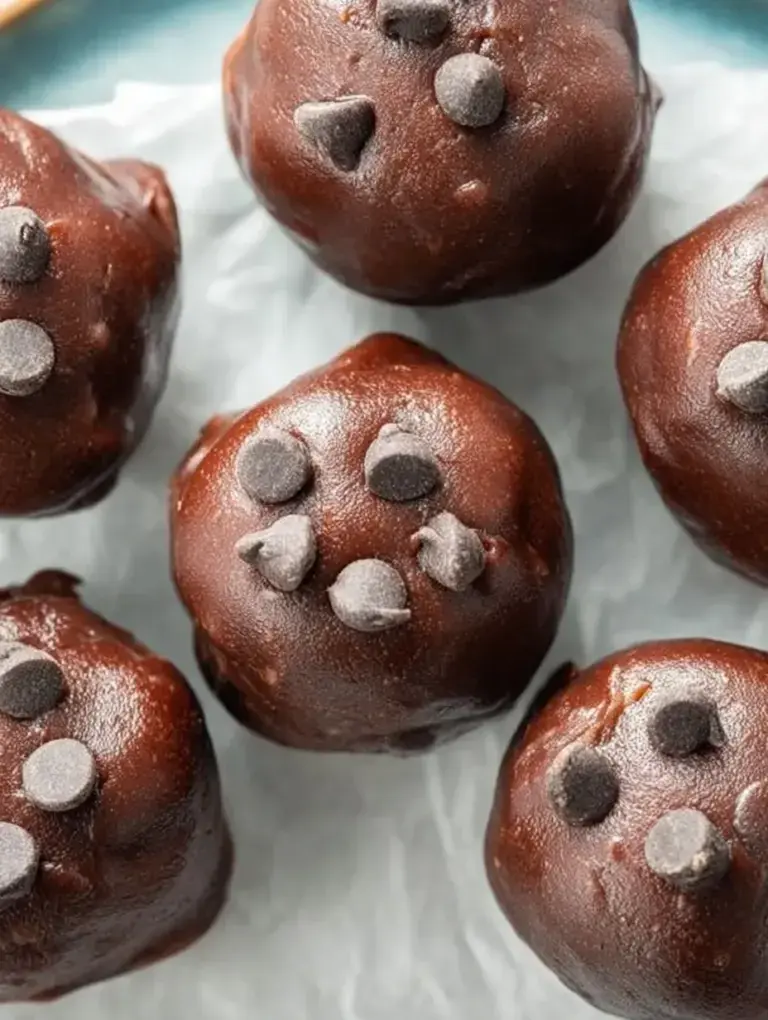
- Refined Coconut Oil: Adding a tiny bit of oil to the chocolate coating makes it smooth and gives it a professional shine.
- Softened Butter Base: This creates a melt-in-your-mouth texture that mimics the center of a soft-baked cookie perfectly.
The Best Cookie Dough Truffles Recipe
I have tried a few versions of these over the years, and this specific ratio of butter to sugar is the one that really hit the mark for us. It is not too sweet, but it feels like a real indulgence when you bite through that snappy chocolate shell.
Ingredient Notes
- Heat-Treated Flour: This is essential for safety; just make sure it cools completely before you mix it with the butter.
- Unsalted Butter: I prefer unsalted so I can control the saltiness myself, especially since we add a pinch of sea salt later.
- Mini Semi-Sweet Chocolate Chips: These stay suspended in the dough better than regular-sized chips.
- Whole Milk: This adds just enough moisture to help the dough come together without making it sticky or wet.
- Melting Wafers: These are much easier to work with than chocolate chips for coating because they stay fluid longer.
Instructions
- Heat the flour. Spread your flour on a baking sheet and bake until it reaches 160 degrees to make it safe. Let it cool completely so it does not melt your butter later.
- Cream the butter. Use your mixer to beat the butter and both sugars until the mixture looks pale and fluffy. This should take about three minutes to get the right airy texture.
- Mix in flavors. Add your vanilla and sea salt, mixing until everything is smooth. You should notice the sweet aroma of the vanilla becoming very strong now.
- Incorporate the flour. Gradually add the cooled flour on a low speed until the mixture looks like dry crumbs. It might look too dry at first, but don’t worry.
- Add the milk. Pour in the milk one tablespoon at a time while mixing until the dough holds together when you squeeze it. It should feel like playdough in your hands.
- Fold and roll. Stir in the mini chips by hand, then roll the dough into one-inch balls. Place them on parchment paper so they do not stick to the tray.
Billy’s Tips and Mistakes to Avoid
- Tip 1: Always sift your flour after heat-treating it. Sometimes it can get little clumps from the heat, and sifting ensures your truffles stay perfectly smooth.
- Tip 2: Do not skip the chilling step for the dough balls. If they are not cold, they will soften too much when you dip them into the warm melted chocolate.
- Tip 3: Use a fork to dip the balls and tap it gently against the side of the bowl. This helps the extra chocolate drip off so you do not end up with a messy pool at the bottom.
- Tip 4: You can make the dough balls up to two days in advance and keep them in the fridge. Just dip them in chocolate when you are ready to serve.
- Tip 5: Let your kids help with the rolling. My daughter loves making the snowballs and she is actually much better at making them perfectly round than I am.
Storage Tips
These keep beautifully in an airtight container in the refrigerator for up to 7 days. If you want to store them longer, they actually freeze very well for up to 60 days. Just let them sit at room temperature for about ten minutes before eating so the center softens slightly.
Variations and Swaps
- Try using white chocolate for the coating and adding rainbow sprinkles for a birthday cake version.
- Swap the mini chocolate chips for crushed peanut butter cups if you want a salty-sweet twist.
- Use a gluten-free flour blend, just remember you still need to heat-treat it for safety.
Why This Recipe Works Every Time
The secret to this recipe is the balance of textures between the snap of the outer chocolate and the soft, buttery interior. I found that using both granulated and brown sugar gives it that authentic cookie flavor that you just cannot get with only one type.
The first time I made these, I did not let the flour cool enough and it turned the butter into an oily mess. Now I always set a timer for the cooling process to make sure the dough stays thick and rollable for dipping.

Ingredients
- 2 cups all -purpose flour
- 1 cup unsalted butter, softened to room temperature
- 3/4 cup granulated white sugar
- 3/4 cup light brown sugar, packed
- 1 teaspoon pure vanilla extract
- 1/2 teaspoon fine sea salt
- 2 tablespoons whole milk
- 1 cup mini semi-sweet chocolate chips
- 10 ounces semi -sweet chocolate melting wafers
- 1 tablespoon refined coconut oil
Instructions
- Heat-treat the flour by spreading it on a baking sheet and baking at 350°F (175°C) for 5 minutes or until the internal temperature reaches 160°F (71°C) to ensure it is food-safe. Let cool completely.
- In a large mixing bowl, cream together the softened butter, granulated sugar, and brown sugar using an electric mixer until light and fluffy, approximately 3 minutes.
- Add the vanilla extract and sea salt, mixing until fully incorporated.
- Gradually add the heat-treated flour to the butter mixture at low speed until a crumbly dough forms.
- Add the milk one tablespoon at a time, mixing until the dough reaches a cohesive, rollable consistency.
- Fold in the mini chocolate chips by hand using a spatula.
- Scoop the dough into 1-inch portions and roll between palms to form smooth spheres. Place on a parchment-lined baking sheet.
- Refrigerate the dough balls for at least 30 to 60 minutes until firm.
- Combine the chocolate melting wafers and coconut oil in a microwave-safe bowl. Heat in 30-second intervals, stirring between each, until completely smooth.
- Using a fork or dipping tool, submerge each chilled dough ball into the melted chocolate. Tap off excess and return to the parchment paper.
- Allow the chocolate to set at room temperature or in the refrigerator for 15 minutes before serving.
Frequently Asked Questions
Do I really have to heat-treat the flour?
Yes, raw flour can carry bacteria, so baking it for a few minutes is a necessary step for safety. It only takes five minutes and gives me peace of mind when my daughter helps herself to a truffle.
Can I use regular chocolate chips for the coating?
You can, but you will definitely want to add the coconut oil to help it melt smoothly. Chocolate chips are designed to hold their shape, so they can be a bit thick for dipping without that extra bit of oil.
Why is my dough too crumbly to roll?
If the dough is not coming together, you might just need an extra teaspoon or two of milk. Sometimes flour absorbs more moisture depending on the humidity in your kitchen, so just add liquid slowly until it feels right.
The Bottom Line
Making these Cookie Dough Truffles is such a joyful way to spend an hour in the kitchen without even turning on the oven. They are small, sweet, and always a hit at holiday parties or as a simple weekend treat for the family. Sweet moments don’t have to be complicated. Let’s make something wonderful together.
I hope these little treats bring as much joy to your home as they do to ours during the holidays. Billy
Billy