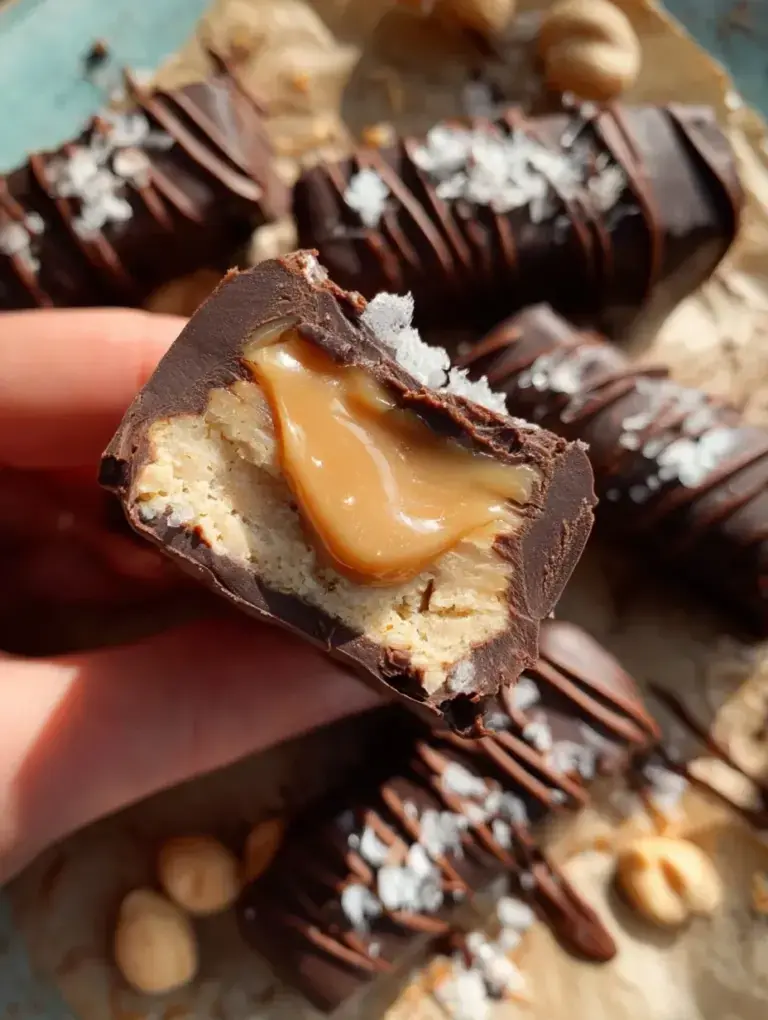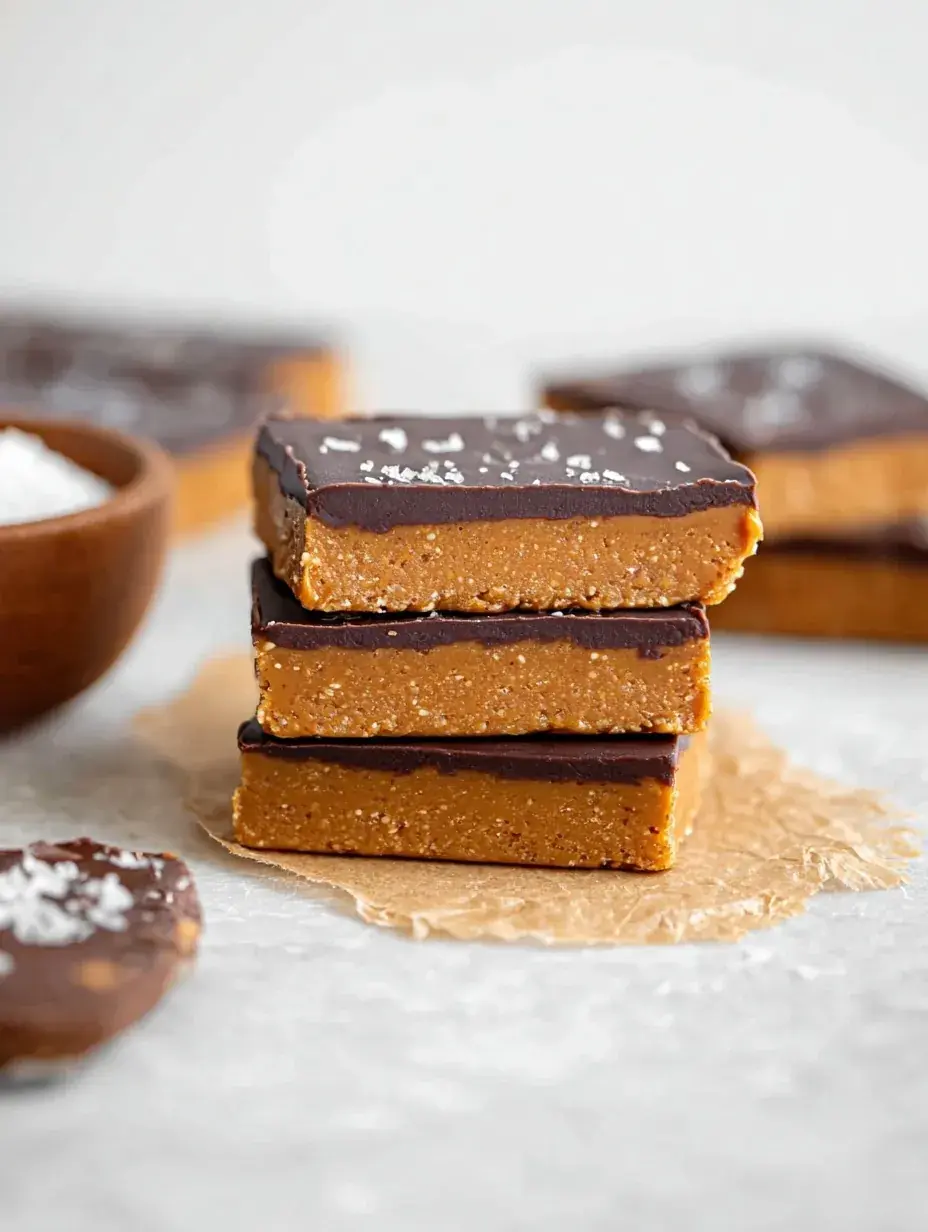
Every January, these No Bake Chocolate Peanut Butter Protein Bars show up on my kitchen counter just as the holiday decorations go back into the attic. My daughter and I are usually craving something a bit more grounded after all the sugar cookies, and these fit the bill perfectly. They keep us fueled for our afternoon walks in the crisp winter air when we need a little extra energy.
Why You Will Love This No Bake Chocolate Peanut Butter Protein Bars
I find that the start of the year always brings a desire for something sturdy and satisfying that doesn’t require turning on the oven. These protein bars have become our go-to winter snack because they feel like a treat but actually keep us going through the grey afternoons. Honestly, I started making these because I needed a quick bite between school runs and winter chores, and they’ve stayed a staple ever since.
After testing this recipe about four times to get the texture just right, I realized the maple syrup and peanut butter combo is what makes them feel so cozy. They aren’t just for gym-goers; they are for moms like me who just need a little boost while playing in the snow or organizing the pantry. My daughter loves the chocolate layer on top, which makes them feel like a real dessert instead of a health snack.
What Makes This No Bake Chocolate Peanut Butter Protein Bars Special
What I love most about these bars is that they actually taste like a peanut butter cup but they are filled with ingredients that make me feel good. The oat flour gives them such a dense, satisfying chew that you just don’t get with store-bought versions that often taste like cardboard. I usually make a big batch on Sunday nights while we listen to music, and they stay perfectly fresh in the fridge for the whole week.
The secret is really in how the protein powder blends with the creamy peanut butter to create a base that isn’t too dry. I’ve found that using a natural, runny peanut butter works best because it incorporates into the oat flour much easier than the stiff, processed brands. It is such a relief to have a snack ready to go that doesn’t involve any baking or complicated cleanup during a busy week.
The Best No Bake Chocolate Peanut Butter Protein Bars Recipe
I remember the first time I tried making these, I added too much milk and ended up with a sticky mess. Now, my daughter and I have the process down to a science, and it is the one thing we always have tucked away in the fridge for emergencies.
Ingredient Notes
- Oat Flour: This provides the hearty, chewy base and keeps the bars gluten-free if you use certified oats.
- Vanilla Whey Protein: I prefer vanilla because it adds a subtle sweetness and a pleasant aroma that balances the peanut butter.
- Natural Peanut Butter: Use the creamy kind that you have to stir; the natural oils help the bars stay soft and easy to bite.
- Pure Maple Syrup: This is my favorite liquid sweetener because it adds a rich depth without being cloyingly sweet.
- Almond Milk: You only need a tiny bit to help the dough come together, so add it very slowly to avoid a soggy base.
Instructions
- Prepare Pan. Line an 8×8 inch square baking pan with parchment paper, making sure it hangs over the sides. This ensures you can lift the whole block out later without the chocolate cracking.
- Mix Dry. In a large mixing bowl, whisk the oat flour and protein powder together until they are perfectly combined. You want to make sure there are no clumps of protein powder hiding in the corners.
- Combine Wet. Add the peanut butter and maple syrup to the dry ingredients, mixing with a stiff spatula. It will look quite crumbly at first, which is exactly what you are looking for at this stage.
- Add Milk. Stir in the almond milk one tablespoon at a time until the mixture feels like a thick cookie dough. You should be able to press it between your fingers and have it hold its shape firmly.
- Press Firmly. Transfer the dough to your pan and use the bottom of a measuring cup to pack it down hard. A tight, even layer is the key to a bar that doesn’t fall apart when you eat it.
- Melt Chocolate. Melt the chocolate chips and coconut oil in the microwave in short bursts until smooth and shiny. Pour it over the base, tilt the pan to coat, and chill for at least an hour until the top is set.
Billy’s Tips and Mistakes to Avoid
- Add the milk slowly because every brand of protein powder absorbs liquid differently. I once added it all at once and had to add more flour to save the batch.
- Use a flat-bottomed cup to press the mixture into the pan to get a professional, even look.
- If you skip the coconut oil in the chocolate, the topping might be too hard and crack when you slice it.
- Store these in the fridge because the natural peanut butter can get very soft if left on the counter for too long.
- Let my daughter help with the chocolate tilting; it is her favorite part and she is surprisingly good at getting it into the corners.
Storage Tips
You can keep these in an airtight container in the refrigerator for up to 7 days. If you want to make them ahead of time, they freeze beautifully for up to 1 month when wrapped individually. I personally think they taste best straight from the fridge when the chocolate is still nice and snappy.
Variations and Swaps
- Swap the peanut butter for almond butter or cashew butter for a slightly different nut flavor.
- Use dairy-free chocolate chips and a plant-based protein powder to make these completely vegan.
- Sprinkle a little bit of flaky sea salt on top of the melted chocolate for a salted peanut butter cup vibe.
Why This Recipe Works Every Time
The balance of the dry oat flour and the fats from the peanut butter creates a texture that is dense without being heavy. I love how the maple syrup acts as both a sweetener and a binder, keeping everything cohesive so the bars don’t crumble in your hand. It is a very forgiving recipe that works well even if your measurements aren’t perfectly precise.
The first time I made this, I learned that the chill time is the most important step for the texture. If you try to cut them too early, the base hasn’t had time to fully hydrate and the chocolate will smear everywhere. Giving it that hour in the cold makes all the difference for those clean, beautiful edges.
Ingredients
- 2 cups oat flour
- 1 cup vanilla whey protein powder
- 1/2 cup creamy natural peanut butter
- 1/3 cup pure maple syrup
- 1/4 cup unsweetened almond milk
- 1/2 cup semi -sweet chocolate chips
- 1 tablespoon coconut oil
Instructions
- Line an 8x8 inch square baking pan with parchment paper, leaving an overhang on two sides for easy removal.
- In a large mixing bowl, combine the oat flour and protein powder, whisking to ensure no lumps remain.
- Incorporate the peanut butter and maple syrup into the dry mixture using a stiff spatula until a crumbly texture is achieved.
- Add almond milk one tablespoon at a time, mixing continuously until the dough becomes cohesive and can be pressed together without crumbling.
- Transfer the mixture to the prepared pan and compress firmly into an even layer using a flat-bottomed measuring cup or spatula.
- In a microwave-safe glass bowl, combine chocolate chips and coconut oil; heat in 30-second intervals at 50% power, stirring between each, until fully emulsified and smooth.
- Pour the chocolate ganache over the protein base and tilt the pan to distribute the layer evenly.
- Place the pan in the refrigerator for a minimum of 60 minutes to allow the lipids in the peanut butter and chocolate to solidify.
- Using the parchment overhang, lift the block from the pan and slice into 12 uniform rectangular bars using a sharp chef's knife.
Frequently Asked Questions
Can I use a different type of protein powder?
Yes, you can use plant-based protein, but keep in mind it often absorbs more liquid. You might need to add an extra splash of almond milk to get the right dough consistency.
How do I make my own oat flour?
Simply put rolled oats into a blender or food processor and pulse until they turn into a fine powder. I do this all the time and it works perfectly for these bars.
Why are my protein bars falling apart?
This usually happens if the mixture is too dry or if they weren’t pressed into the pan firmly enough. Make sure the dough holds together when squeezed before you put it in the pan.
The Bottom Line
Whether you are looking for a quick morning bite or a sweet treat after dinner, these bars are a wonderful staple to have in your kitchen. They are simple to make and even more enjoyable to share with the people you love. Sweet moments don’t have to be complicated. Let’s make something wonderful together.
I hope these bars bring a little bit of ease to your busy winter mornings. Happy snacking from my kitchen to yours! Billy
Billy