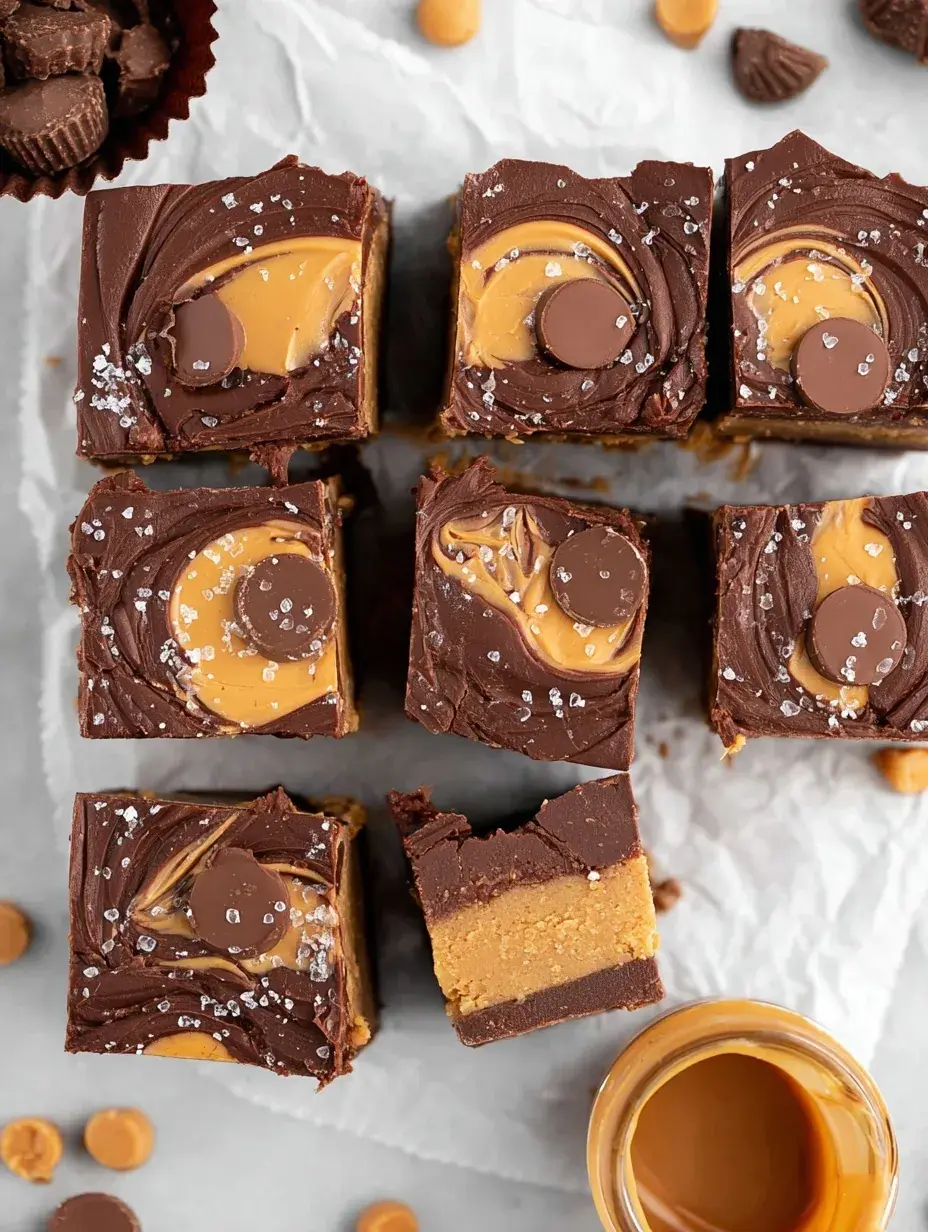
I have a confession to make: I once tried to cut into this fudge before it was fully set because I just could not wait for the chocolate to firm up. The result was a delicious but very messy puddle that we ended up eating with spoons right out of the pan. Now I always set a timer for the fridge to keep myself from ruining those beautiful, clean layers.
Why You Will Love This Peanut Butter Cup Fudge
This recipe has become a total staple in our house whenever the holiday season starts creeping in. I remember my mother making a similar version for school bake sales, and it was always the very first thing to disappear from the table. It is the kind of treat that makes the kitchen feel instantly warmer when the wind is howling outside and the Christmas music is finally playing.
After testing this recipe several times, I found that the secret is in the balance of the salty peanut butter and the sweet chocolate. My daughter loves helping me chop up the mini cups for the top, though I usually have to hide a few because they tend to vanish before they ever hit the fudge. It is a simple joy that makes our weekend baking sessions feel so special.
What Makes This Peanut Butter Cup Fudge Special
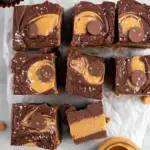
- Key feature: The distinct two-layer texture provides a creamy, melt-in-your-mouth base with a smooth, snappy chocolate finish.
- Key ingredient: Sifted powdered sugar is the secret to avoiding tiny lumps and ensuring the fudge is perfectly silky.
- Ease factor: This is a completely no-bake recipe, meaning you do not have to worry about candy thermometers or oven temperatures.
- Seasonal fit: I usually make this for holiday platters, but it is a wonderful year-round treat for any peanut butter lover.
- Kid-friendly note: Children can easily help by pressing the base into the pan or scattering the chopped candy on top.
The Best Peanut Butter Cup Fudge Recipe
Making fudge does not have to be an intimidating process involving boiling sugar and careful timing. This version is much more relaxed and relies on simple ingredients you probably already have in your pantry right now.
Ingredient Notes
- Creamy Peanut Butter: Use a standard commercial brand rather than the natural stir-style kind to ensure the fudge sets properly.
- Unsalted Butter: This allows you to control the salt levels, especially since peanut butter brands can vary quite a bit.
- Powdered Sugar: Make sure to sift this first so your fudge does not end up with grainy white spots.
- Semi-Sweet Chocolate Chips: These offer a nice contrast to the sweet base, though milk chocolate works if you prefer things very sweet.
- Miniature Peanut Butter Cups: Chopping these up adds a great visual appeal and an extra punch of flavor to every single bite.
Instructions
- Prepare Pan. Line your 8×8 inch square baking pan with parchment paper and leave a little bit hanging over the edges. This overhang acts as a handle so you can lift the fudge out easily once it is firm.
- Melt Base. Combine the peanut butter and butter in a microwave-safe bowl and heat in short bursts. Stir it frequently until the mixture is completely liquid and looks very glossy.
- Add Flavor. Stir in the vanilla extract until it is fully incorporated into the warm butter mixture. You will notice the aroma immediately fills your kitchen with a cozy scent.
- Incorporate Sugar. Gradually add your sifted powdered sugar while stirring constantly until the mixture becomes thick and heavy. It should look like a soft, smooth dough that holds its shape.
- Press Layer. Transfer the peanut butter mixture into your prepared pan and use a spatula to press it into a flat, even layer. Make sure to get it right into the corners for even squares.
- Top with Chocolate. Melt the chocolate chips with the remaining peanut butter and spread it over the base before scattering the chopped candy on top. Press the candy pieces gently so they stick to the chocolate as it sets.
Billy’s Tips and Mistakes to Avoid
- Tip 1: Do not use natural peanut butter that requires stirring because the oil will separate and prevent the fudge from firming up.
- Tip 2: I discovered that adding a little peanut butter to the chocolate chips keeps the top layer from cracking when you slice it.
- Tip 3: If you skip sifting the powdered sugar, you will end up with small lumps that are almost impossible to stir out later.
- Tip 4: Use a warm, dry knife to cut the fudge into squares for the cleanest edges and most professional look.
- Tip 5: Let the fudge sit at room temperature for about ten minutes before cutting if it has been in the fridge for a long time.
Storage Tips
You should store this fudge in an airtight container in the refrigerator for up to 2 weeks to keep the texture firm. If you prefer a softer bite, it can stay at room temperature for about 4 days, provided your kitchen is not too warm. For long-term storage, this fudge freezes beautifully for up to 2 months when wrapped tightly in parchment paper and foil.
Variations and Swaps
- Try using white chocolate chips for the top layer for a different look and a much creamier, sweeter finish.
- You can easily make this dairy-free by using a plant-based butter stick and dairy-free chocolate chips.
- If you want extra texture, swap the creamy peanut butter in the base for a crunchy variety to add a little bit of saltiness and bite.
Why This Recipe Works Every Time
The reason this recipe is so reliable is the simple ratio of fats to sugars, which creates a structure that is sturdy yet soft. I love how the salty notes of the peanut butter keep the sweetness of the powdered sugar from being too overwhelming. It is a crowd-pleaser because it hits all those classic flavor notes that everyone enjoys during a cozy night in.
In my early attempts, the chocolate top would often snap and crack into jagged pieces when I tried to slice it. After testing a few adjustments, I learned that adding that small amount of peanut butter to the melted chocolate chips keeps the layer supple. This small detail changed everything for me and ensures every square looks as good as it tastes.
Ingredients
- 1 cup creamy peanut butter
- 0.5 cups unsalted butter
- 1 teaspoon vanilla extract
- 3 cups powdered sugar, sifted
- 1.5 cups semi -sweet chocolate chips
- 0.25 cup creamy peanut butter (for the chocolate layer)
- 1 cup miniature peanut butter cups, chopped
Instructions
- Line an 8x8 inch square baking pan with parchment paper, leaving an overhang on two sides for easy removal.
- In a medium microwave-safe bowl, combine 1 cup peanut butter and 0.5 cups butter. Heat in 30-second intervals, stirring between each, until completely melted and smooth.
- Stir the vanilla extract into the melted peanut butter mixture.
- Gradually add the powdered sugar to the peanut butter mixture, stirring until the mixture is thick and well combined.
- Transfer the peanut butter mixture into the prepared pan and press into an even layer using a spatula.
- In a small microwave-safe bowl, combine the chocolate chips and 0.25 cup peanut butter. Microwave in 30-second intervals, stirring until smooth and glossy.
- Spread the chocolate mixture evenly over the peanut butter base layer.
- Scatter the chopped peanut butter cups over the chocolate layer and press them gently into the surface.
- Refrigerate the fudge for at least 2 hours, or until completely firm.
- Lift the fudge out of the pan using the parchment paper and cut into 36 squares with a sharp knife.
Frequently Asked Questions
Can I use crunchy peanut butter for this fudge?
Yes, you can certainly use crunchy peanut butter if you enjoy a bit of extra texture in your fudge. I usually prefer creamy for a traditional feel, but the crunch can be a very nice surprise for your guests.
Why is my peanut butter fudge crumbly?
Crumbly fudge usually happens if the butter and peanut butter mixture was too hot when the sugar was added, or if you used a bit too much sugar. Make sure to measure your powdered sugar after sifting to get the most accurate amount.
Does this fudge need to be refrigerated?
It is best to keep it refrigerated so it maintains its shape, especially in warmer kitchens. However, it can sit out on a dessert table for several hours without any issues as long as it is out of direct sunlight.
The Bottom Line
This Peanut Butter Cup Fudge is one of those recipes that reminds me why I love being in the kitchen so much. It is simple, sweet, and always brings a genuine smile to everyone who tries a piece during the holidays. Sweet moments don’t have to be complicated. Let’s make something wonderful together.
I hope your kitchen smells as amazing as mine does right now with all this chocolate and peanut butter. Happy baking and stay cozy! Billy
Billy