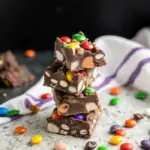
Halloween Rocky Road Treats
Decadent no-bake rocky road squares dressed up for Halloween — a fudgy chocolate base studded with peanuts, candy bars and marshmallows, finished with colorful candy melts and spooky decorations.
Servings: 20
Ingredients
Chocolate Base
- 12 oz semi-sweet chocolate chips
- 6 oz unsalted butter
- 1/4 tsp fine sea salt
- 1 tsp pure vanilla extract
Mix-ins
- 1 cup roasted peanuts (salted or unsalted)
- 1 1/3 cup mini marshmallows
- 8 mini bars Kit Kat (or similar wafer candy), roughly chopped
Decorations
- 4 oz orange candy melts
- 4 oz black or purple candy melts (or another color)
- gummy worms
- Halloween M&M style candies (ghoul mix)
- candy eyes (various sizes)
- Halloween sprinkles
Instructions
Preparation Steps
- Line an 8-inch square pan with parchment leaving an overhang for easy removal; an 9-inch pan works if you prefer thinner squares. Set aside.
- Place chocolate chips and butter in a heatproof bowl. Melt together in the microwave in 20–30 second bursts, stirring between each, until smooth. Alternatively, melt over a pot of barely simmering water (double boiler). Stir in the sea salt and vanilla. Allow the mixture to sit 3–4 minutes so it cools slightly but remains pourable.
- While the chocolate cools slightly, roughly chop the Kit Kat pieces and measure the peanuts and marshmallows. If using full-sized bars, cut into bite-size pieces so they distribute evenly.
- Fold the peanuts and chopped wafer pieces into the warm chocolate. The candy bar coating may soften — that's fine. Add the mini marshmallows last and fold gently so they keep their shape and don't fully melt.
- Spoon the rocky road mixture into the prepared pan and spread with an offset spatula so it reaches into the corners. Press lightly to compress the mixture into an even layer but avoid squashing the marshmallows completely.
- Melt the candy melts in separate small bowls (if using two colors) in 15–20 second bursts in the microwave, stirring until smooth. Dollop spoonfuls of each color on the surface of the rocky road and use a skewer or the tip of a knife to swirl for a marbled Halloween look.
- Mark cut lines on the surface with the point of a knife (for example 4 x 5 grid for 20 pieces). Arrange gummy worms, candy eyes and M&Ms on top, avoiding the cut lines so decorations aren’t sliced in half. If any pieces need extra adhesion, dot a little melted chocolate under them.
- Chill the pan in the refrigerator until fully set, at least 2 hours or overnight for best firmness. Remove from the pan using the parchment overhang and slice along the scored lines with a sharp knife (warming the knife under hot water and drying it between cuts yields cleaner edges).
- Store the rocky road squares in an airtight container in the fridge for up to one week. Bring to room temperature a few minutes before serving if you prefer a softer bite.
Notes
Tip: For cleaner slices, freeze the pan for 20–30 minutes before cutting — the decorations will still hold but the squares slice more neatly. You can make the base a day ahead and decorate just before serving.
This recipe is an original creation inspired by classic Halloween Rocky Road Treats flavors. All ingredient ratios and instructions are independently developed.