The rain was drumming against the window panes while my daughter and I hummed along to the radio in our warm kitchen. She had a tiny smudge of butter on her cheek and a look of pure focus as she watched the mixer swirl. There is something so peaceful about these quiet afternoons when the only plan is to make something sweet together.
Why You Will Love This Edible Sugar Cookie Dough
Watching my daughter’s face light up when I tell her she can actually eat the dough straight from the bowl is the highlight of my week. We used to have those little tugs-of-war about raw eggs, but this recipe changed all of that for us. It has become our favorite little secret snack that we whip up whenever we need a quick kitchen adventure.
I remember the first time we tried making this and I forgot to heat-treat the flour properly, so we had to start all over again. Now, she is the one who reminds me to put the flour in the oven first to make it safe. It is more than just a snack to us; it is about those ten minutes where we just laugh and taste-test every single step together.
What Makes This Edible Sugar Cookie Dough Special
The texture of this dough is incredibly smooth because we take the extra minute to sift the flour after heating it. This prevents those little gritty lumps that can sometimes ruin a no-bake treat.
It uses basic pantry staples that I always have tucked away in my cupboards. I love that I do not have to run to the store when the craving for something sugary hits on a Sunday evening.
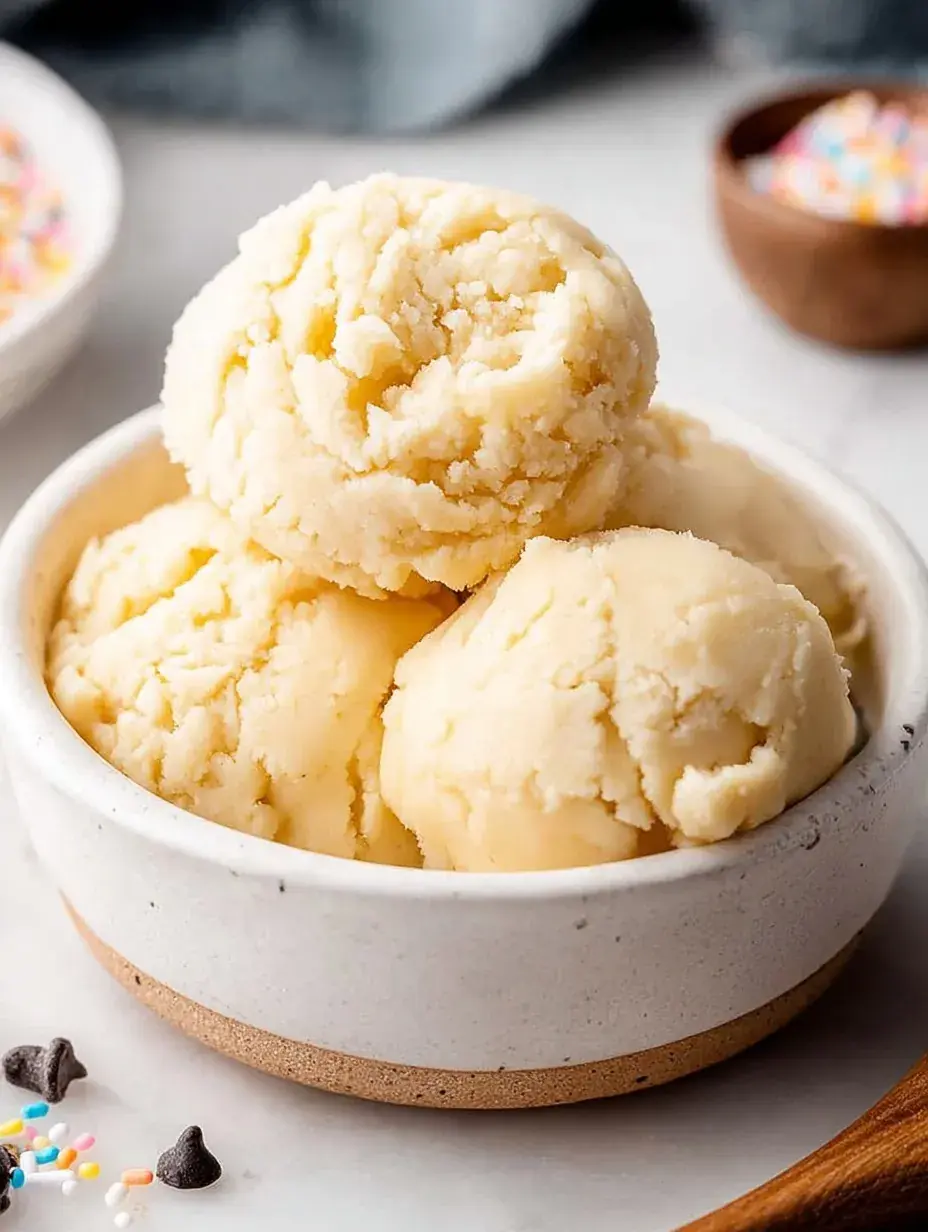
This recipe is completely egg-free and uses heat-treated flour to keep everyone safe. My daughter and I have found that it tastes exactly like the classic cookie dough we loved as kids.
The Best Edible Sugar Cookie Dough Recipe
I made this just last night after dinner when we were all curled up on the sofa wanting a little something extra. It comes together so fast that we were back to our movie before the opening credits even finished.
Ingredient Notes
- All-purpose flour: This is the base of the dough which must be heat-treated to ensure it is safe to eat raw.
- Unsalted butter: I prefer using unsalted so I can control the saltiness myself, but make sure it is really soft for a creamy finish.
- Granulated sugar: This gives that classic crystalline crunch that makes sugar cookies so nostalgic and sweet.
- Vanilla extract: Use the real stuff if you can because it makes the flavor much deeper and more aromatic.
- Whole milk: This acts as the binder to bring everything together into a soft, scoopable dough without using eggs.
Instructions
- Bake Flour. Spread your flour on a tray and bake at 350°F for about 5 to 7 minutes until it hits 160°F. You want it to stay white and not turn brown, so keep a close eye on it.
- Cream Butter. Use your mixer to beat the softened butter and sugar until the mixture looks pale and fluffy. This step is what makes the dough feel light rather than heavy and greasy.
- Add Aromatics. Stir in the vanilla and sea salt until they are fully incorporated into the buttery base. You will start to smell that classic cookie aroma right away.
- Sift Flour. Sift the cooled flour directly into your bowl to get rid of any hard bits from the oven. I have found that skipping this step leads to a grainy texture that is not nearly as pleasant.
- Mix Crumbles. Turn your mixer to low and blend until the mixture looks like coarse sand or small crumbs. Do not worry if it looks dry at this stage before the milk is added.
- Bind Dough. Pour in the milk one spoonful at a time while mixing until it gathers into a smooth ball. It should feel soft to the touch and hold its shape easily on a spoon.
Billy’s Tips and Mistakes to Avoid
- Always check the temperature of your flour with a thermometer to be certain it reached 160°F for safety. I once guessed and ended up worrying the whole time we ate it.
- Let the flour cool completely before adding it to the butter or you will end up with a melted, greasy mess.
- If the dough feels too stiff, add just a tiny splash more milk until it reaches your preferred consistency.
- Sifting is non-negotiable here if you want that professional, melt-in-your-mouth feel without flour clumps.
- Let your kids help with the sifting or the mixing; it is a very forgiving recipe for little hands to participate in.
Storage Tips
You can keep this in an airtight container at room temperature for up to 2 days, but I usually tuck it in the fridge where it stays fresh for up to 4 days. If you want to save some for later, it actually freezes beautifully for about a month. Just let it sit on the counter for a few minutes to soften before digging in.
Variations and Swaps
- Fold in some rainbow sprinkles at the very end to turn this into a fun celebration dough.
- Swap the granulated sugar for brown sugar if you want a deeper, more caramel-like flavor.
- Add a handful of mini chocolate chips or crushed pretzels for a bit of extra texture and crunch.
Why This Recipe Works Every Time
The balance of sugar and butter creates that nostalgic flavor we all remember from sneaking bites of dough as children. By heat-treating the flour and leaving out the eggs, we get all the joy without any of the worry about safety.
I spent a few tries getting the milk ratio just right so it was not too sticky to handle. This version stays perfectly scoopable even after it has been sitting out for a little while, which I learned after testing four different batches.

Ingredients
- 1 cup all -purpose flour
- 1/2 cup unsalted butter, softened
- 1/2 cup granulated sugar
- 1/2 teaspoon sea salt
- 1 teaspoon pure vanilla extract
- 2 tablespoons whole milk
Instructions
- Heat-treat the flour by spreading it on a baking sheet and baking at 350°F (175°C) for 5 to 7 minutes until the internal temperature reaches 160°F (71°C). Allow it to cool completely.
- In a large mixing bowl, cream together the softened butter and granulated sugar using a hand mixer or stand mixer until the mixture is light and fluffy.
- Incorporate the vanilla extract and sea salt into the butter mixture.
- Sift the cooled, heat-treated flour into the bowl to remove any clumps formed during the heating process.
- Mix on low speed until a crumbly dough forms.
- Add the milk one tablespoon at a time, mixing continuously until the dough reaches a smooth, cohesive consistency.
Frequently Asked Questions
Is it really safe to eat this dough?
Yes, because we heat the flour to kill bacteria and omit raw eggs entirely. I always use a food thermometer to make sure the flour hits 160°F so I can feel confident serving it to my daughter.
Can I bake cookies with this recipe?
This specific dough is formulated for eating raw and will not spread or rise correctly in the oven. It is meant to be a snack on its own rather than a traditional cookie base.
How do I heat-treat flour without an oven?
You can actually use the microwave in 30-second bursts, stirring well in between, until it reaches the safe temperature of 160°F. I personally find the oven method more consistent for getting the heat even across the whole batch.
The Bottom Line
Sometimes the best treats are the ones you can enjoy right out of the mixing bowl with a spoon. It is such a simple way to bring a little extra happiness to a normal afternoon. Sweet moments don’t have to be complicated. Let’s make something wonderful together.
I hope this brings as much laughter to your kitchen as it does to ours during our little weekend baking sessions. Billy
Billy