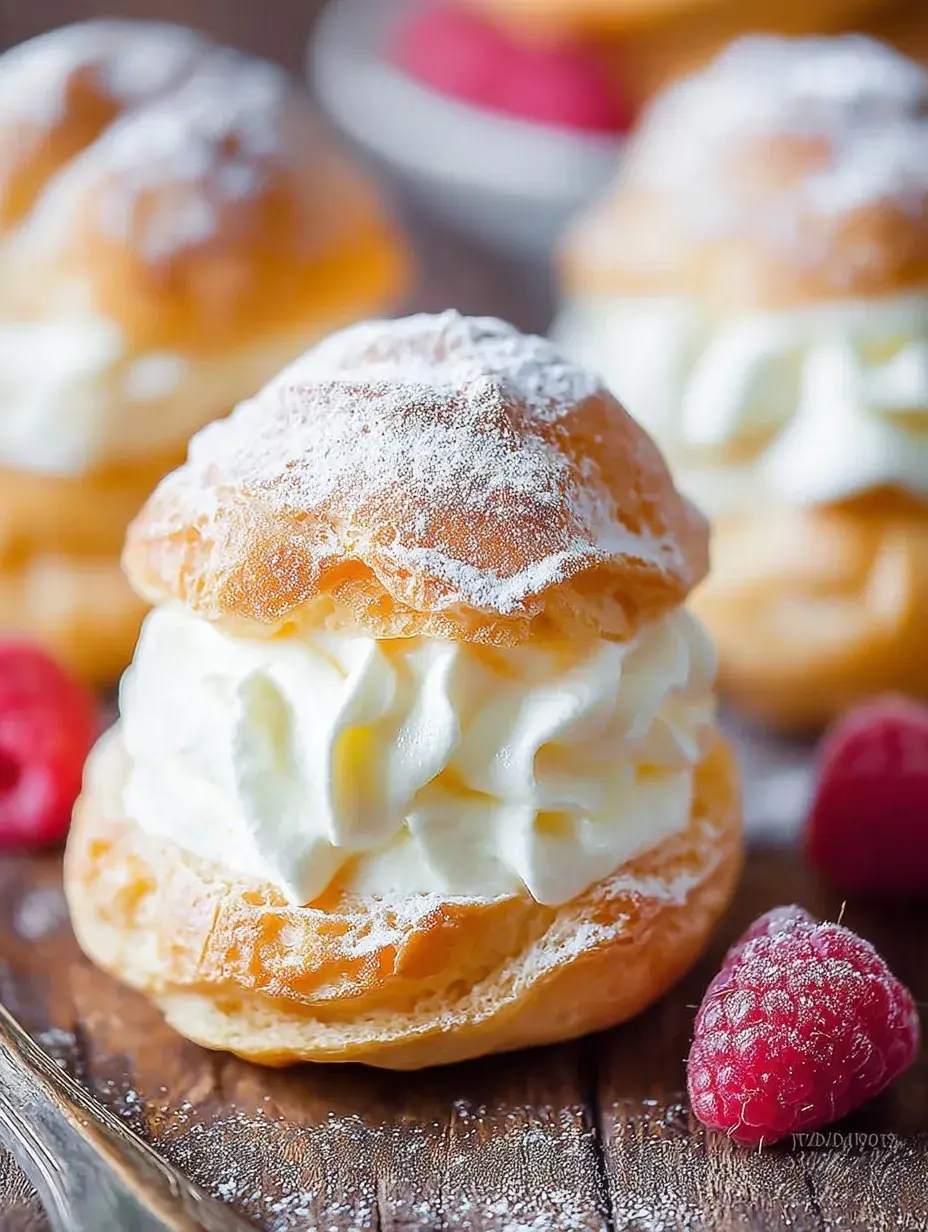
I spent years being terrified of making choux pastry because I thought it was only for professional French bakers. Honestly, my very first attempt at Classic Cream Puffs resulted in flat, soggy pancakes that we ended up eating with spoons anyway. It took a few tries to realize that the secret is all in the timing and a bit of patience while the dough cools.
Why You Will Love This Classic Cream Puffs
I remember watching my grandmother pull these golden clouds out of the oven every Christmas Eve. She made it look so effortless, but I always thought there was some secret magic hidden in her old wooden spoon. Now that I make them with my daughter, I realize the magic is just in the simple joy of watching the dough transform into something so airy and beautiful.
We love the moment when the house starts to smell like toasted butter and sweet vanilla cream. After testing this recipe many times, I finally found the perfect balance that makes the shells sturdy enough to hold the filling but light enough to melt in your mouth. Personally, I have found that these are always the first things to disappear from the dessert table at every family gathering.
What Makes This Classic Cream Puffs Special
These treats are incredibly light and airy, creating a beautiful contrast with the rich whipped cream. They look like they came from a fancy bakery but only require basic kitchen staples from your pantry.
The texture is the real star here, with a slightly crisp exterior and a hollow, soft center. It is the perfect blank canvas for any sweet filling your family prefers during the holiday season.
Making these is a wonderful way to involve kids in the kitchen because the process feels like a science experiment. My daughter loves poking the steam holes and helping me dust the tops with a snowy layer of sugar.
The Best Classic Cream Puffs Recipe
This version of Classic Cream Puffs is my absolute favorite because it is reliable and straightforward. I usually whip these up on a quiet Sunday afternoon when we want something that feels a little more special than a standard cookie.
Ingredient Notes
- Unsalted Butter: This gives the pastry its rich flavor and helps the shells brown beautifully in the oven.
- All-Purpose Flour: It provides the necessary structure to hold those big air pockets without the shells collapsing.
- Large Eggs: Adding these one by one is crucial for that signature glossy finish and perfect rise.
- Heavy Whipping Cream: Make sure it is very cold before whipping so you get those stiff, stable peaks.
- Vanilla Extract: A little bit goes a long way in making the cream filling taste like a sweet dream.
Instructions
- Boil base. Combine water, butter, and salt in a pan and bring it to a full rolling boil. You want the butter completely melted before the water starts evaporating too much.
- Add flour. Dump the flour in all at once and stir vigorously with a sturdy wooden spoon. Keep going until the dough forms a smooth ball that leaves the sides of the pan clean.
- Cool dough. Let the mixture sit for about five minutes so it is not too hot for the eggs. If the dough is too hot, you might end up with scrambled eggs instead of pastry.
- Incorporate eggs. Beat the eggs in one at a time, making sure each one is fully absorbed before adding the next. The dough should eventually look thick, smooth, and very shiny.
- Bake shells. Scoop rounded portions onto your tray and bake until they are a deep golden brown. They should feel firm and light when you gently tap them.
- Release steam. Use a small knife to poke a hole in each shell as soon as they come out of the oven. This lets the steam escape so the insides do not get soggy while cooling.
Billy’s Tips and Mistakes to Avoid
- Do not open the oven door while they are baking. The sudden drop in temperature can cause your beautiful puffs to deflate instantly.
- I learned that using room temperature eggs helps them incorporate into the warm dough much more smoothly.
- If you do not cook the flour mixture long enough on the stove, the puffs will not have enough strength to rise.
- You can bake the shells a day early and store them in an airtight container to save time.
- Let your kids use the sifter for the powdered sugar at the very end for a festive and snowy touch.
Storage Tips
You can keep the unfilled shells at room temperature in a sealed container for up to 2 days. Once you fill them with the whipped cream, they really need to be eaten within 4 hours or the pastry starts to soften. If you have leftovers, store them in the fridge for up to 24 hours, though they will lose their crisp edges.
Variations and Swaps
- Dip the tops in melted dark chocolate for a classic profiterole style treat that looks very elegant.
- Swap the vanilla in the cream for almond extract or a little lemon zest for a bright citrus flavor.
- Use a dairy-free heavy cream substitute if you need a version without cow’s milk for your guests.
Why This Recipe Works Every Time
This recipe relies on the simple science of steam to create that iconic hollow center. By boiling the water and butter properly, you create a base that traps air and expands beautifully in the high heat of the oven. It is a technique that feels rewarding every time you see them puff up.
The first time I made these, I did not let the dough cool enough and the eggs cooked too fast. Now I always set a timer for that five-minute cooling window to ensure the texture stays silky and perfect. It is a small detail that changed everything for my baking confidence.
Ingredients
- 1/2 cup unsalted butter, cubed
- 1 cup wate r
- 1/4 teaspoon sal t
- 1 cup all -purpose flour
- 4 large eggs , room temperature
- 1.5 cups heavy whipping cream, chilled
- 3 tablespoons powdered sugar
- 1 teaspoon vanilla extract
- 1 tablespoon powdered sugar for dusting
Instructions
- Preheat oven to 400°F (200°C) and line a baking sheet with parchment paper.
- In a medium saucepan, combine water, butter, and salt; bring to a rolling boil over medium-high heat.
- Add the flour all at once and stir vigorously with a wooden spoon until the mixture forms a ball and pulls away from the sides of the pan.
- Remove the pan from heat and allow the dough to cool for 5 minutes.
- Add eggs one at a time, beating thoroughly after each addition until the dough is smooth and glossy.
- Drop rounded tablespoons of dough 2 inches apart onto the prepared baking sheet.
- Bake for 25 to 30 minutes until the shells are golden brown and firm to the touch.
- Transfer shells to a wire rack and poke a small hole in the side of each shell to allow steam to escape; cool completely.
- In a chilled bowl, whip the heavy cream, 3 tablespoons powdered sugar, and vanilla extract until stiff peaks form.
- Cut the tops off the cooled shells or use a piping bag to fill the centers with the whipped cream, then dust with the remaining powdered sugar before serving.
Frequently Asked Questions
Why did my cream puffs go flat?
This usually happens if the oven door was opened too early or if they were not baked long enough to set the structure. Make sure they are a deep golden brown and firm to the touch before removing them.
Can I freeze the pastry shells?
Yes, you can freeze the baked, unfilled shells for up to a month in a freezer-safe bag. Just crisp them up in a warm oven for a few minutes after thawing before you add the filling.
How do I know when the dough is ready on the stove?
Look for a thin film forming on the bottom of the pan as you stir the flour into the liquid. This tells you enough moisture has evaporated for the dough to hold its shape.
The Bottom Line
These Classic Cream Puffs are such a joy to bring to the table, especially when guests see how fancy they look. It is a wonderful reminder that even the most intimidating desserts are just a few simple steps away from being a success. Sweet moments don’t have to be complicated. Let’s make something wonderful together.
I hope these bring a little bit of French bakery magic to your kitchen this week. My daughter is already asking for another batch for our next movie night. Billy
Billy