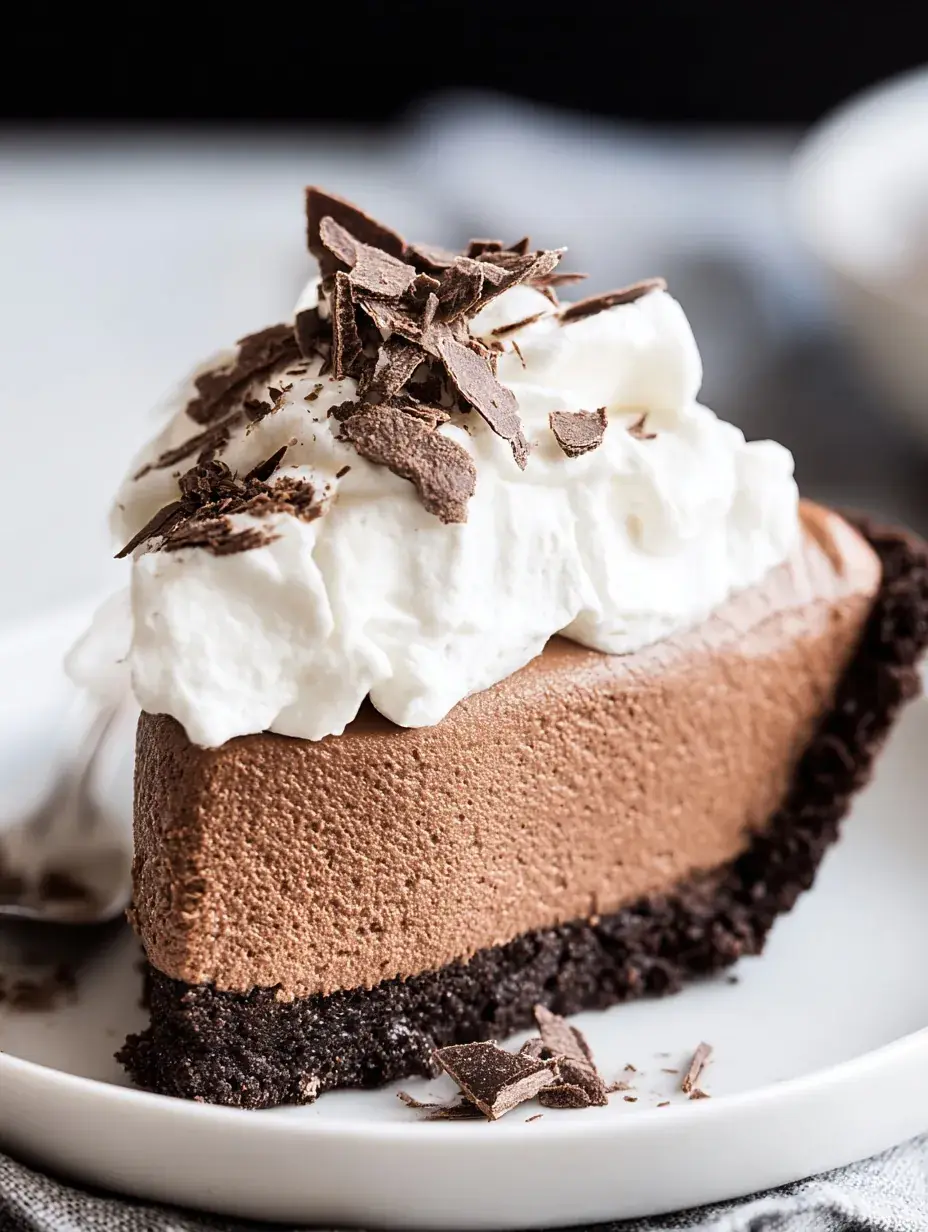
The smell of melting dark chocolate always makes my kitchen feel like the heart of the home, especially on a quiet Sunday afternoon. My daughter usually waits by the counter for the bowl, knowing that this velvety filling is worth every second of the wait. It is the kind of dessert that makes you want to slow down and enjoy a big slice with a hot cup of coffee.
Why You Will Love This French Silk Pie
I remember the first time I tried a slice of this at a local diner when I was a teenager, and I was so intimidated by how fancy it looked. I spent years thinking it was too complicated to make at home until I finally sat down and realized it is really just about taking your time with the whipping process. It has since become a staple in our house for every special occasion.
Honestly, I have made the mistake of not letting the chocolate cool enough before adding it to the butter, which just melts everything. After testing this recipe many times, I have learned exactly when to start mixing to get that perfect mousse texture that holds its shape. It is now the one dessert my family asks for every single Christmas morning.
What Makes This French Silk Pie Special
- Key feature: The texture is incredibly smooth and light, almost like a cloud of chocolate that melts the moment it hits your tongue.
- Key ingredient: Using high-quality unsweetened chocolate is essential because it balances the sweetness of the sugar and the richness of the butter.
- Ease factor: While it takes a little patience with the mixer, the steps themselves are very straightforward for any home baker.
- Seasonal fit: I find this is the ultimate showstopper for a holiday dessert table, but it is just as lovely for a special birthday.
- Kid-friendly note: My daughter loves helping with the chocolate shavings at the end, though she usually eats half of them before they hit the pie.
The Best French Silk Pie Recipe
This version uses a cooked egg base because I feel much more comfortable serving it to my family that way, and it results in a much more stable filling. The last time I made this for a neighborhood potluck, the plate was empty before I even got a slice to my own table.
Ingredient Notes
- Unsweetened Chocolate: This provides the deep cocoa flavor without making the pie cloyingly sweet or heavy.
- Unsalted Butter: I always use room temperature butter so it creams perfectly with the chocolate mixture without any lumps.
- Large Eggs: These create the structure of the filling, and cooking them with the sugar makes the base safe and thick.
- Heavy Whipping Cream: Freshly whipped cream on top is non-negotiable for that classic contrast against the rich chocolate.
- Pie Crust: You can use a store-bought frozen crust to save time, just make sure it is fully blind-baked and completely cool.
Instructions
- Cook Base. Whisk the sugar and eggs in a small saucepan over low heat until the mixture thickens and coats your spoon. You are looking for a smooth, custard-like consistency that reaches 160 degrees on a thermometer.
- Add Chocolate. Stir the melted chocolate into the warm egg mixture until it is glossy and dark. Let this sit on the counter until it reaches room temperature so it does not melt your butter later.
- Cream Butter. Beat your softened butter in a stand mixer until it looks pale and very fluffy. This usually takes about three minutes and creates the foundation for the airy, silk-like texture.
- Combine Mixtures. Slowly pour the cooled chocolate into the butter while the mixer is running on medium speed. The color will start to transform into a beautiful light brown as the two mixtures incorporate.
- Whip Thoroughly. Keep the mixer going for a full five minutes to beat air into the filling until it feels like silk. You will see the volume increase and the texture become noticeably lighter and more stable.
- Chill and Top. Spread the filling into your crust and let it set in the fridge for at least four hours. Just before serving, pile on the whipped cream and those pretty chocolate shavings for a finished look.
Billy’s Tips and Mistakes to Avoid
- Don’t rush the cooling. If the chocolate is still warm when you add it to the butter, you will end up with a liquid mess instead of a fluffy mousse.
- Use a stand mixer. Your arm will get very tired trying to whisk this for five minutes straight, and the consistent speed of a mixer is what creates that signature silkiness.
- Temperature matters. Make sure your butter is truly at room temperature, not melted or too cold, or it won’t trap the air bubbles needed for a light pie.
- Storage tip. This pie actually tastes even better the next day after the flavors have had a chance to really meld together in the fridge.
- Garnish simply. Use a vegetable peeler on a room-temperature chocolate bar to get those beautiful large curls for the top without any extra effort.
Storage Tips
You should keep this pie in the refrigerator at all times since it contains so much butter and cream. It stays fresh and delicious for up to 4 days if you keep it covered with plastic wrap or a pie dome. I do not recommend freezing this one because the texture of the mousse can become slightly grainy once it thaws.
Variations and Swaps
- Stir in a half teaspoon of peppermint extract and top with crushed candy canes for a festive winter version.
- Swap the traditional pastry for a buttery graham cracker crust if you want a bit more crunch and saltiness in every bite.
- Add a teaspoon of espresso powder to the egg and sugar mixture while it cooks to deepen the chocolate notes without making it taste like coffee.
Why This Recipe Works Every Time
The magic of this recipe is all in the aeration that happens during that long five-minute whipping stage. It transforms heavy ingredients like butter and chocolate into something that feels light and elegant, making it the perfect finish to a heavy holiday meal.
I used to think the five-minute timer was a suggestion, but after a few flat pies, I realized it is the most important part of the whole process. That extra time is what gives it the silk in the name, and I have found that using a timer helps me stay disciplined so I never skip those final minutes.

Ingredients
- 1 9 -inch pie crust, blind-baked and cooled
- 1 cup granulated sugar
- 3 large egg s
- 4 ounces unsweetened chocolate, melted and cooled
- 1 cup unsalted butter, softened to room temperature
- 1 teaspoon vanilla extract
- 1 cup heavy whipping cream
- 2 tablespoons powdered sugar
- 1/4 cup chocolate shavings
Instructions
- In a small heavy saucepan, whisk together the granulated sugar and eggs until thoroughly combined.
- Cook over low heat while whisking constantly until the mixture reaches an internal temperature of 160°F (71°C) and thickens enough to coat the back of a spoon.
- Remove the saucepan from heat and stir in the melted chocolate until the mixture is smooth. Set aside to cool to room temperature.
- In a stand mixer bowl, cream the softened butter on medium-high speed until light and fluffy, approximately 3 minutes.
- Gradually pour the cooled chocolate mixture into the butter while beating continuously.
- Continue to beat the mixture on medium-high speed for 5 minutes until the texture is light, airy, and silk-like.
- Beat in the vanilla extract until incorporated.
- Transfer the chocolate filling into the pre-baked pie shell and smooth the surface with an offset spatula.
- Refrigerate the pie for at least 4 hours, or until the filling is firm and set.
- In a chilled bowl, whisk the heavy whipping cream and powdered sugar until stiff peaks form.
- Spread the whipped cream over the top of the chilled pie and garnish with chocolate shavings before serving.
Frequently Asked Questions
Can I use milk chocolate instead of unsweetened?
Personally, I find milk chocolate makes the pie a bit too sweet and soft, so sticking with unsweetened or a very dark bittersweet chocolate is best for the right balance. The unsweetened chocolate provides the structure that helps the pie hold its shape when sliced.
Why is my French Silk Pie filling grainy?
This usually happens if the sugar didn’t fully dissolve in the egg mixture or if the butter was too cold when you started mixing. Make sure to whisk the eggs and sugar constantly over low heat until the mixture is completely smooth and reaches the right temperature.
Do I really have to whip the mixture for five minutes?
Yes, the long whipping time is what creates the airy, silk-like texture that defines this pie. If you stop early, the filling will be much denser and more like a thick ganache than a light mousse.
The Bottom Line
There is something so satisfying about slicing into a perfectly chilled pie and seeing those clean, velvety layers. It is a classic for a reason, and I know your family will love it as much as mine does when you bring it out at the end of the night. Sweet moments don’t have to be complicated. Let’s make something wonderful together.
I hope this brings a little extra sweetness to your kitchen this week, maybe with a little holiday music playing in the background while you whip up that filling. Billy
Billy