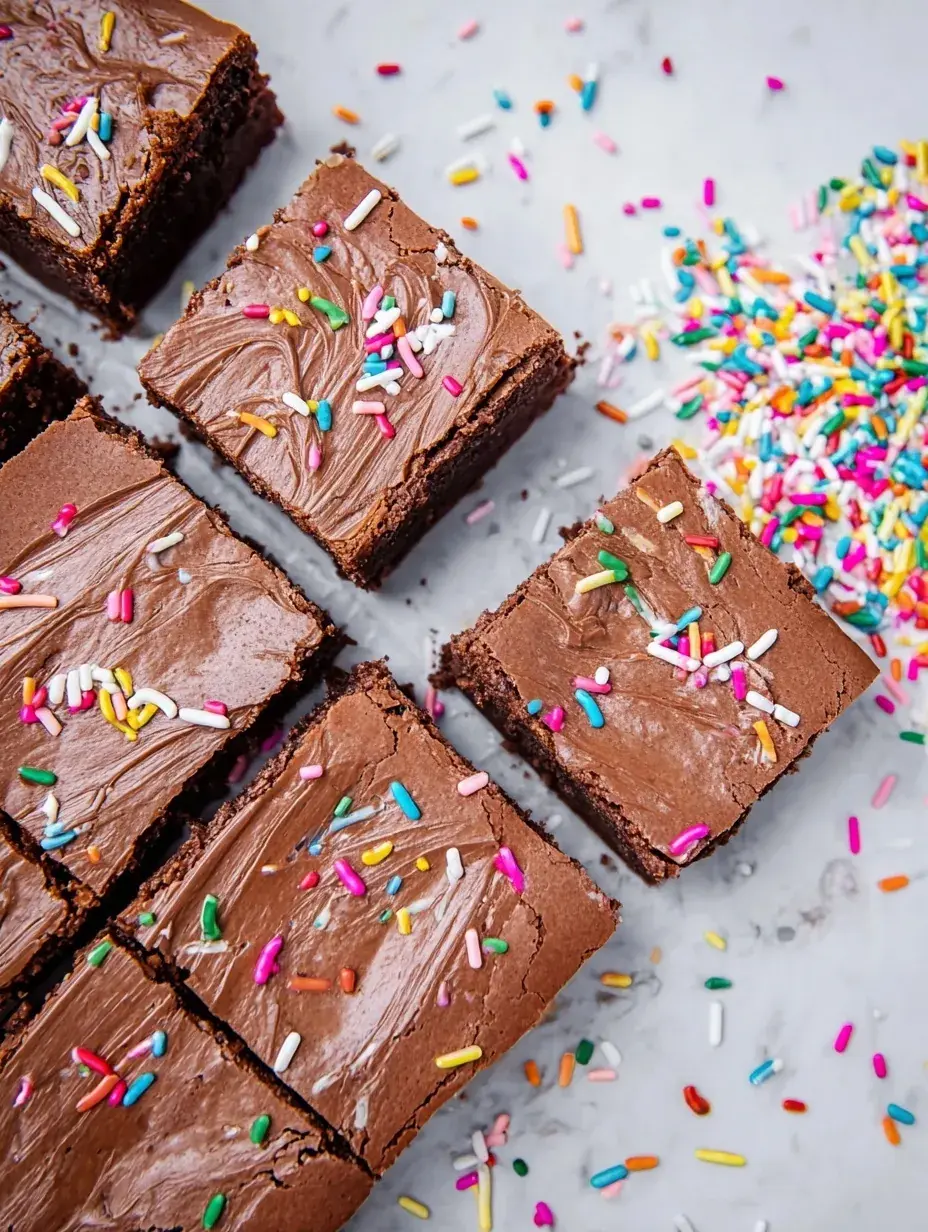
Have you ever had one of those days where you just cannot decide between a chocolatey brownie and a slice of festive cake? My daughter and I were standing in the kitchen last Sunday facing that exact dilemma. These Brownie Birthday Cake Bars were the happy accident that saved our afternoon and satisfied every craving in one go.
Why You Will Love This Brownie Birthday Cake Bars
I used to struggle with picking a single dessert for small family celebrations because some of us love dark chocolate while others want that classic vanilla sprinkle vibe. It felt like I was always making two separate batches of treats just to keep everyone happy, which meant way too many dishes for a simple weekend.
These bars solve that problem perfectly by layering both favorites into one pan, so nobody has to compromise. Personally I have found that this hybrid approach is a total lifesaver for birthday parties or school bake sales where you want to offer variety without double the work.
What Makes This Brownie Birthday Cake Bars Special
There is something about the way the dark cocoa base meets the buttery, almond-scented top layer that feels like a party in your kitchen. This treat is the ultimate crowd pleaser because it combines two classic textures into one easy handheld square.
- Key feature: The texture contrast is amazing, offering a dense, fudgy bottom with a slightly soft and cakey top layer.
- Key ingredient: Almond extract is the secret here because it provides that nostalgic birthday cake flavor that vanilla alone cannot achieve.
- Ease factor: This is perfect for beginner bakers as you only need two bowls and one baking pan to get professional results.
- Seasonal fit: I usually make these for birthday celebrations, but the bright sprinkles make them a joy to bake year-round.
- Kid-friendly note: Children love helping to drop the spoonfuls of cake batter and, of course, adding the extra sprinkles on top.
It is the kind of treat that looks complicated but is actually very forgiving to make even during a busy week.
The Best Brownie Birthday Cake Bars Recipe
The last time I made these, my daughter insisted on adding extra sprinkles to the very top before they went into the oven. The result was a beautiful, colorful crust that made the bars look even more festive than usual.
Ingredient Notes
- Unsweetened Cocoa Powder: This provides the deep chocolate base that balances the sweetness of the top cake layer.
- Almond Extract: This is a small but mighty addition that gives the top layer its signature cake-batter flavor.
- Rainbow Sprinkles: Use the jimmies style sprinkles rather than the tiny hard balls to prevent the colors from bleeding too much.
- Melted Butter: Using melted butter in the brownie layer ensures it stays extra fudgy and moist after baking.
- Brown Sugar: This adds moisture and a slight caramel note to the cake layer, keeping it soft for days.
Instructions
- Prepare and Preheat. Set your oven to 350°F and line an 8×8 inch pan with parchment paper. This makes it much easier to lift the bars out for clean slicing later.
- Mix Brownie Base. Whisk the melted butter and granulated sugar together in a medium bowl until combined. Add the eggs and vanilla, whisking until the mixture looks smooth and slightly glossy.
- Fold Dry Ingredients. Gently stir in the cocoa powder, flour, and salt until no streaks of white remain. Spread this dark batter evenly into the bottom of your prepared pan.
- Cream Cake Layer. In a separate bowl, beat the softened butter and sugars until the mixture is light and fluffy. This step is important for achieving that soft cake texture on top.
- Combine Cake Batter. Stir in the egg and extracts, then mix in the flour and baking powder to form a thick dough. Fold in the rainbow sprinkles until they are evenly distributed.
- Layer and Bake. Drop spoonfuls of the cake dough over the brownie layer and spread them out to cover the chocolate. Bake for 30 to 35 minutes until a toothpick comes out with just a few moist crumbs.
Billy’s Tips and Mistakes to Avoid
- Don’t overmix the brownie batter or it will become tough instead of fudgy. I stop as soon as the flour disappears.
- Softening the butter for the top layer is crucial. I made the mistake of using cold butter once and the layers didn’t spread right.
- Wait for the bars to cool completely before cutting. If you slice them while warm, the layers might merge together too much.
- Use parchment paper with a little overhang. This allows you to lift the whole block out for perfectly straight edges.
- Check the bars at the 30-minute mark. Every oven is different and you want to avoid drying out the cake layer.
Storage Tips
You can keep these bars in an airtight container at room temperature for up to 4 days. If you prefer a firmer texture, they store beautifully in the fridge for about 6 days. For long-term storage, wrap individual squares in plastic wrap and freeze them for up to 3 months.
Variations and Swaps
- Try using holiday-specific sprinkles like red and green for Christmas or pastels for Spring.
- Swap the almond extract for peppermint extract if you want a chocolate mint version during the winter months.
- Add a handful of white chocolate chips to the cake layer for extra sweetness and texture.
Why This Recipe Works Every Time
The secret to why this recipe is so successful is the balance between the two distinct layers. The brownie base is heavy and rich, providing a solid foundation for the lighter and fluffier cake topping.
After making this recipe several times, I learned that using a mix of brown and white sugar in the top layer is what keeps it from becoming crumbly. This small adjustment ensures that the Brownie Birthday Cake Bars remain chewy and delicious even on the second or third day.
Ingredients
- 1/2 cup unsalted butter, melted (brownie layer)
- 1 cup granulated sugar (brownie layer)
- 2 large eggs (brownie layer)
- 1 teaspoon vanilla extract (brownie layer)
- 1/2 cup unsweetened cocoa powder (brownie layer)
- 1/2 cup all -purpose flour (brownie layer)
- 1/4 teaspoon salt (brownie layer)
- 1/2 cup unsalted butter, softened (cake layer)
- 1/2 cup granulated sugar (cake layer)
- 1/4 cup light brown sugar, packed (cake layer)
- 1 large egg (cake layer)
- 1 teaspoon vanilla extract (cake layer)
- 1/4 teaspoon almond extract (cake layer)
- 1 cup all -purpose flour (cake layer)
- 1/2 teaspoon baking powder (cake layer)
- 1/3 cup rainbow sprinkles
Instructions
- Preheat oven to 350°F (175°C) and grease an 8x8 inch square baking pan or line with parchment paper.
- In a medium bowl, whisk together the melted butter and 1 cup sugar for the brownie layer.
- Add 2 eggs and 1 teaspoon vanilla to the brownie mixture, whisking until smooth.
- Gently fold in 1/2 cup cocoa powder, 1/2 cup flour, and 1/4 teaspoon salt until just combined.
- Spread the brownie batter evenly into the bottom of the prepared baking pan.
- In a separate large bowl, cream together the softened butter, 1/2 cup granulated sugar, and brown sugar until light and fluffy.
- Beat in the remaining egg, vanilla extract, and almond extract for the cake layer.
- Stir in 1 cup flour and baking powder until a thick dough forms, then fold in the rainbow sprinkles.
- Drop spoonfuls of the cake layer batter over the brownie layer and spread gently to cover.
- Bake for 30 to 35 minutes, or until a toothpick inserted into the center comes out with only a few moist crumbs.
- Allow the bars to cool completely in the pan before slicing into 16 squares.
Frequently Asked Questions
How should I store Brownie Birthday Cake Bars?
The best way to store these is in an airtight container at room temperature for up to 4 days. If it is very warm in your kitchen, keeping them in the fridge will help the chocolate layer stay firm.
Can I use a box mix for the brownie layer?
Yes, you can certainly use a box mix if you are in a hurry. Just make sure to prepare the brownie batter according to the package directions before adding the homemade cake layer on top.
Why did my sprinkles bleed into the batter?
This usually happens if you use nonpareils, which are the tiny round balls. I always recommend using the long jimmies sprinkles as they hold their shape and color much better during the baking process.
The Bottom Line
These Brownie Birthday Cake Bars are a wonderful way to bring a little extra joy to your kitchen without needing a special occasion. Whether you are baking with your kids or just want a sweet treat for a quiet evening, these bars never disappoint. Sweet moments don’t have to be complicated. Let’s make something wonderful together.
I hope these colorful bars bring as much laughter to your kitchen as they do to ours. Happy baking and enjoy every sprinkle-filled bite! Billy
Billy