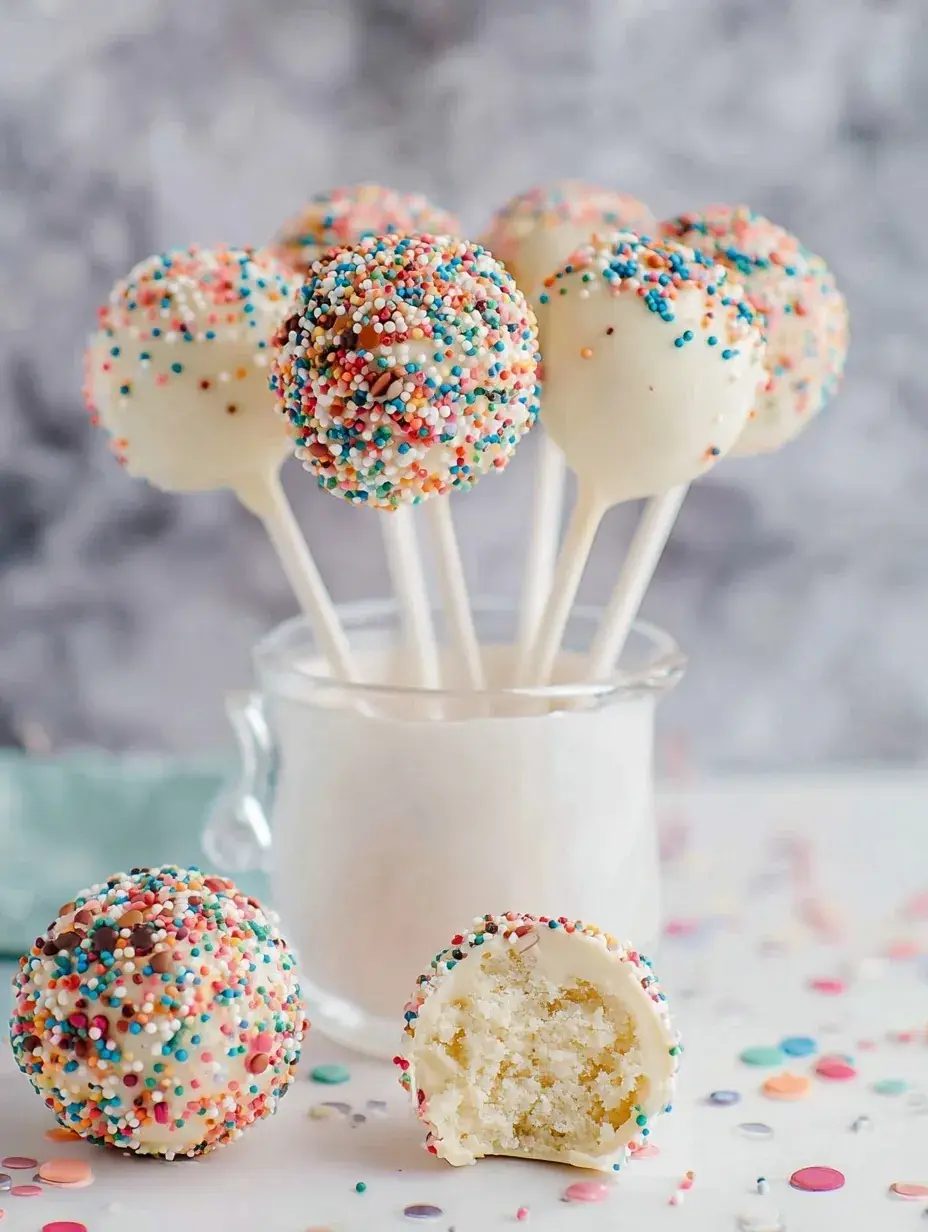
My daughter thinks the pink cake pops at the coffee shop are magic.
Why You Will Love This Copycat Starbucks Birthday Cake Pops
Every time we walk past the glass case at the store, I see my daughter’s eyes light up at those little pink treats on sticks. I finally decided we should try making them at home so we could have a whole batch to share instead of just buying one. The first time we tried this, I used too much frosting and they were a bit of a mushy mess, but we learned exactly how to get that perfect bite together.
It turned into such a messy, laughing afternoon in our kitchen that I will never forget. Honestly, I have found that the homemade version actually tastes fresher because we get to pick our favorite cake mix. My daughter says they are even more special because we decorated them together while listening to Christmas music in the background.
What Makes This Copycat Starbucks Birthday Cake Pops Special
- Dense cake center. Mixing the crumbled cake with just enough frosting creates that signature fudgy texture you expect from the original.
- Smooth candy shell. Adding a tiny bit of shortening to the pink melts ensures a thin, professional-looking coating that snaps when you bite it.
- Box mix base. Using a simple vanilla cake mix keeps the process low-stress so you can focus on the fun part of dipping and decorating.
- Perfectly sweet. The balance of vanilla cake and creamy pink coating tastes exactly like the birthday treat we all know and love.
The Best Copycat Starbucks Birthday Cake Pops Recipe
I have made these so many times now that I can almost do it with my eyes closed. It is the perfect weekend project when you want something sweet that feels like a real celebration in the kitchen.
Ingredient Notes
- Vanilla Cake Mix: This provides the classic flavor and soft structure needed for the center of the pop.
- Vanilla Frosting: Use just enough to bind the crumbs; adding too much will make the pops too heavy to stay on the sticks.
- Pink Candy Melts: These give you that iconic color without having to worry about temperamental food coloring in white chocolate.
- Vegetable Shortening: This is my secret for thinning out the candy coating so it is fluid enough to cover the cake smoothly.
- White Nonpareils: These tiny sprinkles are the finishing touch that makes them look exactly like the ones from the cafe.
Instructions
- Bake the cake. Follow the package instructions and bake the vanilla cake until a toothpick comes out clean. Let it cool completely until the pan is no longer warm to the touch.
- Crumble the sponge. Break the cooled cake into tiny, uniform crumbs using your hands or a stand mixer. You want a fine texture with no large chunks remaining in the bowl.
- Mix the dough. Add the vanilla frosting and mix until the crumbs hold together like a thick dough. It should feel pliable and stay in a ball when you squeeze it firmly in your palm.
- Shape the pops. Roll the mixture into small, smooth spheres and place them on a parchment-lined tray. Chill them in the freezer until they are firm enough to handle without losing their round shape.
- Prepare the coating. Melt the pink candy with a little shortening until the mixture is fluid and drips easily from a spoon. Dip the tip of your stick into the candy before inserting it halfway into each ball to act as glue.
- Dip and sprinkle. Submerge the cake ball fully, then gently tap off the excess coating until the surface is smooth. Add the white sprinkles immediately before the shell hardens and sets completely.
Billy’s Tips and Mistakes to Avoid
- Always let your cake cool entirely before crumbling, or the steam will make the crumbs gummy.
- I discovered that using a deep, narrow bowl for melting makes the dipping process much easier than a wide dish.
- If you skip the chilling step, the cake balls will likely fall off the sticks and sink into your melted candy.
- Store the finished pops in a styrofoam block while they dry to prevent flat sides on your beautiful pink shells.
- Let my daughter help with the sprinkles, but make sure the coating is still wet or they will just bounce right off.
Storage Tips
You can keep these at room temperature in an airtight container for up to 2 days. If you want them to last longer, they stay fresh in the fridge for up to 5 days. Personally, I love freezing a batch for up to 1 month and just taking one out whenever we need a little afternoon pick-me-up.
Variations and Swaps
- Try using a chocolate cake mix for a rich twist that still looks adorable with the pink coating.
- You can use a gluten-free cake mix and frosting if you have family members with dietary restrictions.
- Change the candy melt color to blue or green for a fun themed party or a different holiday look.
Why This Copycat Starbucks Birthday Cake Pops Recipe Works Every Time
The texture of these pops is what really makes them special because they are so soft and fudgy on the inside. I think the simplicity of using a box mix allows you to really focus on the dipping technique, which is usually the hardest part for home bakers. It is such a joy to see a tray of these finished and looking just like the ones from the shop.
I learned that if the cake balls are too cold when you dip them, the coating might crack as it sets, so letting them sit for just a minute after the freezer makes a huge difference. Taking that extra moment ensures every single pop comes out with a perfectly smooth, unblemished surface.

Ingredients
- 1 box (15.25 oz) vanilla cake mix
- 1 cup wate r
- 1/2 cup vegetable oil
- 3 large egg s
- 1/2 cup vanilla frosting
- 12 oz pink candy melts
- 1 tbsp vegetable shortening
- 2 tbsp white nonpareil sprinkles
- 24 lollipop stick s
Instructions
- Preheat your oven to 350°F (175°C) and grease a 9x13 inch baking pan.
- Prepare the cake batter by combining the vanilla cake mix, water, vegetable oil, and eggs in a large bowl. Whisk until smooth.
- Pour the batter into the prepared pan and bake for 28-32 minutes, or until a toothpick inserted into the center comes out clean.
- Allow the cake to cool completely at room temperature for at least 30 minutes.
- Crumble the cooled cake into a large mixing bowl using a stand mixer with a paddle attachment or by hand until fine, uniform crumbs form.
- Incorporate the vanilla frosting into the cake crumbs. Mix until the texture is dough-like and holds its shape firmly when squeezed.
- Scoop the mixture and roll into 1-inch spherical balls (approximately 30 grams each). Place the balls on a parchment-lined baking sheet.
- Refrigerate the cake balls for 1 hour or freeze for 30 minutes to ensure they are firm for the dipping process.
- Melt the pink candy melts with the shortening in a deep, microwave-safe bowl in 30-second intervals, stirring between each until the coating is completely fluid and smooth.
- Dip the tip of a lollipop stick (about 1/2 inch) into the melted candy and insert it halfway into a chilled cake ball.
- Submerge the entire cake ball into the pink coating. Lift vertically and gently tap the stick against the bowl's rim to shake off the excess coating.
- Apply white nonpareil sprinkles immediately while the coating is still wet.
- Insert the base of the sticks into a cake pop stand or a Styrofoam block and allow the pops to set at room temperature for 20 minutes before serving.
Frequently Asked Questions
Why do my cake pops keep falling off the sticks?
This usually happens if the cake balls are too heavy or if you didn’t dip the stick in candy before inserting it. Make sure you use just enough frosting to hold the crumbs together and always use that little bit of melted candy as glue.
Can I use white chocolate instead of candy melts?
Yes, but white chocolate can be a little more finicky to melt and color. If you go this route, make sure to use oil-based food coloring so the chocolate doesn’t seize up on you.
Do I have to use a box mix for this recipe?
Not at all, you can use any leftover homemade vanilla cake you have on hand. Just make sure the cake is moist enough to crumble and mix well with the frosting.
The Bottom Line
There is something so rewarding about making your own Copycat Starbucks Birthday Cake Pops and seeing your family enjoy them. They are bright, cheerful, and bring a little bit of coffee shop magic right into your own kitchen. Sweet moments don’t have to be complicated. Let’s make something wonderful together.
I hope these little pink treats bring as much joy to your kitchen as they do to ours. Happy baking and enjoy every sweet bite! Billy
Billy