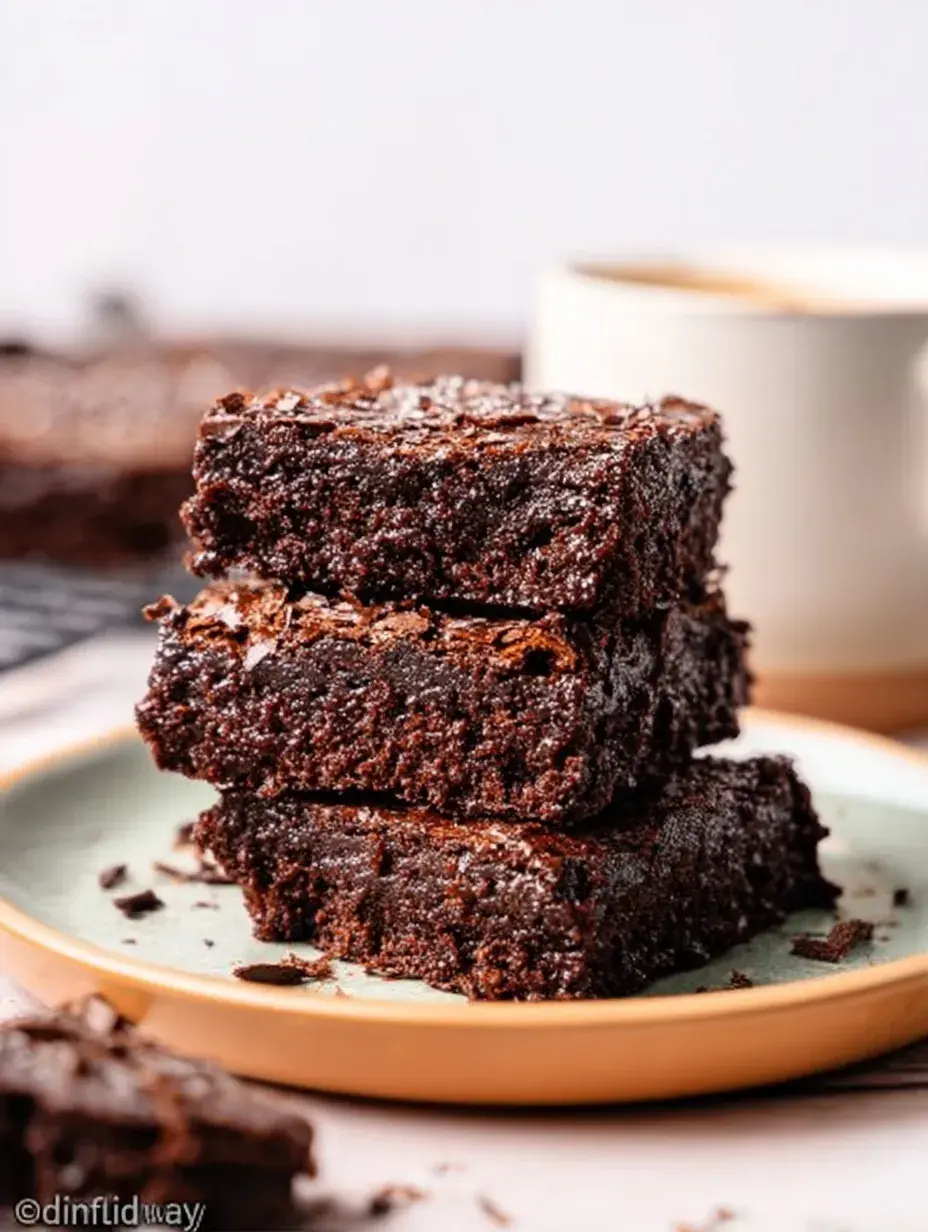
Have you ever felt like you needed a deep chocolate fix but didn’t want the heavy sugar crash that usually follows? I certainly have, especially on those rainy Sunday afternoons when the house feels a bit too quiet. This tray of Healthy Homemade Brownies has become my favorite way to satisfy that craving while keeping things a little lighter in our kitchen.
Why You Will Love This Healthy Homemade Brownies
My daughter loves being my little kitchen helper, especially when chocolate chips are involved in the process. There is something so special about watching her small hands carefully whisk the batter while her face lights up as the chocolate disappears into the mix. We usually bake these together while the rain taps on the window, filling the house with a scent that feels like a warm hug.
Honestly, I have found that these brownies are the perfect way to teach her that wholesome ingredients can still taste like a real treat. The first time we made them, she couldn’t even tell they were different from the box mix she usually begs for at the store. It has become our little secret recipe that we whip up whenever we need a cozy moment together after school.
What Makes This Healthy Homemade Brownies Special
The texture is incredibly fudgy and rich, which is often hard to achieve with gluten-free bakes. You get those perfect crispy edges while the middle stays soft and melty just like a classic brownie.
Using maple syrup instead of refined sugar gives them a much deeper flavor profile. It adds a subtle warmth that pairs beautifully with the dark chocolate and sea salt.
It is a wonderful option for families with different dietary needs since it is naturally gluten-free. Everyone can enjoy a square without feeling like they are missing out on the traditional dessert experience.
The Best Healthy Homemade Brownies Recipe
I remember the first time I tried making a lighter version of my favorite dessert and it turned out like a dry brick. After quite a bit of trial and error in my own kitchen, I finally landed on this specific balance of almond flour and coconut oil that tastes truly indulgent.
Ingredient Notes
- Almond Flour: This provides the base and creates a tender, moist crumb that flour-free recipes often lack.
- Maple Syrup: I prefer using pure maple syrup for a natural sweetness that doesn’t overwhelm the cocoa.
- Coconut Oil: Make sure it is melted but not hot so it doesn’t cook the eggs prematurely.
- Dark Chocolate Chips: Using 70% cacao or higher keeps the sugar low while adding an intense chocolate punch.
- Eggs: These are essential for the structure, so I always make sure they are at room temperature for better mixing.
Instructions
- Prep the Pan. Line your 8×8 inch baking pan with parchment paper and preheat the oven to 350°F. This ensures your brownies won’t stick and makes cleanup much easier later.
- Whisk Dry Ingredients. In a medium bowl, combine the almond flour, cocoa, salt, and baking soda. Whisk until the mixture is uniform and you don’t see any stubborn lumps of cocoa.
- Mix Wet Ingredients. In a larger bowl, whisk the eggs, syrup, coconut oil, and vanilla until smooth. You want the mixture to look glossy and well-combined before adding the flour.
- Combine Everything. Gradually fold the dry mixture into the wet ingredients using a spatula. Be gentle here so you don’t overwork the batter; stop as soon as the streaks of flour disappear.
- Add Chocolate. Fold in those dark chocolate chips until they are evenly distributed. The batter should look thick, dark, and very inviting at this stage.
- Bake and Cool. Pour it into the pan and bake for about 20 to 25 minutes. Let them cool completely in the pan so they set properly before you try to slice them.
Billy’s Tips and Mistakes to Avoid
- Tip 1: Do not overbake these or they will lose that signature fudgy center. I usually pull them out when a toothpick still has a few moist crumbs attached.
- Tip 2: Use room temperature eggs to prevent the melted coconut oil from seizing up and creating lumps.
- Tip 3: Always sift your cocoa powder if it looks clumpy, as those little bitter balls won’t always break down during whisking.
- Tip 4: Let them cool entirely before cutting, or you might end up with a bit of a gooey mess instead of clean squares.
- Tip 5: If you want a little extra crunch, my daughter loves adding a handful of chopped walnuts to her half of the tray.
Storage Tips
These keep beautifully at room temperature in an airtight container for up to 3 days. If you want them to last longer, you can pop them in the fridge for about 7 days. Personally I think they taste even fudgier when they are cold from the refrigerator.
Variations and Swaps
- Peanut Butter Swirl: Drop small spoonfuls of almond or peanut butter on top before baking and swirl with a knife for a marbled look.
- Dairy-Free: Ensure your chocolate chips are certified dairy-free to keep the whole recipe suitable for those with sensitivities.
- Holiday Spice: Add a pinch of cinnamon or even a dash of peppermint extract for a festive winter version.
Why This Recipe Works Every Time
This recipe works because it relies on the natural fats in almond flour and coconut oil to create moisture. Instead of heavy butter and white sugar, we are using ingredients that actually provide some nourishment while satisfying that deep chocolate craving.
I learned the hard way that skipping the parchment paper makes these almost impossible to lift out neatly. Now I always leave a little overhang on the sides so I can lift the whole block out once it is cool, which gives me those perfect bakery-style edges every time.
Ingredients
- 1 cup superfine almond flour
- 1/2 cup unsweetened cocoa powder
- 1/4 teaspoon sea salt
- 1/2 teaspoon baking soda
- 2 large eggs , room temperature
- 1/2 cup pure maple syrup
- 1/4 cup melted coconut oil
- 1 teaspoon vanilla extract
- 1/2 cup dark chocolate chips (70% cacao or higher)
Instructions
- Preheat the oven to 350°F (175°C) and line an 8x8 inch baking pan with parchment paper.
- In a medium bowl, whisk together the almond flour, cocoa powder, salt, and baking soda until no lumps remain.
- In a separate large bowl, whisk the eggs, maple syrup, melted coconut oil, and vanilla extract until well combined.
- Gradually fold the dry ingredients into the wet ingredients using a spatula until just combined.
- Fold in the dark chocolate chips.
- Pour the batter into the prepared baking pan and smooth the top with a spatula.
- Bake for 20 to 25 minutes, or until a toothpick inserted into the center comes out with just a few moist crumbs.
- Allow the brownies to cool completely in the pan before slicing into 12 squares.
Frequently Asked Questions
Can I use coconut flour instead of almond flour?
No, coconut flour absorbs much more liquid and would make these very dry and crumbly. I recommend sticking with superfine almond flour for the best results and texture.
How do I know when they are done?
Look for the edges to be set and the top to have a slight dullness rather than a wet shine. A toothpick should come out with a few crumbs, but not raw liquid batter.
Can I freeze these brownies?
Yes, they freeze wonderfully for up to 2 months if wrapped tightly in plastic wrap or stored in a freezer bag. I often make a double batch just to have some tucked away for busy weeks.
The Bottom Line
These Healthy Homemade Brownies are proof that you don’t need a long list of processed ingredients to make a decadent treat. Whether you are baking with your kids or just need a quiet moment with a cup of tea, this recipe delivers every time. Sweet moments don’t have to be complicated. Let’s make something wonderful together.
I hope these bring a little bit of cozy joy to your kitchen this week. My daughter is already asking when we can make our next batch for her school snack box. Billy
Billy