My daughter climbed up on her little step stool and immediately wanted to press monster eyes into every mound of dough. I was tired of baking cookies that flattened out and turned into sad, eye-less discs by the time they cooled. What helped was a simple change in technique that keeps the cookies chunky and the decorations where kids put them, so she gets to be proud of her creations and I get fewer re-dos.
Why You’ll Love This Spooky Halloween Monster Cookies
I learned that a few easy moves in the mixing bowl make decorating with tiny hands actually fun instead of frantic. These cookies hold their shape, so you can press candy eyes on right after baking and they stay put.
They use familiar ingredients from the pantry and a straightforward method, which means you can get the dough ready with a kid helper and come back later to bake and decorate together.
What Makes this Recipe Unique
- Shortcut technique: The dough starts with melted, cooled butter so you get a fast mix-in-the-bowl method that still yields a chewy cookie.
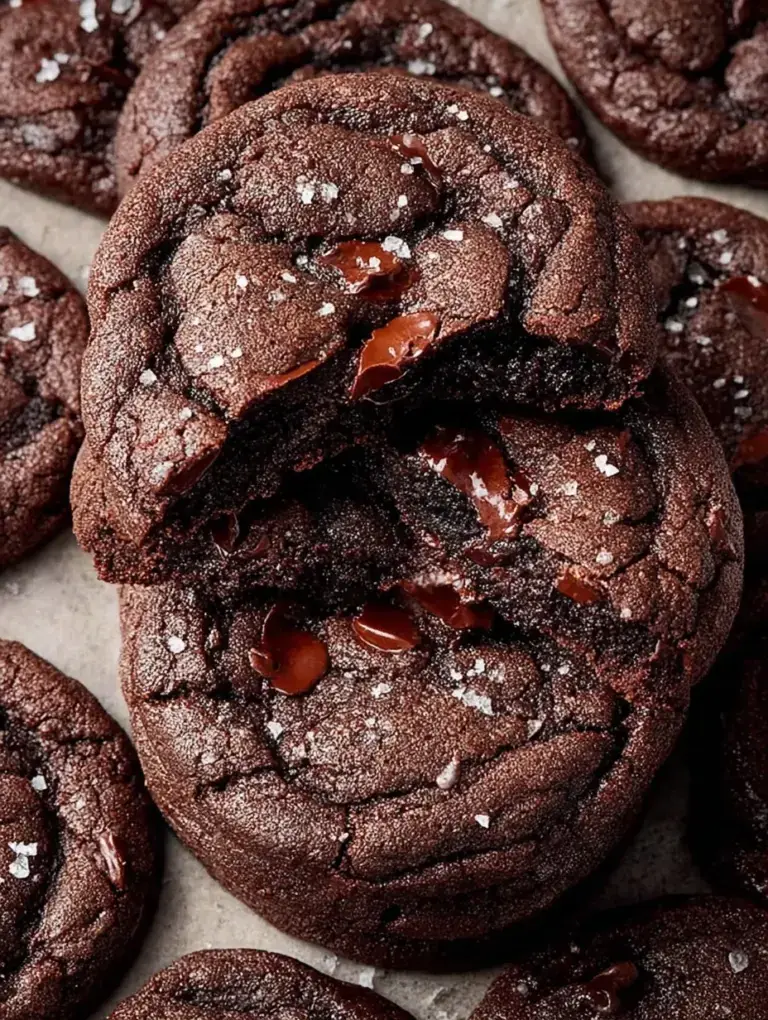
- Deep chocolate color: Black cocoa plus Dutch-process cocoa give a dramatic, spooky base without fuss.
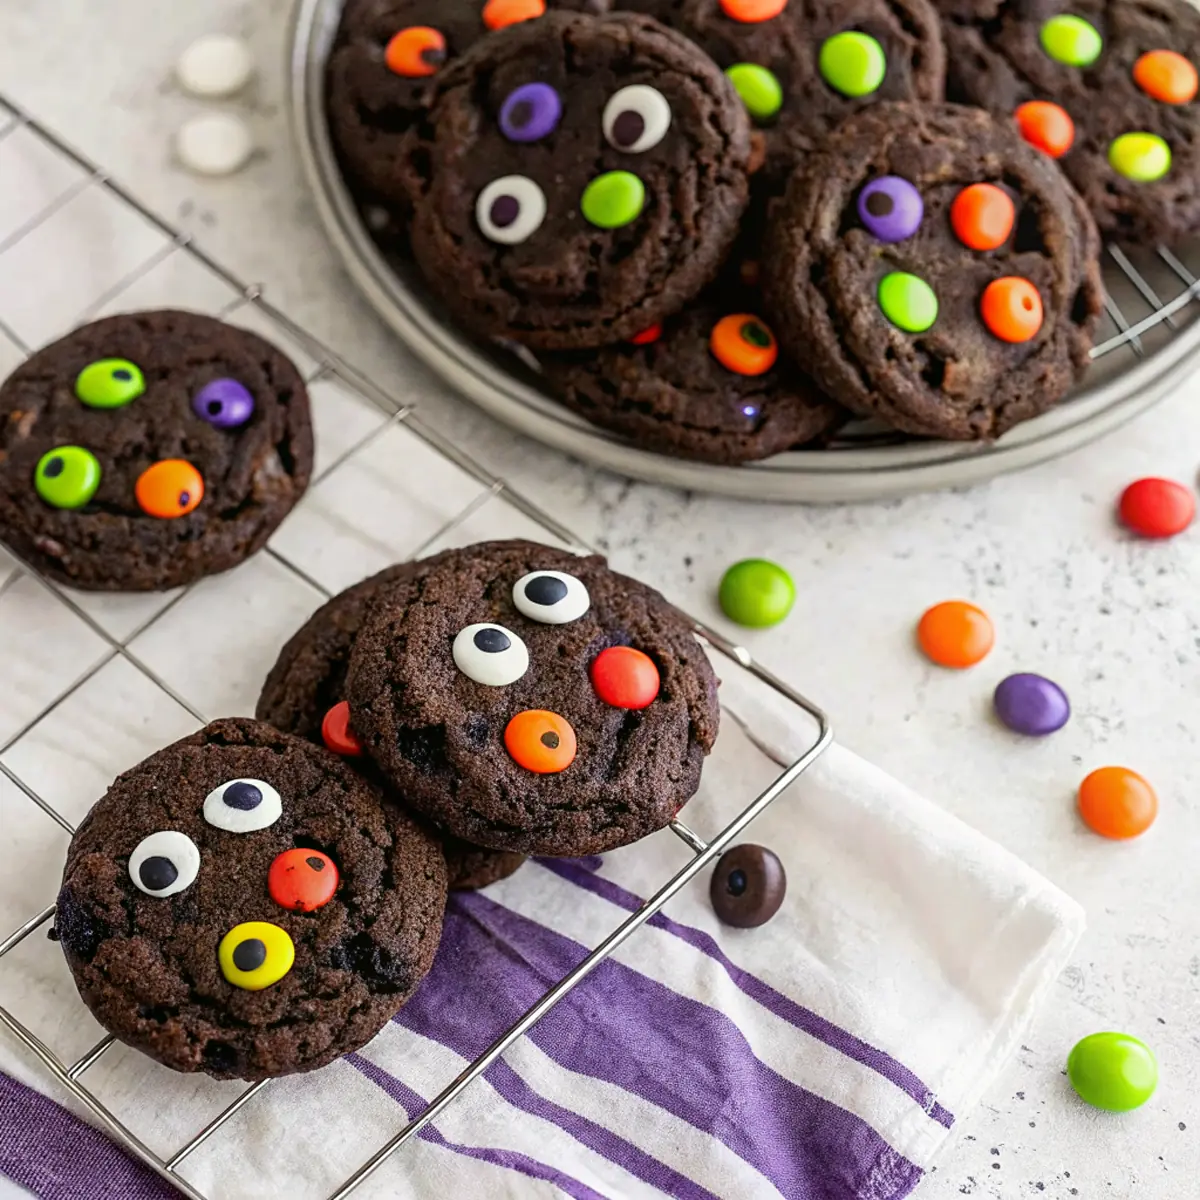
- Kid-friendly decorating: Candy monster eyes go on while cookies are warm so little decorators see instant results.
- Mix of textures: Dark chocolate and candy-coated pieces add melty and crunchy bites in each cookie.
Estimated Macros & Calories
A quick estimate to help plan your baking session. (estimated per serving, without optional ingredients)
- Calories: 320
- Protein: 4 g
- Carbohydrates: 37 g
- Fat: 18 g
- Fiber: 3 g
The Most Authentic Spooky Halloween Monster Cookies Recipe
Short, direct, and exactly the way I make them when my daughter insists on being my official taste tester.
Ingredient Notes
– Unsalted butter, melted and cooled: Gives the dough a quick, easy start and contributes to a tender, chewy texture; don’t skip cooling it first so the eggs don’t scramble.
– Dark brown sugar: Adds moisture and a deep caramel note that keeps the cookies soft.
– Granulated sugar: Balances sweetness and helps with a slight crisp on the edge.
– Fine sea salt: Brings out the chocolate flavors; measure it so it doesn’t overpower.
– Vanilla extract: Simple flavor lift; adds warmth that makes the chocolate sing.
– Large eggs: Bind the dough and give it glossy structure; add them one at a time so the batter stays smooth.
– Baking soda and baking powder: Both are used so the cookies rise correctly without getting cakey; be sure they’re evenly mixed with the dry ingredients.
– All-purpose flour: The base for chewiness; spoon and level for accurate amounts.
– Black cocoa powder + Dutch-process cocoa powder: Together they give that rich, dark color and bold chocolate flavor you want for spooky cookies.
– Instant espresso powder (optional): Small boost to the chocolate notes if you like a deeper flavor; leave it out if you prefer.
– Dark chocolate chips or chopped dark chocolate: Melty pockets of chocolate that pair well with the candy pieces.
– M&M ghoul mix or Halloween candy-coated chocolates: Fold in some so you get color and crunch without crushing all of them during mixing.
– Candy monster eyes: For decorating — press into warm cookies so they stick.
Instructions
Step 1: Warm the oven and prep pans
Preheat the oven and line a half-sheet pan with parchment paper, keeping an extra pan on hand if you’ll bake batches. Little helpers can put the parchment down while you handle the hot parts.
Step 2: Combine butter and sugars
Whisk the cooled melted butter with both sugars and the salt in a large bowl until mostly combined; a few streaks are fine. Avoid whipping air into the mix so the dough stays dense and chewy.
Step 3: Add eggs and vanilla
Beat in the vanilla and the eggs one at a time until the batter is smooth and glossy, scraping the bowl so everything is evenly incorporated. This keeps the texture even and helps later folding go smoothly.
Step 4: Sift dry ingredients together
Sift the flour, black cocoa, Dutch-process cocoa, baking soda, baking powder, and instant espresso powder in a separate bowl and stir to distribute the leaveners and cocoa. This step prevents lumps and makes folding faster.
Step 5: Fold dry into wet
Fold the dry mixture into the wet in two additions with a spatula, gently combining until no large streaks of flour remain. Go easy so you don’t overwork the dough and lose chewiness.
Step 6: Add chocolate and candy
Stir in the dark chocolate chips or chopped dark chocolate, then fold in about half of the candy-coated chocolates so the mix stays colorful without all the pieces getting crushed. Save a few extras to press into the tops later.
Step 7: Chill the dough
Cover the bowl and chill the dough briefly, preferably longer or overnight for more flavor and less spread. Chilled dough makes it easier to keep little hands from flattening the cookies during portioning.
Step 8: Portion the dough
Portion the dough onto the prepared pan using a small scoop or rounded spoon, leaving space between mounds so they can spread slightly. Press a few extra candy pieces into the tops now if you want a colorful surface.
Step 9: Bake until set
Bake in the center of the oven until the edges are set and the centers still look soft; shorter baking yields a softer center, longer gives a chewier edge. Rotate the pan halfway through so the color is even.
Step 10: Decorate while warm
As soon as the cookies come out, gently press one or two candy monster eyes into each warm cookie so they adhere. Let the cookies cool on the pan briefly, then transfer to a rack to finish cooling.
Step 11: Store or freeze
Store baked cookies in an airtight container layered with parchment to keep them fresh, or freeze scooped uncooked dough on a tray and transfer to a bag for longer storage. Frozen dough can be baked straight from the freezer with a tad more time.
Tips and Mistakes to Avoid
– Chill the dough so the cookies don’t spread too thin when kids press decorations; it also makes scooping neater.
– Don’t overmix after adding flour; stopping when there are no big streaks keeps cookies chewy.
– Press eyes in while cookies are still warm so they stick without extra melting or glue.
– Save some candy pieces to press on top after portioning so they show up on the surface.
Storage Tips
Keep baked cookies in an airtight container at room temperature for a few days, layered with parchment to prevent sticking. If you want to keep dough longer, freeze scooped dough on a tray and then move to a freezer bag for a couple of months; bake from frozen and add a little extra oven time. To refresh cooled cookies, warm briefly in a low oven to soften the chocolate.
Variations and Substitutions
– Swap the dark chocolate for milk or semi-sweet chocolate if your family prefers a sweeter bite.
– Use different candy-coated mixes for color changes, or leave them out for plain chocolate chunk cookies.
– For a gluten-free option, use a reliable all-purpose gluten-free blend in place of the flour and measure carefully to match texture.
– For a dairy-free choice, try a stick-style vegan butter substitute that melts and cools similarly to keep the method the same.
Why This Recipe Is The Real Deal
What sells these cookies in my house is how fast the dough comes together and how well they hold up to decorating, which matters when a small helper wants instant results. I usually have dough mixed and chilling while my daughter sets the table for dessert, and that little runaround makes the whole process feel speedy.
Chilling does add wait time, yes, but the hands-on portion is quick and the payoff is cookies that look like the work of tiny decorators rather than a melted mess.
The Bottom Line
These monster cookies fix the annoying problem of cookies that spread and lose their personality, and they let kids take real pride in the decorating. Try them with a little helper, then tell me which eye placement got the biggest cheer.
Billy Mackenzie
Founder of MerryDessert.com
Simple, joyful homemade desserts — sweet moments, made with love.

Spooky Halloween Monster Cookies
Ingredients
Cookie Dough
- 1 cup unsalted butter, melted and cooled (2 sticks)
- 7/8 cup dark brown sugar, packed
- 2/3 cup granulated sugar
- 1 tsp fine sea salt
- 1 tbsp vanilla extract
- 2 large eggs
- 1 tsp baking soda
- 1/4 tsp baking powder
- 2 1/4 cups all-purpose flour, spooned and leveled
- 1/2 cup black cocoa powder
- 2 tbsp Dutch-process cocoa powder
- 1 tsp instant espresso powder (optional, enhances chocolate flavor)
- 1 1/4 cups dark chocolate chips or chopped dark chocolate
Decoration
- 1 cup M&M ghoul mix or Halloween candy-coated chocolates
- 30 candy monster eyes or as many as you like to decorate
Instructions
Preparation Steps
- Preheat oven to 350°F. Line a half-sheet pan with parchment paper and set aside. If you plan to bake multiple batches, have an extra pan ready.
- In a large mixing bowl whisk the cooled melted butter with both sugars and the salt until mostly combined. You do not want to cream air into the mixture; a few streaks are fine.
- Beat in the vanilla and the eggs one at a time, mixing just until the batter is smooth and glossy. Scrape down the bowl so everything is evenly incorporated.
- In a separate bowl sift together the flour, black cocoa, Dutch-process cocoa, baking soda, baking powder, and instant espresso powder. Stir to distribute the leaveners and cocoa evenly.
- Fold the dry ingredients into the wet in two additions with a spatula, gently combining until no large streaks of flour remain. Avoid overworking to keep the cookies chewy.
- Stir in the dark chocolate chips with a spatula, then fold in about half of the M&Ms so the mix is distributed but not crushed.
- Cover the bowl and chill the dough in the refrigerator for at least 30 minutes, preferably 2 hours or overnight — chilled dough spreads less and develops more flavor.
- Using a 3-tablespoon scoop (or two rounded tablespoons), portion dough onto the prepared pan leaving 2–3 inches between mounds. Press a few extra M&Ms into the tops of each mound now if you like a colorful surface.
- Bake in the center of the preheated oven for 11–14 minutes: 11–12 minutes yields a softer center, 13–14 minutes gives a chewier edge. If baking from frozen add 1–2 minutes. Rotate the pan halfway through baking for even color.
- As soon as the cookies come out of the oven, gently press 1–2 candy monster eyes into each warm cookie so they adhere. Let cookies cool on the pan for 6–8 minutes, then transfer to a wire rack to finish cooling.
- Store baked cookies in an airtight container layered with parchment for up to 3 days at room temperature, or freeze unbaked scooped dough on a tray and transfer to a freezer bag for up to 3 months.