Every Christmas cookie tray needs a showstopper.
Not necessarily the fanciest cookie. Not the most complicated one either. Just the cookie that makes people stop, point, and say, “How did you make those?”
For me, that’s always been Christmas Pinwheel Cookies.
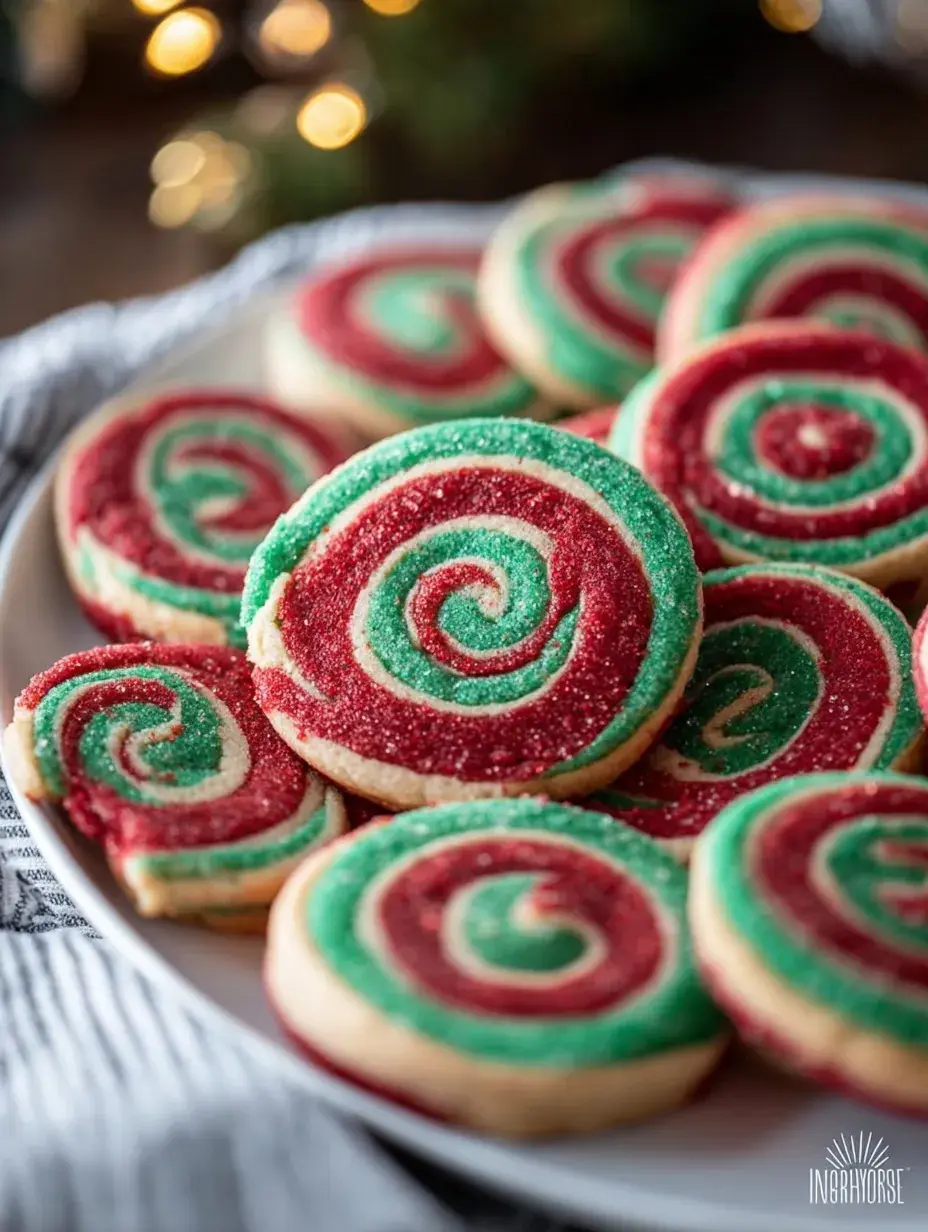
There’s something undeniably cheerful about those bright red and white swirls. They look like they came straight from a holiday bakery window, yet they’re surprisingly simple once you break the process down into steps. Every slice reveals a festive spiral that’s guaranteed to make any cookie platter look a little more magical.
And if you’re baking with kids, get ready. Watching the dough roll into a giant swirl is usually everyone’s favorite part.
Why These Cookies Belong On Every Holiday Cookie Tray
Christmas baking isn’t just about flavor.
It’s about creating memories and traditions.
These cookies deliver both. They have the classic buttery sugar cookie flavor everyone loves, a hint of peppermint that feels perfectly festive, and a colorful swirl that instantly says Christmas.
They’re also wonderful for gifting because they hold their shape beautifully and stay fresh for several days.
Ingredients You’ll Need
For The Cookie Dough
- Unsalted butter
- Granulated sugar
- Egg
- Vanilla extract
- Peppermint extract
- All-purpose flour
- Baking powder
- Salt
For The Holiday Swirl
- Red gel food coloring
For Decoration
- Festive nonpareil sprinkles
Ingredient Notes
Use Gel Food Coloring
Gel coloring creates a vibrant red color without making the dough sticky.
Peppermint Is Optional
The peppermint flavor is subtle, but it adds a wonderful holiday touch.
Chill The Dough Properly
Cold dough is much easier to roll, stack, and slice.
Step-By-Step Instructions
Step 1: Make The Dough
Cream together the butter and sugar until light and fluffy. Add the egg, vanilla extract, and peppermint extract.
Step 2: Add Dry Ingredients
Whisk together the flour, baking powder, and salt, then gradually mix into the wet ingredients until a dough forms.
Step 3: Divide The Dough
Separate the dough into two equal portions.
Step 4: Color One Portion
Add red gel food coloring to one half of the dough and knead until evenly colored.
Step 5: Chill
Wrap both dough portions and refrigerate for at least one hour.
Step 6: Roll The Dough
Roll each dough portion into matching rectangles on parchment paper.
Step 7: Stack The Layers
Carefully place the red dough over the plain dough, aligning the edges.
Step 8: Create The Spiral
Starting from the long side, tightly roll the dough into a log.
Step 9: Add Sprinkles
Roll the outside of the log in festive sprinkles.
Step 10: Chill Again
Wrap the log and refrigerate until firm.
Step 11: Slice
Cut the dough into even rounds to reveal the pinwheel pattern.
Step 12: Bake
Bake until the edges are set and the cookies are lightly golden.
Step 13: Cool
Allow the cookies to cool completely before serving.
The Secret To Perfect Pinwheel Cookies
The most important part of this recipe is patience.
It can be tempting to skip the chilling steps, but properly chilled dough creates cleaner spirals and sharper edges. If the dough becomes too soft while rolling, simply place it back in the refrigerator for a few minutes.
Trust me—it’s worth the extra time.
Fun Variations
Green And Red Pinwheels
Divide the dough into thirds and create both red and green holiday spirals.
Candy Cane Version
Increase the peppermint flavor and add crushed candy canes to the sprinkle coating.
Chocolate Pinwheels
Replace the red coloring with cocoa powder for a chocolate-and-vanilla swirl.
Rainbow Celebration Cookies
Use multiple colors for birthdays and special occasions throughout the year.
Storage Tips
Store the baked cookies in an airtight container at room temperature for up to 5 days.
The dough log can also be refrigerated for several days before slicing and baking, making these cookies perfect for holiday prep.
Frequently Asked Questions
Can I make the dough ahead of time?
Yes. The dough log can be prepared up to 3 days in advance.
Why did my pinwheel pattern flatten?
The dough was likely too warm before baking. Chilling thoroughly helps maintain the shape.
Can I freeze the cookie log?
Absolutely. Freeze the wrapped log for up to 2 months and slice when ready to bake.
Do I have to use peppermint extract?
Not at all. The cookies are delicious with vanilla alone.
Final Thoughts
Some Christmas cookies are all about flavor. Others are all about presentation.
These Christmas Pinwheel Cookies give you both.
They’re buttery, festive, fun to make, and guaranteed to stand out on any holiday dessert table. Whether you’re baking with family, preparing cookie gift boxes, or simply looking for a recipe that captures the spirit of the season, these colorful little swirls never disappoint.
And honestly, seeing those perfect red-and-white spirals come out of the oven feels a little bit like Christmas magic every single time.

Ingredients
- 1 cup unsalted butter, softened
- 1 cup granulated white sugar
- 1 large eg g
- 1.5 teaspoons vanilla extract
- 0.5 teaspoon peppermint extract
- 2.5 cups all -purpose flour
- 0.5 teaspoon baking powder
- 0.25 teaspoon sal t
- 0.5 teaspoon red gel food coloring
- 0.25 cup festive nonpareil sprinkles
Instructions
- In a large bowl, cream together the softened butter and granulated sugar until light and fluffy.
- Beat in the egg, vanilla extract, and peppermint extract until well combined.
- Whisk together the flour, baking powder, and salt in a separate bowl.
- Gradually add the dry ingredients to the wet ingredients, mixing until a stiff dough forms.
- Divide the dough into two equal portions.
- Add the red gel food coloring to one portion and knead until the color is uniform.
- Wrap each dough ball in plastic wrap and refrigerate for at least 1 hour.
- Roll out the vanilla dough on a piece of parchment paper into a 12x9 inch rectangle.
- Roll out the red dough on a separate piece of parchment paper into a 12x9 inch rectangle.
- Carefully flip the red dough onto the vanilla dough and remove the top layer of parchment.
- Roll the stacked dough tightly into a log starting from the long edge.
- Roll the log in festive nonpareil sprinkles to coat the outside.
- Wrap the log in plastic and refrigerate for at least 1 more hour until firm.
- Preheat oven to 350°F (175°C) and line baking sheets with parchment paper.
- Slice the log into 1/4-inch thick rounds and place on baking sheets 2 inches apart.
- Bake for 8 to 10 minutes until the edges are just set but not browned.
- Cool on the baking sheet for 5 minutes before transferring to a wire rack.