My daughter saw the colorful candy bag on the counter and practically sprinted to get her step stool. She loves helping me sort the colors, though half of them usually end up in her mouth before they make it into the dough. It is these little kitchen afternoons that make baking so much more than just making a snack.
Why You Will Love This M&M Cookie Bars
I remember the first time I tried making these because I was out of clean cookie sheets but had a massive craving for something chewy. I just pressed everything into a single pan, hoping for the best, and honestly, they turned out better than any individual cookie I had ever scooped.
They have that dense, buttery center that stays soft for days, which is a big deal in our house where treats need to last. After testing this recipe several times, I found that skipping the mixer and just stirring by hand gives them the perfect fudgy texture that my family loves.
What Makes This M&M Cookie Bars Special
- The Extra Egg Yolk: Using one whole egg plus an extra yolk is my secret for getting that ultra-chewy, fudge-like texture.
- Melted Butter Base: By melting the butter instead of creaming it, you get a much denser bar that feels more like a blondie.
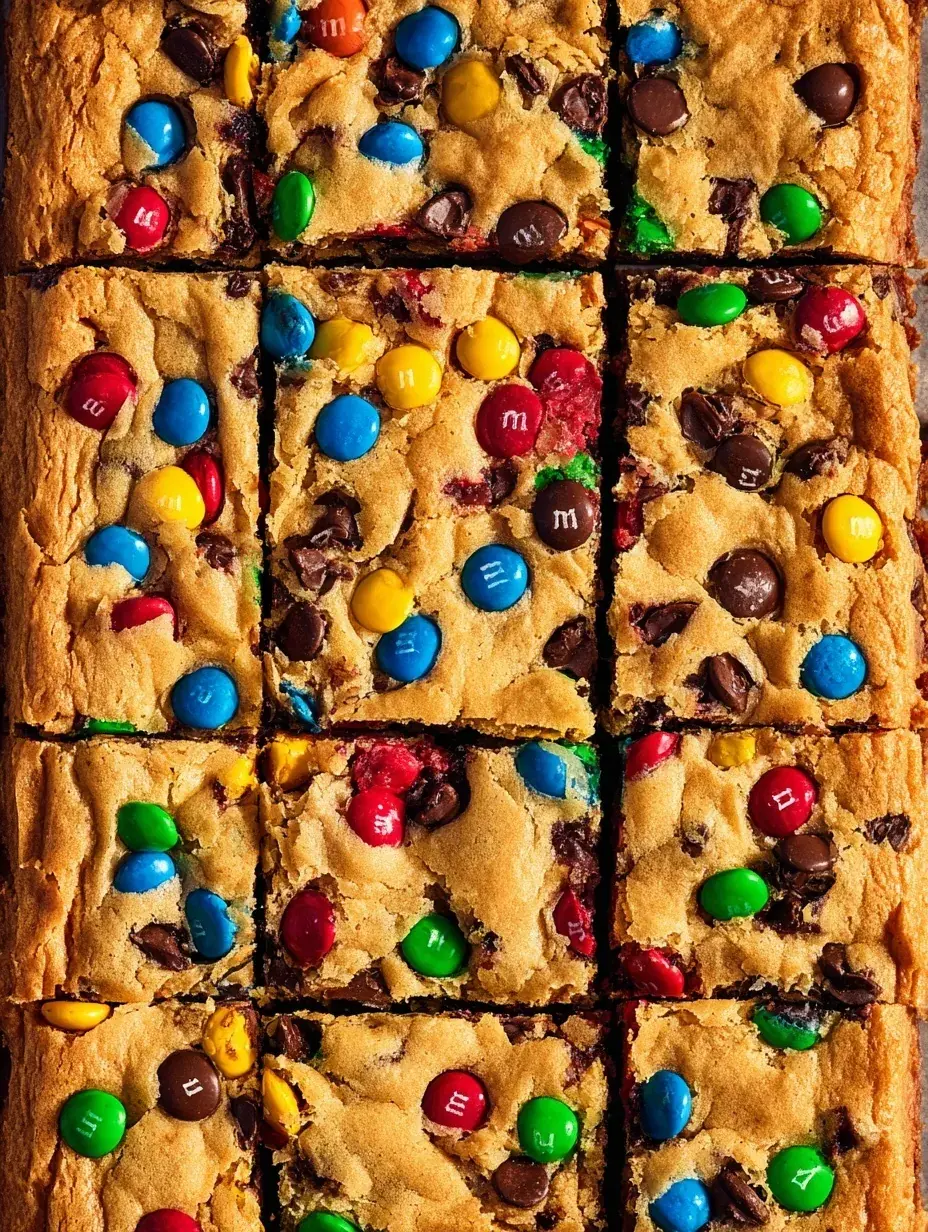
- Vibrant Colors: Those bright candy shells add a crunch that you just do not get with regular chocolate chips alone.
- One-Pan Simplicity: You do not have to worry about dough spreading or multiple baking rounds because everything goes in at once.
The Best M&M Cookie Bars Recipe
I usually make these on a quiet Sunday afternoon when we want something sweet but I do not want to spend an hour at the oven. They fill the whole house with that warm vanilla smell that makes everything feel a bit more cozy.
Ingredient Notes
- Melted Butter: This creates a dense and chewy base rather than a cakey one, just make sure it is not boiling hot when you add the sugar.
- Brown Sugar: I use a full cup of packed brown sugar because it adds moisture and that deep caramel flavor we all love.
- Vanilla Extract: I always add a generous tablespoon because it balances the sweetness of the chocolate perfectly.
- Egg Yolk: Adding that second yolk makes the bars rich and prevents them from becoming too crumbly.
- M&M Candies: You can use the classic milk chocolate ones or even the peanut butter version if you want to change things up.
Instructions
- Prep and Whisk. Preheat your oven to 325 degrees and line your pan with parchment paper so you can lift the bars out easily later. Whisk the flour, baking soda, and salt together until the mixture is light and combined.
- Mix the Butter. Stir the melted butter and both sugars together in a large bowl until the mixture looks smooth and no lumps remain. You can do this by hand with a sturdy whisk or a wooden spoon.
- Add Liquids. Whisk in the egg, the extra egg yolk, and the vanilla extract vigorously. You want the batter to look slightly shiny and well-emulsified before you move on to the dry ingredients.
- Combine Ingredients. Gently fold the flour mixture into the wet ingredients using a spatula. Stop mixing as soon as you see only a few small streaks of flour left to keep the bars tender.
- Fold in Candies. Stir in your chocolate chips and most of the candies, saving a handful for the top. The dough will be quite thick and heavy at this point.
- Press and Bake. Spread the dough into your prepared pan and press the remaining candies into the top for a bright finish. Bake for about 25 minutes until the edges are golden but the center still looks a little soft.
Billy’s Tips and Mistakes to Avoid
- Do not overbake these or they will lose that signature chewiness. I usually pull mine out when the center still looks slightly underdone because they firm up as they cool.
- Always use parchment paper with an overhang. The first time I made M&M Cookie Bars, I didn’t use paper and they were so hard to get out of the pan in one piece.
- Measure your flour by spooning it into the cup rather than scooping the cup into the bag. Scooping packs the flour down and can make your bars dry and tough.
- Wait at least an hour before slicing. If you cut them while they are hot, they will fall apart and you will miss out on those clean, pretty edges.
- Let your daughter help press the candies into the top. It is a great way to get kids involved without them being near the hot stove.
Storage Tips
You can keep these in an airtight container at room temperature for up to 4 days. If you want them to stay extra soft, toss a piece of white bread into the container with them. They also freeze beautifully for up to 3 months if you wrap them individually in plastic wrap.
Variations and Swaps
- Swap the standard candies for red and green ones during December to make these a festive holiday treat.
- If you need a gluten-free version, I have had great success using a 1-to-1 gluten-free flour blend in this exact recipe.
- Add half a cup of chopped walnuts or pecans if you like a bit of saltiness and extra crunch in your bars.
Why This Recipe Works Every Time
The ratio of brown sugar to granulated sugar is what really makes the difference here. The extra moisture from the brown sugar ensures that the bars stay soft even after they have cooled completely on the counter.
I learned the hard way that using a lower oven temperature like 325 degrees is essential. When I tried baking them at 350, the edges got too crispy before the middle had a chance to set properly, so stick to the lower heat for the best results.
Ingredients
- 2 1/4 cups all -purpose flour
- 1/2 teaspoon baking soda
- 1/2 teaspoon fine sea salt
- 3/4 cup unsalted butter, melted and cooled slightly
- 1 cup light brown sugar, packed
- 1/2 cup granulated white sugar
- 1 tablespoon pure vanilla extract
- 1 large eg g
- 1 large egg yolk
- 1 cup semi -sweet chocolate chips
- 1 cup M &M candies, divided
Instructions
- Preheat the oven to 325°F (165°C) and line a 9x9 inch baking pan with parchment paper, leaving an overhang on the sides.
- In a medium bowl, whisk together the flour, baking soda, and salt until well combined.
- In a large bowl, stir together the melted butter, brown sugar, and granulated sugar until no lumps remain.
- Add the egg, egg yolk, and vanilla extract to the butter mixture and whisk vigorously until the batter looks shiny.
- Fold the dry ingredients into the wet ingredients using a spatula until just a few streaks of flour remain.
- Stir in the chocolate chips and 3/4 cup of the M&M candies.
- Press the dough evenly into the prepared baking pan using a spatula or floured hands.
- Sprinkle the remaining 1/4 cup of M&M candies over the top and press them lightly into the surface.
- Bake for 25 to 30 minutes, or until the edges are golden brown and the center is set but still soft.
- Remove from the oven and allow to cool completely in the pan for at least 1 hour before lifting out by the parchment and slicing into 16 bars.
Frequently Asked Questions
Why are my cookie bars hard?
This usually happens if the flour was over-packed during measuring or if the bars stayed in the oven for just a few minutes too long. Try pulling them out while the center still has a tiny bit of a wobble.
Can I use a different size pan?
I recommend a 9×9 inch pan for the perfect thickness. If you use a 9×13 pan, they will be much thinner and you will need to reduce the baking time significantly to avoid burning them.
Can I make the dough ahead of time?
Yes, you can press the dough into the pan, cover it tightly, and keep it in the fridge overnight. Just let it sit at room temperature for about 20 minutes before you pop it into the oven.
The Bottom Line
These bars are such a classic for a reason and they never fail to bring a smile to my daughter’s face. Whether you are taking them to a potluck or just enjoying one with a cold glass of milk, they are pure comfort in a pan. Sweet moments don’t have to be complicated. Let’s make something wonderful together.
I hope your kitchen fills with the same sweet chocolate smell that ours did this afternoon. Happy baking to you and your family! Billy
Billy