I will admit, the first time I tried to make a holiday bark, I rushed the cooling process and ended up with a sticky, melted mess all over my counter. My daughter just laughed and helped me scrape it into bowls, but I learned my lesson about patience. Now, this Spooky Halloween Oreo Bark is our favorite tradition because it is virtually impossible to mess up if you just let the fridge do the work.
Why You Will Love This Spooky Halloween Oreo Bark
A few Octobers ago, we had a sudden rainy afternoon and nothing planned for the upcoming school party. I looked in the pantry and saw a half-empty bag of chocolate chips and some leftover cookies from the weekend. We decided to just melt everything together and throw on some scary eyes to see what would happen.
It turned out to be the hit of the classroom, and I realized I did not need to spend hours at the stove to make something memorable. Personally, I have found that the best treats are the ones where my daughter gets to be the lead decorator while I handle the microwave.
What Makes This Spooky Halloween Oreo Bark Special
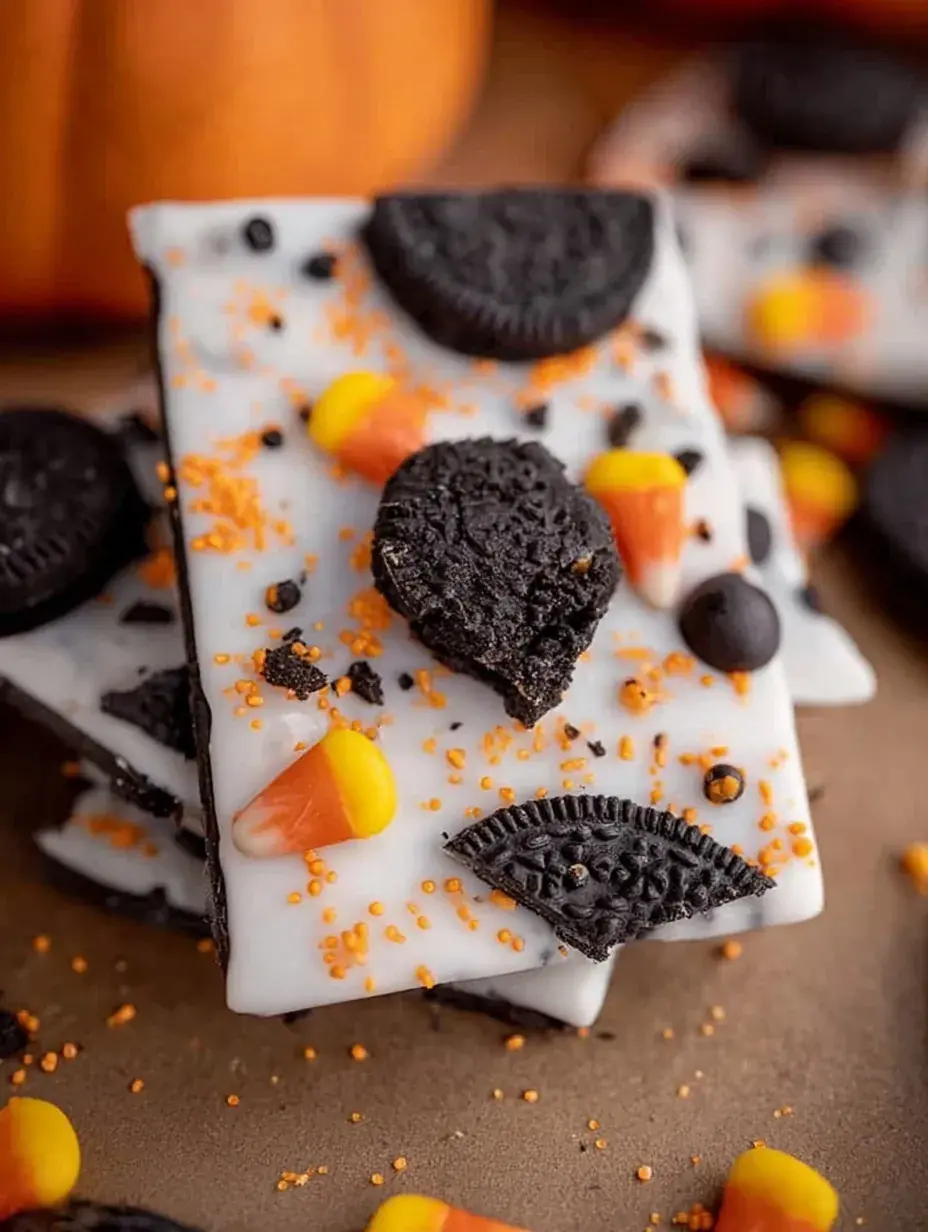
This isn’t just a basic candy bar; it is a crunchy, creamy landscape of holiday fun that looks much more impressive than it actually is. It is the kind of treat that makes the house feel festive in under an hour.
- Key feature: The contrast between the smooth white chocolate and the chunky cookie bits creates a texture that everyone loves.
- Ease factor: You do not need an oven or any fancy equipment, making it a stress-free project for a busy October night.
- Kid-friendly note: Letting little hands scatter the candy eyes and sprinkles is the best part of the whole process.
It is the perfect balance of creamy and crunchy for a holiday snack.
The Best Spooky Halloween Oreo Bark Recipe
Honestly, I make this every year now because it saves me when I forget about a bake sale until the night before. It is such a relief to have a recipe that looks this good with so little effort.
Ingredient Notes
- White Candy Melts: These melt smoother than standard chips and set up firm enough to snap perfectly.
- Oreo Cookies: I like to keep the pieces a bit chunky so you get that classic chocolate crunch in every bite.
- Orange and Purple Melts: These add the vibrant Halloween colors without needing to mess around with liquid food coloring.
- Edible Candy Eyes: These are the secret to making the bark look spooky and give the dessert a funny little personality.
- Halloween Sprinkles: I prefer the ones with little bats or pumpkins to really lean into the seasonal theme.
Instructions
- Prepare the Pan. Line a large baking sheet with parchment paper or a silicone mat so the chocolate does not stick. This ensures your bark will lift off easily once it is cold.
- Melt the Base. Heat your white candy melts in short bursts in the microwave, stirring every thirty seconds until the mixture is silky and smooth. It should look like thick, glossy cream.
- Spread the Chocolate. Pour the white chocolate onto your prepared sheet and smooth it out until it is about a quarter-inch thick. You want an even layer so the pieces are easy to break later.
- Add the Cookies. Press your crushed cookie pieces into the wet chocolate while it is still warm and soft. This helps them stay put once the Spooky Halloween Oreo Bark hardens.
- Drizzle the Colors. Melt your orange and purple candy and flick it across the top with a spoon for a messy, artistic look. There is no wrong way to do this part, so just have fun with it.
- Decorate and Chill. Scatter your sprinkles and eyes over the top before placing the tray in the fridge for thirty minutes. It needs to be completely firm and cold before you try to snap it into pieces.
Billy’s Tips and Mistakes to Avoid
- Tip 1: Don’t over-crush the cookies into dust or they will just turn the white chocolate grey. I learned that the hard way during my second batch ever.
- Tip 2: Use a warm knife if you want clean edges, or just use your hands for a more rustic, jagged look.
- Tip 3: If you skip the stirring between microwave intervals, the candy melts can burn in the center even if the edges look solid.
- Tip 4: Make this a day ahead and keep it in the fridge so it stays crisp and snap-worthy for your guests.
- Tip 5: Let your kids pick where the eyes go to give the bark a silly, chaotic look that fits the holiday perfectly.
Storage Tips
Keep your bark in an airtight container at room temperature for up to 5 days, though I prefer the fridge if your kitchen is warm. It also stays fresh in the refrigerator for about 10 days if you want to keep it extra crispy. You can even freeze it for up to 2 months in a freezer-safe bag.
Variations and Swaps
- Swap the white chocolate for dark chocolate if you want a moodier, midnight-themed look for your party.
- Use gluten-free sandwich cookies to make this a treat that everyone at the gathering can safely enjoy.
- Add a handful of pretzels for a salty-sweet version that my daughter personally thinks is even better than the original.
Why This Recipe Works Every Time
This bark works because it relies on simple ingredients that are already delicious on their own. By layering textures and bright colors, you get a professional-looking result without the stress of traditional candy making.
After testing this recipe several times, I realized that the thickness of the chocolate is the real key to success. If it is too thin, it shatters too easily, but a quarter-inch gives you that satisfying snap I was looking for.
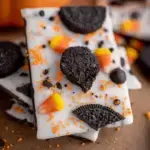
Ingredients
- 16 ounces white candy melts or white chocolate chips
- 12 Oreo cookies , coarsely crushed
- 1/4 cup orange candy melts
- 1/4 cup purple candy melts
- 2 tablespoons Halloween -themed sprinkles
- 24 edible candy eyes
Instructions
- Line a large baking sheet with parchment paper or a silicone baking mat.
- Melt the white candy melts in a microwave-safe bowl in 30-second intervals, stirring between each, until completely smooth.
- Spread the melted white chocolate onto the prepared baking sheet in an even layer approximately 1/4 inch thick.
- Evenly distribute the crushed Oreo pieces over the surface of the wet chocolate.
- Melt the orange and purple candy melts in separate small bowls according to package directions.
- Drizzle the orange and purple melted candy over the cookie layer using a spoon or piping bag.
- Scatter the Halloween sprinkles and edible candy eyes across the bark, pressing down lightly to ensure they adhere.
- Place the baking sheet in the refrigerator for 30 minutes or until the chocolate is completely firm.
- Break the chilled bark into irregular pieces by hand or with a sharp knife before serving.
Frequently Asked Questions
Can I use regular white chocolate chips instead of melts?
Yes, you can, but they can be a little softer at room temperature than candy melts. I usually add a tiny bit of coconut oil if I am using chips to help them melt more smoothly and set more firmly.
Why did my candy eyes fall off the bark?
You have to make sure you press them gently into the chocolate while it is still wet. If the base starts to set before you get to the eyes, they won’t have anything to grab onto as it cools.
How do I get the colors to drizzle more easily?
Make sure your colored melts are nice and warm right before you use them. If they are too thick, add a drop of vegetable oil to thin them out until they fall easily from your spoon.
The Bottom Line
Halloween should be more about the fun and less about the fuss in the kitchen. This bark is a simple way to bring a little bit of joy to your family without spending all day over a hot stove. Sweet moments don’t have to be complicated. Let’s make something wonderful together.
I hope your kitchen is filled with giggles and just the right amount of spooky fun this week. Happy haunting and happy baking! Billy
Billy