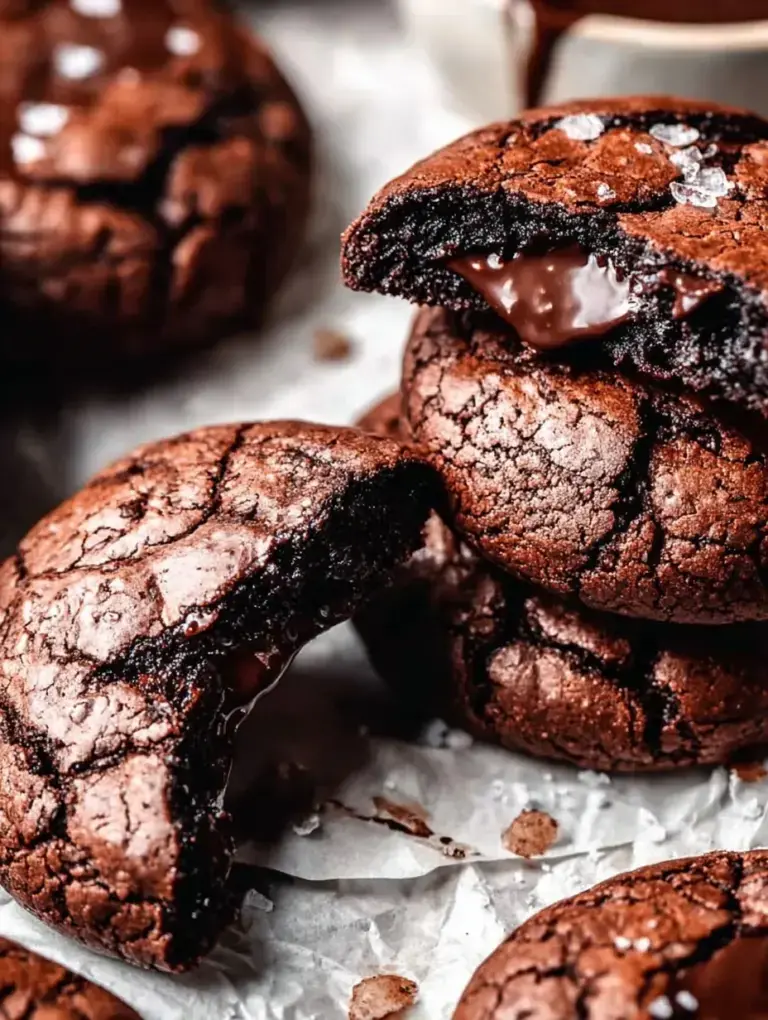
My daughter spotted the cocoa powder on the counter and immediately started dusting her nose with it while reaching for the whisk. She knows that when we make Chocolate Crinkle Cookies, the Christmas season has officially begun in our house. We spent the whole afternoon watching the oven light, waiting for those beautiful cracks to appear in the snowy sugar.
Why You Will Love This Chocolate Crinkle Cookies
I first discovered these at a neighborhood cookie swap years ago, and I remember being so surprised that something that looked like a professional brownie could be so simple to make. I honestly expected a complicated dough, but it was just a few pantry staples mixed together in one bowl. The contrast of the dark chocolate against the white sugar was so striking that I knew I had to get the recipe right for my own family.
After testing a few versions in my own kitchen, I found that letting the dough chill for a long time is the real secret to that perfect crinkle look. It is a discovery that changed my holiday baking routine forever because it allows me to prep everything the night before. Personally I have found that the longer they sit in the fridge, the better the chocolate flavor becomes.
What Makes This Chocolate Crinkle Cookies Special
- Deep Cocoa Flavor: Using a full cup of unsweetened cocoa makes these taste like the richest brownie you have ever had.
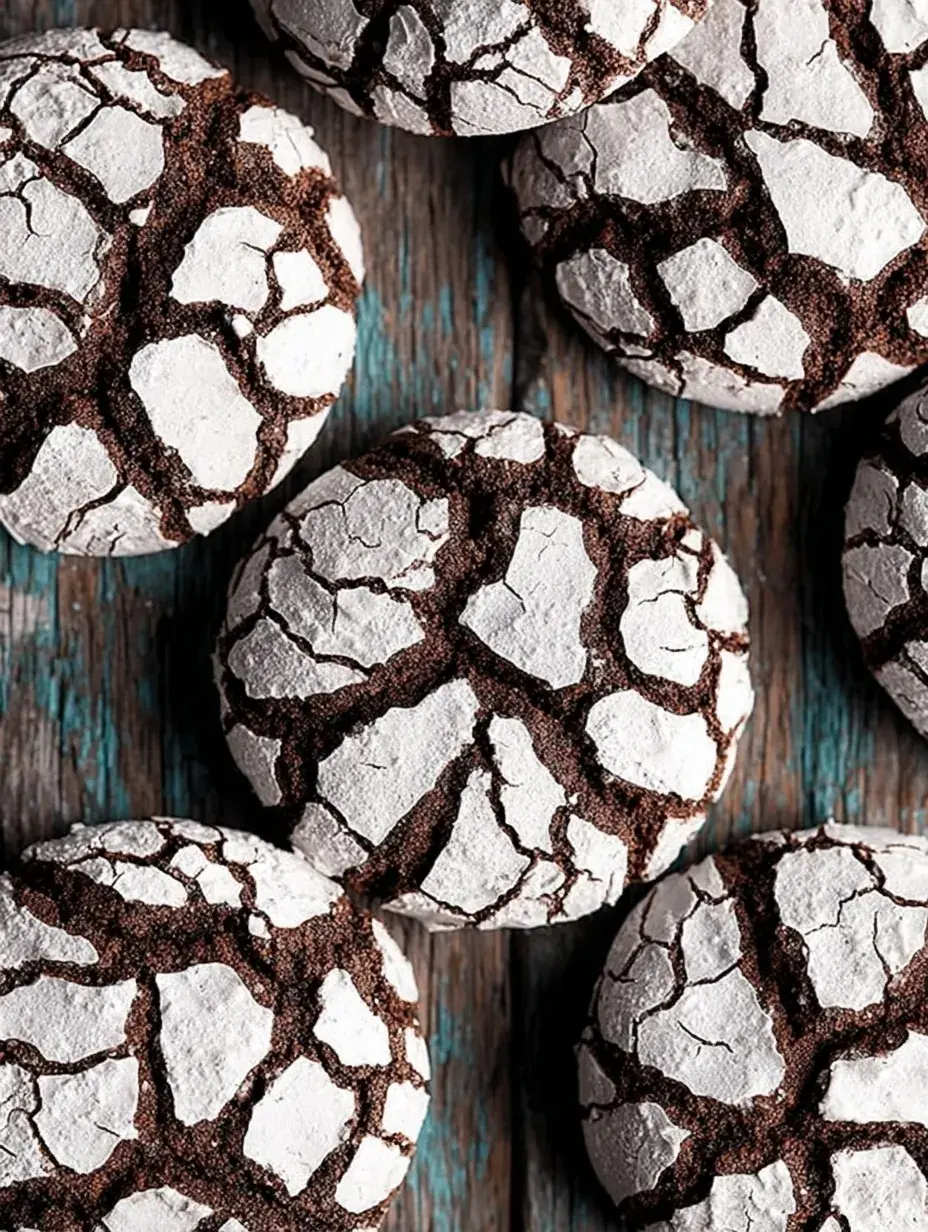
- Snowy Contrast: Rolling the dough generously in powdered sugar creates that beautiful black and white look that pops on any platter.
- Soft Fudgy Center: The high egg count and oil ensure the middle stays gooey even after the edges get a little crisp.
- Make-Ahead Ease: You can prep the dough a day early, which is a lifesaver during the busy holiday rush.
The Best Chocolate Crinkle Cookies Recipe
I make these every December without fail because they are the one treat my daughter specifically asks for when we start decorating the tree. They are simple, reliable, and always the first thing to disappear from the dessert plate.
Ingredient Notes
- Unsweetened Cocoa Powder: This provides the deep chocolate base and the dark color that contrasts with the sugar.
- Vegetable Oil: I prefer using oil over butter here because it keeps the cookies soft and fudgy for days.
- Large Eggs: These act as the binder and give the cookies their characteristic cake like texture.
- Baking Powder: This is essential for creating the lift that makes the cookies crack while baking.
- Confectioners Sugar: Do not skip the heavy coating, as this is what creates the beautiful crinkle effect.
Instructions
- Mix Base. Whisk together the cocoa, granulated sugar, and oil in a medium bowl until the mixture looks smooth and dark. It should look like a thick chocolate paste.
- Add Liquids. Beat in the eggs one at a time before stirring in the vanilla extract for flavor. Make sure each egg is fully incorporated before adding the next one.
- Combine Dry. Whisk the flour, baking powder, and salt in a separate bowl and then gradually stir them into the chocolate mixture. The dough will be very soft and slightly sticky at this point.
- Chill Dough. Cover the bowl tightly and refrigerate for at least 4 hours or overnight. This step is mandatory because the dough must be firm enough to handle without melting in your hands.
- Shape Balls. Scoop rounded tablespoons and roll them into 1 inch balls before rolling them heavily in the confectioners sugar. You want them to be completely white with no chocolate showing through.
- Bake Cookies. Place them on a lined sheet and bake for 10 to 12 minutes until the edges feel set. The centers should still feel soft and look slightly underbaked when you pull them out.
Billy’s Tips and Mistakes to Avoid
- If the dough is too sticky to roll, put it back in the freezer for 15 minutes to firm it up quickly. I have made the mistake of trying to roll warm dough and it just creates a mess.
- Roll the balls in the powdered sugar twice if you want a really stark white finish that stays bright after baking.
- Do not overbake these cookies or they will lose that fudgy brownie center and become dry like a biscuit.
- Use a cookie scoop to ensure all the balls are the same size so they bake at the exact same rate.
- Wait at least five minutes before moving them to a wire rack or they might fall apart while they are still hot.
Storage Tips
You can keep these in an airtight container at room temperature for up to 4 days. If you want to keep them longer, they actually freeze beautifully for up to 2 months. Just make sure to layer them with parchment paper so the sugar does not get messy.
Variations and Swaps
- Add a half teaspoon of peppermint extract for a festive candy cane twist that my daughter loves.
- Swap the all purpose flour for a 1:1 gluten free baking blend if you need to accommodate dietary needs.
- Press a chocolate kiss into the center immediately after they come out of the oven for extra indulgence.
Why This Recipe Works Every Time
The science behind this recipe is all about the temperature of the dough meeting the heat of the oven. Because the dough is cold, the outside sets while the middle is still expanding, which forces those beautiful cracks to form through the sugar. It creates a texture that is crispy on the edges but incredibly soft in the middle.
I once tried to rush a batch for a school event and skipped the long chill time, and the cookies spread into flat puddles. I learned that the four hour wait is what makes the structure possible. Now I always tell people that patience is the most important ingredient for the perfect Chocolate Crinkle Cookies.

Ingredients
- 1 cup unsweetened cocoa powder
- 2 cups granulated sugar
- 1/2 cup vegetable oil
- 4 large egg s
- 2 teaspoons vanilla extract
- 2 cups all -purpose flour
- 2 teaspoons baking powder
- 1/2 teaspoon sal t
- 1/2 cup confectioners ' sugar
Instructions
- In a medium bowl, whisk together the cocoa powder, granulated sugar, and vegetable oil until combined.
- Beat in the eggs one at a time, then stir in the vanilla extract.
- In a separate bowl, whisk together the flour, baking powder, and salt.
- Gradually stir the dry ingredients into the wet mixture until a soft dough forms.
- Cover the dough and refrigerate for at least 4 hours or overnight to ensure the dough is firm enough to roll.
- Preheat oven to 350 degrees F (175 degrees C) and line baking sheets with parchment paper.
- Scoop rounded tablespoons of dough and roll into 1-inch balls.
- Roll each ball generously in confectioners' sugar until heavily coated.
- Place balls 2 inches apart on the prepared baking sheets.
- Bake for 10 to 12 minutes until the edges are set but the centers remain soft to the touch.
- Let cool on the baking sheet for 5 minutes before transferring to a wire rack.
Frequently Asked Questions
Why didn’t my cookies crinkle?
This usually happens if the dough was not cold enough or if your baking powder is old. Make sure your dough is chilled thoroughly so it does not spread too fast in the oven.
Can I use butter instead of oil?
You can, but the texture will be more like a traditional cookie and less like a fudgy brownie. Oil is what gives these their unique soft crumb and keeps them moist for longer.
Can the dough be made ahead of time?
Yes, you can keep the dough in the fridge for up to 2 days before rolling and baking. It is actually a great way to save time during the busy holiday season.
The Bottom Line
These cookies are a holiday staple for a reason and they never fail to bring a smile to my daughter’s face. Whether you are baking for a party or just a quiet night by the fire, they are the perfect treat. Sweet moments don’t have to be complicated. Let’s make something wonderful together.
I hope these bring as much chocolatey joy to your kitchen as they do to mine this winter. Happy baking! Billy
Billy